Category: Breakfast

  • Tropical Pineapple Christmas Balls – No-Bake Holiday Treat

    Tropical Pineapple Christmas Balls – No-Bake Holiday Treat

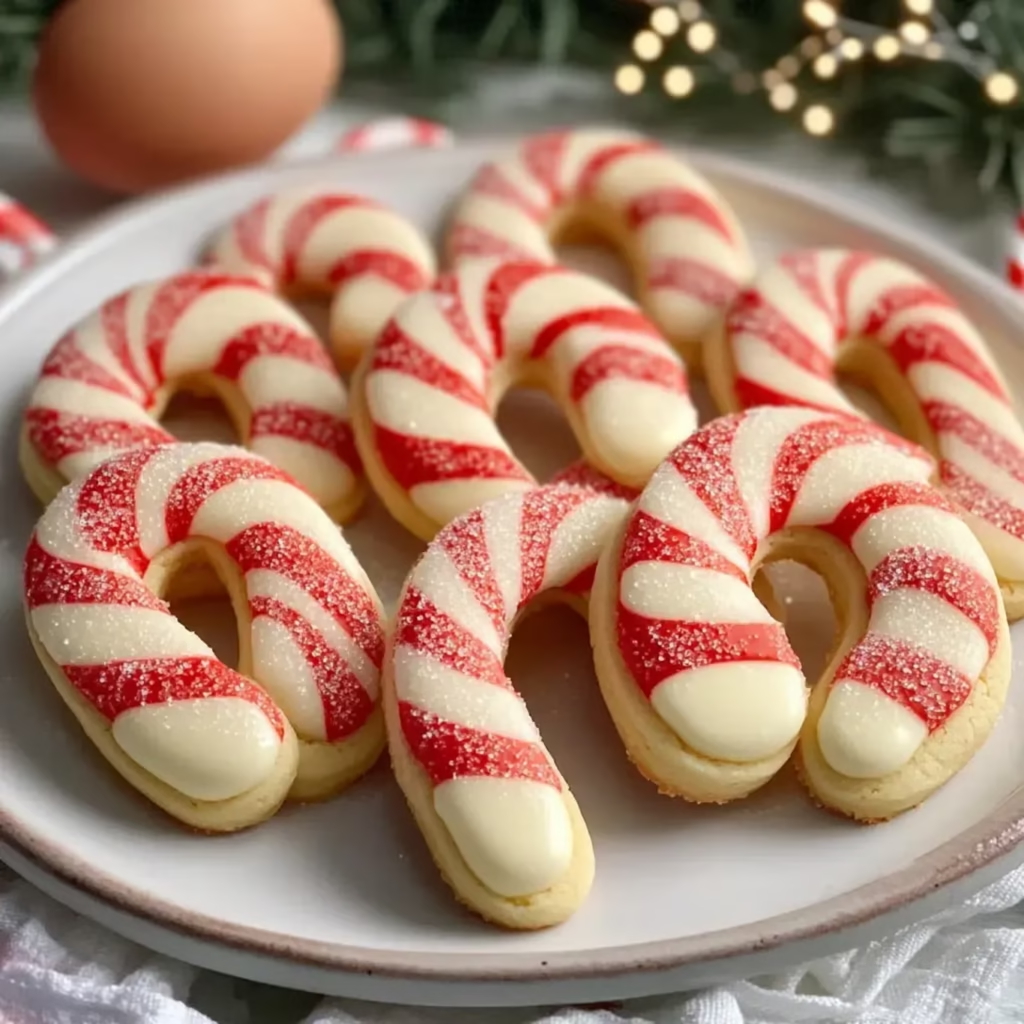
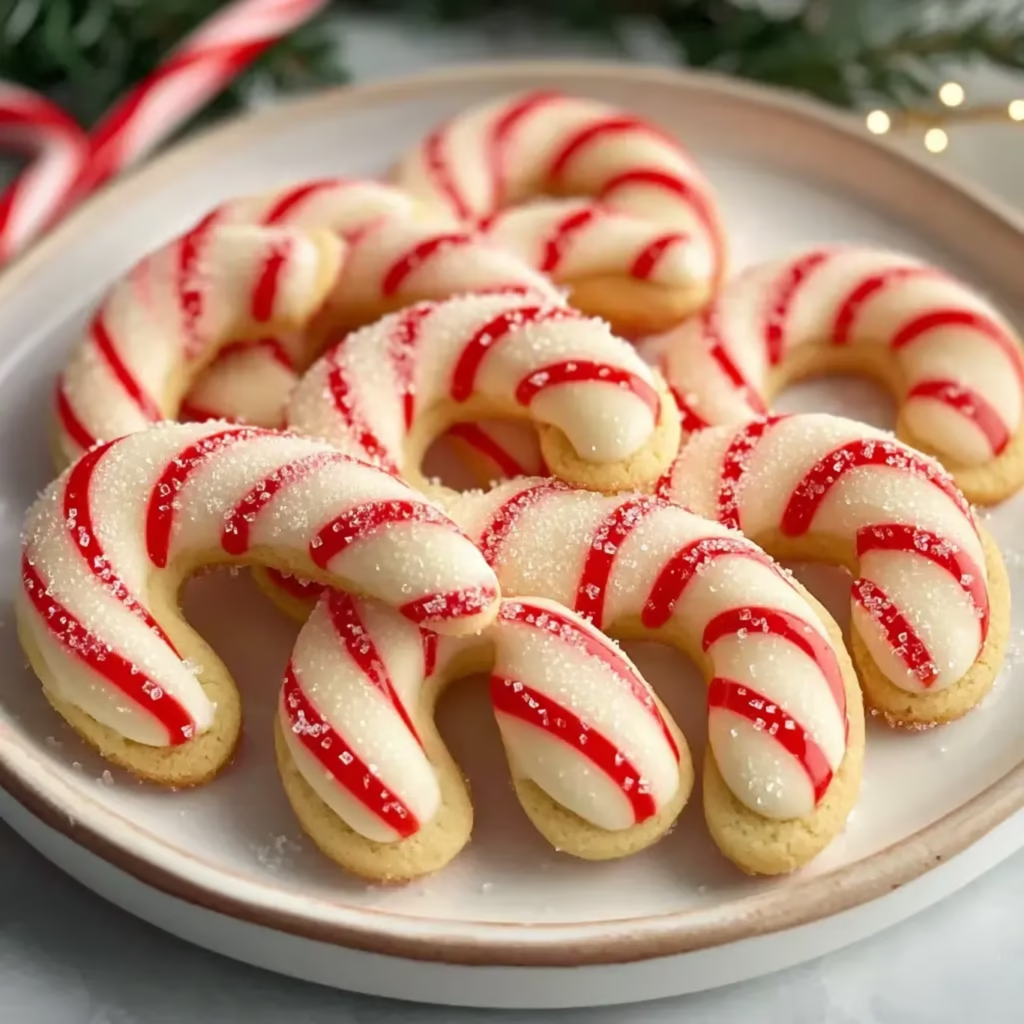
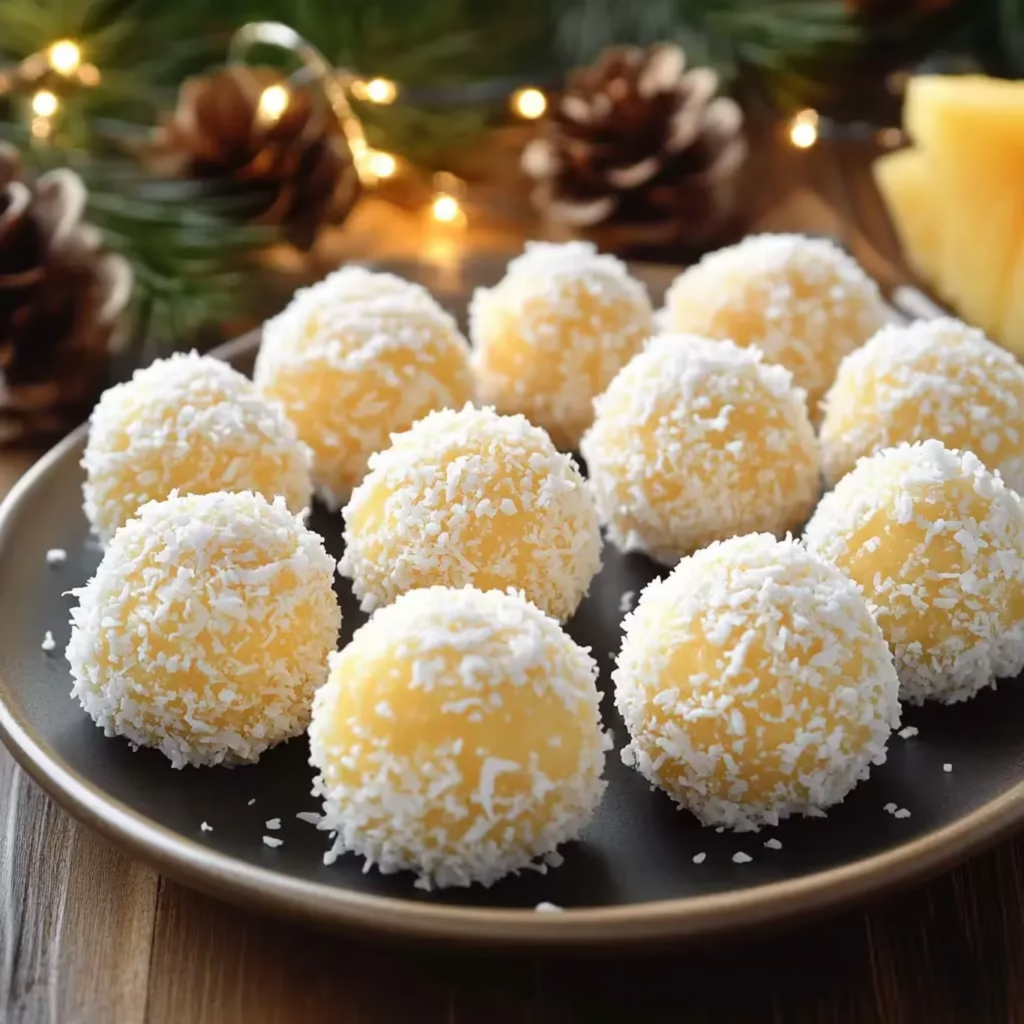
    These pineapple Christmas balls bring a taste of the tropics to your holiday celebrations. After experimenting with different combinations I’ve found the perfect balance of sweet pineapple creamy cheese and coconut that creates these irresistible treats. The best part? No baking required making them perfect for busy holiday seasons.

    Tropical Holiday Magic

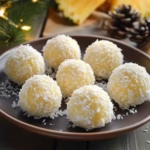
    My pineapple Christmas balls always surprise guests with their unique tropical twist on holiday flavors. The combination of creamy filling studded with pineapple and rolled in coconut creates such a delightful treat. They’re always the first to disappear from holiday platters.

    What You’ll Need

    • Pineapple: Drain it really well.
    • Cream Cheese: Room temperature works best.
    • Coconut: Fine and unsweetened.
    • Graham Crumbs: Fresh for best texture.
    • Pineapple Jello: Adds extra flavor pop.

    Let’s Make Magic

    Mix It Up
    Blend everything until perfectly combined.
    Chill Time
    Patience makes rolling much easier.
    Shape with Care
    Create those perfect little spheres.
    Ready to Share
    Keep them cool until serving time.

    Keep Them Fresh

    The key to perfect pineapple Christmas balls is proper storage. They stay beautifully fresh in the fridge and actually taste even better after the flavors have had time to meld together. If freezing just remember to thaw them gently in the refrigerator.

    Share the Joy

    These pineapple Christmas balls make such wonderful gifts. I love packaging them in pretty holiday boxes or cellophane bags. The tropical twist makes them stand out among traditional holiday treats and everyone always asks for the recipe.

    Frequently Asked Questions

    → Why use room temperature cream cheese?

    Room temperature cream cheese is easier to mix and helps avoid lumps in the finished product.

    → Why drain the pineapple well?

    Well-drained pineapple ensures the mixture isn’t too wet, making it easier to form into balls and maintain shape.

    → Do I need to prepare the jello first?

    No, just add the powder directly to the mixture. It’s used for flavor and helping bind the ingredients.

    → How should I store these?

    Keep them in a food-safe container in the refrigerator due to the cream cheese content.

    → Why chill before rolling?

    Chilling firms up the mixture, making it easier to roll into balls and coat with coconut.

    Print
    clock clock iconcutlery cutlery iconflag flag iconfolder folder iconinstagram instagram iconpinterest pinterest iconfacebook facebook iconprint print iconsquares squares iconheart heart iconheart solid heart solid icon

    Tropical Pineapple Christmas Balls – No-Bake Holiday Treat

    5 Stars 4 Stars 3 Stars 2 Stars 1 Star No reviews
    • Author: Hannah
    • Prep Time: 10
    • Total Time: 10 minutes

    Description

    Tropical no-bake treats combining crushed pineapple, cream cheese, and coconut for a unique holiday dessert perfect for warm weather celebrations.


    Ingredients

    Units Scale

    1398 ml canned crushed pineapple, very well drained.

    28 ounces cream cheese, softened.

    32 cups unsweetened fine desiccated coconut.

    41/2 cup graham crumbs.

    53 ounce packet pineapple jello.


    Instructions

    1- Beat softened cream cheese in large bowl until smooth.

    2- Add pineapple, 1 cup coconut, graham crumbs, and dry jello powder. Mix well.

    3- Refrigerate mixture for one hour.

    4- Roll tablespoons of mixture into balls. Coat each ball in remaining coconut.

    5- Place in food-safe container and keep refrigerated.


    Notes

    1- No baking required.

    2- Must keep refrigerated.

    3- Can use dry jello powder directly.

  • Classic Candy Cane Cookies – Perfect Holiday Treats

    Classic Candy Cane Cookies – Perfect Holiday Treats

    I fell in love with Candy Cane Cookies during my first holiday season as a home baker. These festive swirls of red and white dough aren’t just cookies they’re little pieces of Christmas magic. The peppermint aroma that fills your kitchen while they bake instantly transforms any day into a holiday celebration. Every time I make them my kids’ eyes light up at the sight of those perfect candy cane twists.

    What Makes These Cookies Special

    Making these cookies has become one of our favorite holiday traditions. There’s something so joyful about rolling and twisting the dough into those perfect candy cane shapes. The peppermint flavor is just right not too strong but enough to make you think of snowy winter days. They’re beautiful on a cookie platter but honestly they rarely make it that far in my house.

    Everything You’ll Need

    • Butter: Make sure it’s room temperature I usually leave mine out for two hours before starting.
    • Sugar: Plain granulated sugar works perfectly here.
    • Eggs: Room temperature eggs blend so much better in the dough.
    • Flour: Regular all-purpose flour creates that perfect cookie texture.
    • Peppermint Extract: Just a little goes a long way trust me on this.
    • Food Coloring: I always use gel color it gives you that beautiful red without making the dough too wet.
    • Egg White: This gives our cookies that lovely shine.
    • Sparkling Sugar: The final touch that makes them truly magical.

    Let’s Make Some Holiday Magic

    Making Your Dough
    Start by creaming your butter and sugar until it’s light and fluffy. This usually takes about 3 minutes in my mixer. When you add the peppermint extract the whole kitchen starts smelling like Christmas.
    The Fun Part
    This is where my kids love to help. We divide the dough and color half of it red. Then we roll them into long ropes just like making play dough snakes. Twisting them together is like making edible candy canes.
    The Final Touch
    That egg white wash makes such a difference giving each cookie a beautiful shine. And when you sprinkle on that sparkling sugar it looks like fresh fallen snow.

    Save Some for Later

    Here’s a little secret these cookies freeze beautifully. Sometimes I make a double batch and freeze half of them already shaped. It’s like having a holiday backup plan in your freezer. Just pop them straight from the freezer onto your baking sheet when unexpected guests arrive. They’ll never know they weren’t made that day.

    Keeping Them Fresh

    If you’re planning to serve these within a couple weeks store them in your favorite cookie tin. I layer them between pieces of parchment paper to keep them perfect. The dough can hang out in your fridge for a few days too just wrap it really well. My favorite trick is keeping shaped cookies in the freezer ready to bake whenever the craving hits.

    Frequently Asked Questions

    → Why chill the dough?

    Chilling for at least 3 hours firms up the dough, making it easier to roll into ropes and helping cookies maintain their shape while baking.

    → What if my dough is too dry?

    Sprinkle cool water over dry dough and work it in until the dough comes together to the right consistency.

    → Why let cookie sheets cool between batches?

    Hot cookie sheets can melt the butter in the dough before baking, causing cookies to spread and lose their shape.

    → How long do these cookies keep?

    They stay fresh for one to two weeks when stored in a sealed container at room temperature.

    → What if the cookies spread too much?

    Chill the shaped, unbaked cookies in the refrigerator or freezer for a few minutes before baking to prevent spreading.

    Conclusion

    These holiday cookies combine red and white peppermint-flavored dough twisted into classic candy cane shapes. Finished with an egg wash and sparkling sugar for festive shine.


    Print
    clock clock iconcutlery cutlery iconflag flag iconfolder folder iconinstagram instagram iconpinterest pinterest iconfacebook facebook iconprint print iconsquares squares iconheart heart iconheart solid heart solid icon

    Classic Candy Cane Cookies – Perfect Holiday Treats

    5 Stars 4 Stars 3 Stars 2 Stars 1 Star No reviews
    • Author: Hannah
    • Prep Time: 20
    • Cook Time: 24
    • Total Time: 44 minutes

    Description

    Festive peppermint-flavored cookies twisted into candy cane shapes with red and white dough, topped with sparkling sugar.


    Ingredients

    Units Scale

    2 sticks (227g) unsalted butter, room temperature.

    1 cup (200g) sugar.

    1 1/2 teaspoons peppermint extract.

    1 teaspoon vanilla extract.

    1 teaspoon baking powder.

    1/2 teaspoon kosher salt.

    1 large egg.

    2 3/4 cups (385g) all-purpose flour.

    1 teaspoon liquid red food coloring.

    1 egg white (for finishing).

    2 tablespoons sparkling sugar (for finishing).


    Instructions

    1- Beat butter, sugar, extracts, baking powder and salt until pasty. Add egg, then flour until just combined.

    2- Divide dough in half. Add red food coloring to one half and mix until evenly colored.

    3- Form each dough into disk, wrap in plastic, refrigerate at least 3 hours.

    4- Roll 1-inch pieces into 5-inch ropes of each color. Twist together and shape into candy canes.

    5- Brush with egg white wash, sprinkle with sugar. Bake at 350°F for 8-10 minutes until edges barely brown.


    Notes

    1- Can sprinkle water on dry dough.

    2- Chill shaped cookies if spreading.

    3- Let pans cool between batches

  • Easy Chicken Avocado Melt Sandwich – Perfect Hot Lunch

    Easy Chicken Avocado Melt Sandwich – Perfect Hot Lunch

    I fell in love with this Chicken Avocado Melt Sandwich the first time I made it on a busy weeknight. Now it’s my go-to recipe when I want something quick but special. The way the juicy chicken creamy avocado and melted cheese come together between crispy toasted bread it’s like a warm hug on a plate. Every time I make it people ask for the recipe.

    What Makes It So Good

    What makes this sandwich truly amazing is how all those flavors play together. You’ve got that perfectly seasoned chicken layered with rich avocado and cheese that melts into every bite. When the bread gets all golden and crispy it’s pure comfort food magic. Plus you can switch things up however you like it’s like having a different sandwich every time.

    Perfect Pairings

    • Fresh Greens: A light salad with vinaigrette makes the perfect partner.
    • Sweet Potato Fries: These add such nice color and flavor to the plate.
    • Crunchy Slaw: That creamy-crunchy combo is unbeatable.
    • Warm Soup: Nothing beats dunking this sandwich in tomato soup.
    • Fresh Fruit: Some crisp apple slices balance everything perfectly.
    • Simple Pasta Salad: Great for a heartier meal.

    My Best Tips

    • Fresh Is Best: I always look for perfectly ripe avocados they make such a difference in this sandwich.
    • Getting That Crunch: A little butter on the outside of your bread before grilling gives you that perfect golden crust.
    • Avocado Trick: A quick squeeze of lemon keeps those avocado slices bright and fresh.
    • Green It Up: Sometimes I tuck in some baby spinach it adds such nice freshness.
    • Spice It Up: My secret? A dash of hot sauce mixed into the mayo.

    Make It Your Own

    This sandwich is so fun to customize. Sometimes I’ll use sharp cheddar instead of the regular cheese or add roasted red peppers for sweetness. My kids love it with cucumber slices for extra crunch and my husband’s favorite version includes pickled jalapeños for heat. You really can’t go wrong!

    Common Questions

    • Best Chicken Seasonings? I love using garlic powder paprika and Italian herbs they really make the chicken shine.
    • Leftover Chicken? Perfect! Just warm it up and maybe add some extra seasoning.
    • More Veggies? The more the merrier try whatever looks fresh at the store.

    Why You’ll Love It

    What really makes this sandwich special is how it turns simple ingredients into something that feels restaurant-worthy. It’s perfect for those days when you want something a little fancy but don’t have hours to spend in the kitchen. Every bite gives you that perfect combination of flavors and it’s so satisfying to make something this good at home.

    Perfect For Any Time

    One of my favorite things about this sandwich is how it fits into any meal. Sometimes I’ll make it for a cozy weekend lunch other times it’s my answer to “what’s for dinner?” When friends come over unexpectedly it’s my go-to because it always impresses but takes just minutes to put together.

    Keeping It Fresh

    • Storage: While this sandwich is best fresh you can keep the components ready in the fridge.
    • Warming Up: A quick trip in a hot skillet brings back that perfect crunch.
    • Prep Ahead: I often cook extra chicken just to have it ready for sandwiches during the week.

    Take Your Sandwich to the Next Level

    Let me share some of my favorite ways to make this sandwich extra special. Sometimes I’ll use sourdough bread from our local bakery or add a layer of pesto under the cheese. When I’m feeling fancy I’ll caramelize some onions to add on top or make a quick garlic aioli spread. These little touches make each sandwich feel unique and special.

    Give It a Try

    You know what’s amazing about this sandwich? It’s how something so simple can make any day feel a little more special. Whether you’re making it for a quick lunch or serving it to friends it never disappoints. The combination of warm chicken melty cheese and creamy avocado just works every single time. And once you make it your own way with your favorite add-ins you’ll see why it’s become such a favorite in my kitchen.

    Frequently Asked Questions
    → What’s the best bread to use?
    Sturdy breads like sourdough or ciabatta work best as they can hold up to the fillings and grilling process without getting soggy.
    → Can I use pre-cooked chicken?
    Yes, leftover or rotisserie chicken works great in this sandwich. Just warm it slightly before assembling for best results.
    → How do I keep the avocado from browning?
    Slice the avocado just before assembling the sandwich. The lemon in the mustard also helps prevent browning.
    → What cheese melts best?
    Swiss, provolone, and cheddar all melt well. Choose based on your flavor preference – Swiss is mild, cheddar is sharp, provolone is buttery.
    → Can I make this ahead?
    It’s best served fresh and warm, but you can prep the chicken ahead of time. Assemble and grill just before serving.

    Print
    clock clock iconcutlery cutlery iconflag flag iconfolder folder iconinstagram instagram iconpinterest pinterest iconfacebook facebook iconprint print iconsquares squares iconheart heart iconheart solid heart solid icon

    Easy Chicken Avocado Melt Sandwich – Perfect Hot Lunch

    5 Stars 4 Stars 3 Stars 2 Stars 1 Star No reviews
    • Author: Hannah
    • Prep Time: 10
    • Cook Time: 20
    • Total Time: 30 minutes

    Description

    A warm, gourmet sandwich featuring tender chicken, creamy avocado and melted cheese on grilled bread. Quick to make and incredibly satisfying.


    Ingredients

    Boneless skinless chicken breasts (2).

    Salt and pepper to taste.

    Olive oil (1 tablespoon plus more for grilling).

    Ripe avocado (1).

    Sliced cheese of choice (4 slices).

    Bread slices (4).

    Mayonnaise (2 tablespoons).

    Dijon mustard (1 tablespoon).

    Red onion, thinly sliced (1 small).

    Tomato, sliced (1).

    Butter or olive oil for grilling.


    Instructions

    Season chicken breasts, cook in oil 6-7 minutes per side until done.

    Slice avocado, prepare cheese, onions and tomatoes.

    Layer mayonnaise and mustard on bread slices.

    Layer chicken, avocado, cheese, onion and tomato on bread.

    Cook sandwiches in butter until golden and cheese melts, about 3-4 minutes per side.


  • Marshmallow Hot Chocolate French Toast Bites – Sweet Breakfast Treat

    Marshmallow Hot Chocolate French Toast Bites – Sweet Breakfast Treat

    I came up with these Marshmallow Stuffed Hot Chocolate French Toast Bites on a chilly morning when I was craving something extra cozy. Let me tell you they’re like a warm hug for breakfast! I start with pillowy Hawaiian rolls stuff them with gooey marshmallow fluff and coat them in this amazing cocoa-sugar mixture. When you dip them in hot chocolate it’s pure breakfast magic.

    Why These Are So Special

    What makes these little bites absolutely irresistible is how they combine everything comforting about breakfast into perfect little packages. They’re surprisingly easy to make but look and taste like something from a fancy brunch spot. Every time I serve them people’s eyes light up especially when they discover that marshmallow center!

    Let’s Gather Our Ingredients

    • King’s Hawaiian Sweet Rolls: These little rolls are perfect but brioche works too.
    • Marshmallow Fluff: This creates the most amazing gooey centers.
    • Eggs and Half n Half: The base for our rich French toast coating.
    • Vanilla and Cinnamon: These warm spices make everything cozy.
    • Sugar & Hot Chocolate Mix: Trust me this coating is everything!

    Let’s Make Some Magic

    Starting with the Rolls
    First thing I do is split those sweet rolls and add a generous spoonful of marshmallow fluff. Don’t be shy with it that gooey center is what makes these special!
    The French Toast Bath
    Then I whisk up my egg mixture with half n half cinnamon and vanilla until it’s perfectly blended. The smell alone will make your kitchen feel cozy.
    The Dip
    Each stuffed roll gets a quick swim in the egg mixture. Just 15-20 seconds is perfect you don’t want them too soggy.
    Getting Golden
    Into the buttery pan they go until they’re crispy and golden on all sides. I love watching them transform!
    The Final Touch
    While they’re still warm I roll them in that magical mix of sugar and hot chocolate powder. This is what makes them extra special.

    Mix It Up

    Sometimes I’ll switch things up using Nutella instead of marshmallow fluff or adding a sprinkle of cayenne to the coating for a little kick. Once I used mint hot chocolate powder for the coating during the holidays it was amazing! Feel free to play around with different fillings and toppings.

    My Best Tips

    Here’s what I’ve learned from making these countless times: don’t soak the rolls too long or they’ll fall apart. Keep your heat at medium so they get golden without burning. And always use good quality hot chocolate mix in the coating it makes such a difference in flavor.

    Keeping Them Fresh

    These little bites are best fresh but if you have any leftovers (which rarely happens in my house!) they’ll keep in the fridge for a couple days. When I want to reheat them I pop them in the oven for a few minutes it brings back that perfect crispy outside. Just skip the microwave it makes them soggy and nobody wants that!

    Making Them Extra Special

    Let me tell you about my favorite ways to serve these! Sometimes I’ll add a dollop of whipped cream on top or drizzle them with caramel sauce. A side of crispy bacon makes it feel like a proper breakfast. But my absolute favorite way is to serve them with mugs of hot chocolate topped with extra marshmallows it’s like a cozy breakfast dream come true.

    Common Questions

    • Different Bread? Yes! I’ve used brioche rolls and they were amazing.
    • Keeping Them Crispy? Serve them right after you coat them in that cocoa sugar magic.
    • Make Ahead? You can prep everything the night before just save the cooking for morning.

    Final Touches

    These Marshmallow Stuffed Hot Chocolate French Toast Bites are more than just breakfast they’re little bites of joy! Every time I make them for friends or family they disappear so quickly. There’s something about that combination of warm toast gooey marshmallow and chocolate coating that just makes people happy.


    Frequently Asked Questions

    → Can I make these ahead of time?

    While best served fresh and warm, you can prepare the marshmallow-stuffed rolls ahead of time. Just dip and cook right before serving.

    → Why use King’s Hawaiian rolls?

    These sweet rolls provide the perfect size for bites and their sweetness complements the hot chocolate coating. Regular dinner rolls can work but won’t be as sweet.

    → How do I prevent them from getting soggy?

    Don’t soak the rolls too long in the batter – 15-20 seconds maximum. Also make sure your pan is properly heated before cooking.

    → Can I use regular marshmallows instead of fluff?

    Marshmallow fluff works better as it spreads easily and won’t melt out during cooking like regular marshmallows might.

    → What’s the best hot chocolate mix to use?

    Any premium hot chocolate mix will work well. Choose one you enjoy drinking as you’ll use it both in the coating and for dipping.

    Conclusion

    A decadent breakfast treat that transforms sweet Hawaiian rolls into crispy, marshmallow-filled French toast bites with a rich hot chocolate coating.


    Print
    clock clock iconcutlery cutlery iconflag flag iconfolder folder iconinstagram instagram iconpinterest pinterest iconfacebook facebook iconprint print iconsquares squares iconheart heart iconheart solid heart solid icon

    Marshmallow Hot Chocolate French Toast Bites – Sweet Breakfast Treat

    5 Stars 4 Stars 3 Stars 2 Stars 1 Star No reviews
    • Author: Hannah

    Description

    Sweet Hawaiian rolls stuffed with marshmallow fluff, turned into French toast bites and coated in hot chocolate sugar. A decadent breakfast treat.


    Ingredients

    King’s Hawaiian Original Sweet Rolls (12 pack).

    Marshmallow Fluff (1/2 cup).

    Eggs (3).

    Half and half (3/4 cup).

    Cinnamon (1/2 teaspoon).

    Vanilla extract (1 teaspoon).

    Salted butter (3 tablespoons).

    White sugar (1/4 cup).

    Hot chocolate mix (1 tablespoon plus more for dipping).


    Instructions

    1- Split rolls and fill each with 1 tablespoon marshmallow fluff.

    2- Whisk together eggs, half and half, cinnamon and vanilla.

    3- Soak stuffed rolls in batter for 15-20 seconds.

    4- Fry in butter until golden brown on all sides, working in batches.

    5- Roll in hot chocolate sugar mixture while warm.

    6- Plate with hot cocoa for dipping.


  • Easy Cherry Cobbler Muffins | Sweet Breakfast Treat

    Easy Cherry Cobbler Muffins | Sweet Breakfast Treat

    My cherry cobbler muffins bring dessert to breakfast time. Sweet cherries crumbly streusel soft muffin base create perfect morning treat or afternoon snack.

    Baker’s Dream

    Packed with juicy cherries topped with buttery crumbs these muffins taste like they’re from your favorite bakery. Make ahead freeze well perfect for busy mornings.

    Simple Ingredients

    • Flour: All purpose for muffins crumb top.
    • Cherries: Fresh frozen or pie filling work.
    • Butter: Creates rich tender crumb.
    • Sugar: Sweetens perfectly.
    • Cinnamon: Warms up topping.
    • Eggs Milk: Keep muffins moist.
    • Baking Powder: Perfect rise.

    Quick Steps

    Mix:
    Whisk eggs butter sugar vanilla milk. Add flour powder salt combine gently.
    Add Cherries:
    Drain cherries toss in flour fold into batter fill cups.
    Top:
    Mix butter flour sugar cinnamon sprinkle over add extra cherries.
    Bake:
    375°F 22 minutes until done cool serve.

    Perfect Results

    Mix just until combined keeps texture light. Dry cherries well prevents sogginess. Use parchment liners easy removal.

    Mix It Up

    Try blueberries peaches raspberries. Add nuts chocolate chips coconut to topping. Each variation brings new flavor.

    Winning Combo

    Sweet cherries buttery crumbs create perfect bite. Easy process reliable results make these muffins go to recipe.

    How to Serve

    Enjoy warm with butter honey morning coffee. Perfect dessert topped with vanilla ice cream.

    Keep Fresh

    Store room temp three days fridge week freezer month. Warm before serving brings back fresh baked taste.

    Always Perfect

    Great breakfast brunch dessert anytime treat. Bakery style looks flavor impress every crowd.

    Good For You

    Cherries pack antioxidants while eggs milk add protein. Sweet treat with benefits enjoy balance.

    Classic Update

    Takes beloved cherry cobbler transforms into handy muffin form. Keeps familiar comfort adds convenience.

    Prep Smart

    Mix ingredients night before bake fresh morning. Easy way have warm treats ready when needed.

    Perfect Partners

    Pairs with coffee juice morning eggs brunch spread. Makes complete breakfast any day special.

    Share Joy

    Package in parchment twine makes thoughtful gift. Everyone loves homemade cherry cobbler muffins.

    Frequently Asked Questions

    → Why rinse the cherries?

    Rinsing removes excess syrup that could make muffins too wet. Tossing in flour helps them stay distributed in batter.

    → Can I use fresh cherries?

    Fresh pitted cherries work well. Cook briefly with sugar to soften before using. Frozen cherries should be thawed and drained.

    → How do I store these muffins?

    Store in airtight container at room temperature 3 days. Freeze up to 3 months, thaw overnight.

    → Why is my streusel topping melting?

    Cold butter is essential for crumbly streusel. If butter gets too warm, chill mixture before sprinkling on muffins.

    → Can I make these ahead?

    Prepare batter and streusel night before, store separately in fridge. Let batter reach room temp before baking.

    Conclusion

    Cherry cobbler muffins are a delightful breakfast treat that combines the classic flavors of a traditional cobbler with the convenience of a muffin. Made with fresh or frozen cherries and topped with a buttery streusel, these muffins offer a perfect balance of sweet and crumbly textures.


    Print
    clock clock iconcutlery cutlery iconflag flag iconfolder folder iconinstagram instagram iconpinterest pinterest iconfacebook facebook iconprint print iconsquares squares iconheart heart iconheart solid heart solid icon

    Easy Cherry Cobbler Muffins | Sweet Breakfast Treat

    5 Stars 4 Stars 3 Stars 2 Stars 1 Star No reviews
    • Author: Hannah

    Description

    Sweet muffins filled with cherries and topped with buttery streusel. Like having dessert for breakfast.


    Ingredients

    Units Scale

    2 cups all-purpose flour + 1 tablespoon.

    1/2 teaspoon salt.

    2 teaspoons baking powder.

    2 large eggs.

    1/4 cup salted butter, melted.

    1/2 cup granulated sugar.

    1 teaspoon vanilla extract.

    3/4 cup milk.

    21 ounces cherry pie filling.

    1/4 cup cold butter, cubed.

    1/2 cup flour.

    1 teaspoon baking powder.

    1/4 cup sugar.

    1/4 teaspoon cinnamon.

    1 tablespoon milk.


    Instructions

    Heat oven to 375°F. Line muffin pan with liners.

    Sift flour, salt and baking powder.

    Whisk eggs, melted butter, sugar, vanilla and milk.

    Mix wet into dry ingredients until just combined.

    Rinse and drain half the cherries. Toss with flour and fold into batter.

    Divide batter in pan. Top with remaining cherry filling.

    Mix cold butter, flour, sugar and cinnamon until crumbly. Add milk.

    Top with streusel. Bake 22-25 minutes until done


  • Chocolate Peppermint Whoopie Pies with Marshmallow Filling

    Chocolate Peppermint Whoopie Pies with Marshmallow Filling

    My kitchen smells amazing when I bake these Peppermint Chocolate Whoopie Pies. The rich chocolate cake rounds paired with creamy peppermint filling take me right back to my childhood Christmas baking sessions. I love watching my kids’ faces light up when they see these treats cooling on the counter. Each bite brings together soft chocolate cakes filled with my special peppermint buttercream and marshmallow fluff mixture topped with bits of crushed peppermint candy.

    A Christmas Favorite in My House

    These whoopie pies never last long in my cookie jar. The mix of chocolate and cool peppermint makes them perfect for winter gatherings. My family can’t decide if they’re cookies cakes or pies but they know these treats mean the holidays are here. I always make extra batches because they disappear so quickly at our Christmas parties.

    What Goes Into These Treats

    • Dry Ingredients: Grab 1¾ cups all-purpose flour half cup unsweetened cocoa powder 1 teaspoon baking soda and half teaspoon salt from your pantry.
    • Wet Ingredients: You’ll need half cup softened butter 1 cup light brown sugar 1 large egg 1 teaspoon vanilla and ¾ cup buttermilk.
    • Filling: Set out half cup butter 1½ cups powdered sugar 1 teaspoon each of peppermint and vanilla extract a jar of marshmallow fluff and some candy canes to crush up.

    Kitchen Magic Time

    Making Your Cakes
    Start by warming up your oven to 350°F. Line your baking sheets with parchment or those handy silicone mats. Mix your dry ingredients in one bowl. In your mixer cream the butter and brown sugar until fluffy. Add your egg and vanilla then gradually mix in the flour mixture and buttermilk. Scoop little portions onto your baking sheets and bake for 10 minutes until they bounce back when touched.
    Whipping Up the Filling
    Beat your butter and sugar until it’s light and fluffy. Mix in the vanilla peppermint and salt. Fold in that fluffy marshmallow cream until everything looks smooth. Pop it in the fridge for a bit to firm up.
    Putting It All Together
    Spread filling on half your cakes sandwich them together and roll the edges in crushed peppermint. Let them chill if you can wait that long.

    My Secret Tips

    I always use my trusty cookie scoop for perfectly matched cake rounds. The filling spreads like a dream after some time in the fridge. Real peppermint extract makes all the difference in flavor. I lay out parchment paper under my work area because those candy pieces tend to scatter everywhere.

    Make Them Pretty

    Sometimes I add a drop of food coloring to make pink or green filling for different holidays. My kids love adding sparkly sprinkles to theirs. When I want extra crunch I mix some crushed candy right into the filling. A drizzle of melted chocolate on top looks beautiful too.

    Keep Them Fresh

    These treats stay perfect in the fridge for about 3 days. I put parchment between layers so they don’t stick together. If you want to make them ahead wrap each one in plastic and pop them in the freezer. They’ll keep for two months but honestly they never last that long in my house.

    Mix It Up

    Sometimes I chop up peppermint bark instead of candy canes. Orange extract gives them a chocolate orange flavor that my husband loves. For fancy parties I dip the edges in melted chocolate before adding the crushed candies.

    What You’ll Need

    Your mixer will get a workout with these. Good baking sheets and parchment paper are must-haves. I love using my small cookie scoop for even portions. A simple spatula works great for filling but piping bags make prettier swirls. Keep some wax paper handy for crushing candies it makes cleanup so much easier.

    Frequently Asked Questions

    → How long do these whoopie pies last?

    Store in the refrigerator for up to 3 days or freeze for up to 2 months. When stacking, separate layers with parchment paper to prevent sticking.

    → Why do ingredients need to be room temperature?

    Room temperature ingredients blend better and create a smoother batter. This ensures even baking and proper texture in the final cookies.

    → Can I make these ahead of time?

    Yes, you can make and freeze them for up to 2 months. Wrap individually in plastic wrap and store in a freezer container.

    → How do I know when the cakes are done?

    The centers should spring back when gently touched after about 10 minutes of baking. Let them cool completely before filling.

    → Can I adjust the peppermint flavor?

    Yes, you can add more or less peppermint extract to taste. Start with less and adjust to your preference as peppermint extract can be strong.

    Conclusion

    These festive whoopie pies combine soft chocolate cake rounds with a peppermint-marshmallow filling and crushed candy cane coating. Perfect for holiday gatherings and gifting.

    Print
    clock clock iconcutlery cutlery iconflag flag iconfolder folder iconinstagram instagram iconpinterest pinterest iconfacebook facebook iconprint print iconsquares squares iconheart heart iconheart solid heart solid icon

    Chocolate Peppermint Whoopie Pies with Marshmallow Filling

    5 Stars 4 Stars 3 Stars 2 Stars 1 Star No reviews
    • Author: Hannah

    Description

    Soft chocolate cake cookies sandwiched with peppermint buttercream and marshmallow filling, then rolled in crushed candy canes for holiday flair.


    Ingredients

    Units Scale

    2 cups all-purpose flour.

    1/2 cup cocoa powder.

    1 teaspoon baking soda.

    3/4 teaspoon salt.

    1/2 cup unsalted butter, at room temperature.

    1 cup packed brown sugar.

    1 large egg, at room temperature.

    1 teaspoon vanilla extract.

    1 cup buttermilk, at room temperature.

    3/4 cup unsalted butter, at room temperature (for filling).

    1 1/4 cups confectioners’ sugar, sifted.

    1 teaspoon vanilla extract (for filling).

    1/2 teaspoon peppermint extract.

    1/8 teaspoon salt (for filling).

    2 1/2 cups marshmallow crème.

    Crushed candy canes, for garnish.


    Instructions

    1- Preheat oven to 350°F. Line baking sheets with parchment or silicone mats.

    2- Whisk flour, cocoa powder, baking soda, and salt together.

    3- Beat butter and brown sugar until fluffy, add egg and vanilla. Alternate adding flour mixture and buttermilk.

    4- Scoop 2 teaspoons batter per cookie, bake 10 minutes until centers spring back.

    5- Beat butter and sugar, add extracts and salt. Mix in marshmallow crème. Refrigerate 30 minutes.

    6- Spread filling between cookies and roll edges in crushed candy canes.


  • Easy White Chocolate Peppermint Pie – Perfect Holiday Dessert

    Easy White Chocolate Peppermint Pie – Perfect Holiday Dessert

    Get ready to fall in love with my White Chocolate Peppermint Pie a dreamy holiday dessert that combines a rich chocolatey Oreo crust with the most luscious peppermint cheesecake filling you can imagine. It’s refreshingly minty indulgently creamy and absolutely perfect for the festive season. I love serving it both chilled and frozen it’s like having two amazing desserts in one.

    What Makes This Pie Special

    This isn’t just any holiday pie it’s pure winter wonderland in every slice. The way that creamy peppermint filling plays with the crunchy Oreo crust is absolutely magical. What I really love is how easy it is to make ahead perfect for those busy holiday gatherings when you want something spectacular without the last minute fuss.

    Everything You’ll Need

    • Oreo Cookies: These create our perfectly chocolatey base crushed into fine crumbs.
    • Unsalted Butter: Melted to hold that beautiful crust together.
    • Cream Cheese: Make sure it’s softened for the smoothest filling.
    • White Chocolate Chips: When melted they add such wonderful richness.
    • Peppermint Extract: Just enough for that perfect holiday flavor.
    • Frozen Whipped Topping: This makes our filling incredibly light and fluffy.
    • Heavy Whipping Cream: For that gorgeous cloud like topping.
    • Powdered Sugar: Sweetens our whipped cream just right.
    • Peppermint Candies: Crushed for the prettiest festive garnish.
    • White Chocolate Shavings: Optional but they make everything look so elegant.

    Let’s Make the Pie

    Start with the Base
    Heat your oven to 350°F then turn those Oreos into fine crumbs mix with melted butter and press into your pie plate. A quick 8-10 minute bake and let it cool completely.
    Create the Filling
    Beat that cream cheese until it’s silky smooth then mix in your melted white chocolate and peppermint extract. Gently fold in the whipped topping pour it all into your cooled crust then into the fridge for at least 2 hours.
    Add the Finishing Touch
    Whip up your cream with powdered sugar and a hint of extract until it’s perfect for piping. Spread or pipe it over your chilled pie then sprinkle with those crushed candies and chocolate shavings.

    My Best Tips

    Want that perfect crust? Baking makes it extra crunchy but chilling works too if you prefer it softer. Start light with the peppermint extract you can always add more to taste. For those picture perfect slices warm your knife first and if you’re craving something extra special try freezing it for an ice cream pie effect.

    Mix It Up

    Feel like trying something different? Skip the peppermint and use vanilla extract instead or swirl in some raspberry sauce for a fun twist. No time to bake? Just chill that crust instead. And if you’re feeling fancy whip up your own cream instead of using store bought the extra effort really shows.

    Keep It Fresh

    This beauty stays perfect in the fridge for up to 5 days or freeze it for a couple months if you’re planning ahead. When serving from frozen let it soften just a bit to get that dreamy creamy texture back.

    Make It Shine

    Let’s talk presentation those crushed peppermint candies and white chocolate shavings on top aren’t just pretty they add such wonderful texture. Want to make it extra special? Add a drizzle of chocolate or caramel sauce. I love arranging mini candy canes around the edge too it makes everyone smile when they see it.

    Frequently Asked Questions
    → Does the crust need to be baked?
    No, this can be a no-bake pie. The crust can be refrigerated for 15-20 minutes instead of baking, though baking gives a crunchier texture.
    → Can I freeze this pie?
    Yes, freezing for a couple hours or overnight helps the pie hold together and gives it a nice texture, though it’s not required.
    → How strong is the peppermint flavor?
    Start with less peppermint extract and adjust to taste. Mix all ingredients before adding more to avoid overpowering peppermint flavor.
    → What’s the best way to cut this pie?
    Use a warm, wet, sharp knife for clean, straight cuts through both filling and crust.
    → How long does this pie keep?
    Store in the refrigerator for up to 5 days. The pie can also be frozen for longer storage.

    Print
    clock clock iconcutlery cutlery iconflag flag iconfolder folder iconinstagram instagram iconpinterest pinterest iconfacebook facebook iconprint print iconsquares squares iconheart heart iconheart solid heart solid icon

    Easy White Chocolate Peppermint Pie – Perfect Holiday Dessert

    5 Stars 4 Stars 3 Stars 2 Stars 1 Star No reviews
    • Author: Hannah

    Description

    A festive dessert combining white chocolate and peppermint in a creamy cheesecake filling, all nestled in an Oreo cookie crust.


    Ingredients

    Units Scale

    25 chocolate cream-filled cookies (Oreos).

    4 tablespoons unsalted butter, melted.

    8 ounce block cream cheese, softened.

    1 1/2 cups white chocolate chips, melted.

    1 teaspoon peppermint extract.

    8 ounce container frozen whipped topping, thawed.

    1 cup heavy whipping cream.

    1/4 cup powdered sugar.

    1/4 teaspoon peppermint extract (or vanilla extract).

    1/4 cup crushed peppermint candies.

    White chocolate shavings (optional).


    Instructions

    1- Process Oreos into crumbs, mix with melted butter. Press into pie plate and bake at 350°F for 8-10 minutes.

    2- Beat cream cheese until smooth, mix in melted white chocolate and peppermint extract. Fold in whipped topping.

    3- Pour filling into cooled crust. Refrigerate 2 hours to set.

    4- Whip cream with powdered sugar and extract until stiff peaks form.

    5- Spread or pipe whipped cream on pie. Garnish with crushed peppermint and white chocolate shavings.


  • Easy Raspberry Swirl Cookies with Cream Cheese Dough

    Easy Raspberry Swirl Cookies with Cream Cheese Dough

    I’ve been making these Raspberry Swirl Cookies for years and they never fail to amaze me. The way the tender cream cheese dough wraps around that vibrant raspberry filling creates such beautiful swirls. Every time I bake them my kitchen fills with the most wonderful buttery sweet aroma. They’re truly one of my favorite cookies to share during the holidays.

    What Makes These Special

    These cookies are like little works of art that taste as amazing as they look. I love how the cream cheese makes the dough so incredibly tender it just melts in your mouth. That pop of raspberry adds such a lovely brightness. They’re fancy enough for special occasions but I often make them just because they’re too good to save for holidays.

    Your Shopping List

    • Cream Cheese: Use full-fat cream cheese for a creamy dough texture; softened for easy mixing.
    • Butter: Unsalted butter ensures the balance of sweetness and richness.
    • Flour: Sifted all-purpose flour guarantees a smooth and pliable dough.
    • Raspberry Jam: Opt for high-quality, seedless jam for a consistent filling and beautiful swirls.

    Let’s Create Together

    Prepare the Dough
    Cream together softened cream cheese and butter until smooth. Gradually add sifted flour and a pinch of salt, mixing until a dough forms. Chill the dough wrapped in plastic wrap for 30 minutes.
    Roll and Add Jam
    Roll the dough into a rectangle on a floured surface. Spread an even layer of raspberry jam, leaving a margin at the edges.
    Roll into a Log
    Carefully roll the dough into a tight log, starting from the jam-covered side. Chill the log briefly for clean slicing.
    Bake the Cookies
    Slice the log into cookies and bake at 180°C (350°F) for 12–15 minutes, or until edges turn golden.

    Mix It Up

    Sometimes I love switching things up by using different jams strawberry is amazing and blackberry adds such gorgeous color. A little lemon zest in the dough brightens everything up beautifully. My sister loves when I sprinkle chopped almonds over the jam before rolling it gives such nice crunch.

    Keep Them Fresh

    These cookies stay perfect in an airtight container for about a week. I often make extra and freeze them with parchment paper between layers they last for months that way. Just let them come to room temperature before serving they taste just as fresh as the day they were baked.

    A Family Tradition

    Every time I make these cookies I think of baking with my grandmother. The recipe has been passed down and tweaked over the years but that feeling of joy and connection remains. There’s something so special about sharing these treasured treats with new generations.

    Perfect Pairings

    These cookies are absolutely divine with a cup of earl grey tea or your favorite coffee. When I’m hosting during the holidays I arrange them on a pretty platter with other cookies. A light dusting of powdered sugar right before serving makes them look extra magical.

    Helpful Tips

    If your dough starts cracking while you roll it just let it warm up for a few minutes. Keep your surface lightly floured to prevent sticking. The secret to those perfect swirls is making sure your dough is nice and cold before slicing. Little tricks like these make such a difference.

    Holiday Magic

    There’s something so special about these cookies during the holidays. They look beautiful on any dessert table and everyone always asks for the recipe. I love watching people’s faces light up when they take their first bite it’s pure joy in cookie form.

    Frequently Asked Questions

    → Why chill the dough twice?
    The first chilling helps firm the dough for rolling, while the second chilling after forming the log makes it easier to slice cleanly.
    → Why leave a margin without jam?
    The clean margin helps seal the log properly when rolling, preventing the jam from leaking during baking.
    → Can I use different jam flavors?
    Yes, any seedless jam works well. Try strawberry, blackberry, or apricot for different variations.
    → Why use thread to slice?
    Thread allows for clean cuts without compressing the dough, helping maintain the swirl pattern better than a knife.
    → Why dust with powdered sugar after cooling?
    Adding powdered sugar while cookies are hot will cause it to melt. Waiting ensures an even, attractive coating.

    Conclusion

    These refined cookies combine a tender cream cheese dough with raspberry jam in a beautiful swirl pattern, finished with powdered sugar for a festive touch.


    Print
    clock clock iconcutlery cutlery iconflag flag iconfolder folder iconinstagram instagram iconpinterest pinterest iconfacebook facebook iconprint print iconsquares squares iconheart heart iconheart solid heart solid icon

    Easy Raspberry Swirl Cookies with Cream Cheese Dough

    5 Stars 4 Stars 3 Stars 2 Stars 1 Star No reviews
    • Author: Hannah

    Description

    Delicate cream cheese cookies swirled with sweet raspberry jam and dusted with powdered sugar for an elegant holiday treat.


    Ingredients

    Units Scale

    8 ounces cream cheese, softened.

    1/2 cup unsalted butter, softened.

    1 1/2 cups all-purpose flour, sifted.

    1/2 teaspoon kosher salt.

    1/3 cup seedless raspberry jam.

    Powdered sugar for dusting.


    Instructions

    1- Cream together butter and cream cheese until smooth. Mix in sifted flour and salt until dough forms.

    2- Shape dough into disc, wrap in plastic. Chill 30 minutes.

    3- Roll dough to 10×30 inch rectangle. Spread with jam, leaving 1/2 inch margin on one short end.

    4- Roll into log starting from jam-covered end. Seal with clean edge. Chill 15 minutes.

    5- Slice into 1/4 inch cookies. Bake at 375°F for 17-20 minutes until edges golden. Cool then dust with powdered sugar.


  • Mini Peppermint Cheesecakes – Perfect Holiday Treats

    Mini Peppermint Cheesecakes – Perfect Holiday Treats

    These Mini Peppermint Cheesecakes are my absolute favorite holiday dessert to make. I discovered this recipe a few years ago and have been perfecting it ever since. The combination of creamy cheesecake and cool peppermint is just magical. Every time I serve these at parties people can’t believe how adorable and delicious they are.

    Why You’ll Fall in Love

    I adore how these little cheesecakes combine three amazing flavors smooth creamy cheesecake rich chocolate and refreshing peppermint. Their mini size makes them perfect for parties plus you can dress them up however you like. My guests always get excited when they see these on the dessert table.

    What You’ll Need

    • Oreos: 10 crushed Oreos for the crust, ensuring a rich chocolatey base.
    • Butter: 2 tablespoons melted, to bind the crust mixture.
    • Cream Cheese: 8 ounces full-fat, softened, for a smooth, creamy texture.
    • Sour Cream: 2 tablespoons, adding tang and richness to the filling.
    • Sugar: 1/3 cup granulated, to sweeten the filling.
    • Peppermint Extract: 1/2 teaspoon, for the perfect minty flavor.
    • Mini Chocolate Chips: 1/4 cup, for bursts of chocolate in every bite.
    • Peppermint Chips: 1/4 cup, adding a festive crunch and color.
    • Egg: 1 large, for structure and creaminess.
    • Whipped Cream: Homemade or store-bought, for the topping.
    • Candy Cane Kisses: For a decorative and delicious garnish.

    Let’s Make Them Together

    Prepare the Crust
    Preheat oven to 350°F (175°C). Crush Oreos into fine crumbs, combine with melted butter, and press into a greased mini cheesecake pan. Bake for 8 minutes.
    Make the Filling
    Beat cream cheese, sugar, sour cream, and peppermint extract until smooth. Mix in the egg, followed by the peppermint and mini chocolate chips.
    Bake the Cheesecakes
    Pour filling over the cooled crusts, filling each cavity evenly. Bake for 20 minutes until set. Let cool for 30 minutes, then refrigerate for at least 2 hours.
    Add Toppings
    Pipe whipped cream onto chilled cheesecakes and garnish with Candy Cane Kisses. Serve immediately for the best flavor and presentation.

    My Best Tips

    Always use full-fat cream cheese it makes such a difference in the texture. I love chilling my bowl before making the whipped cream it whips up so much better. Sometimes I add a tiny drop of pink food coloring to make them extra festive. And if you can’t find peppermint chips Andes mints work beautifully too.

    Keep Them Fresh

    These little beauties stay perfect in the fridge for about 2 days in an airtight container. If you want to make them ahead you can freeze them without the whipped cream for up to a month. Just thaw them overnight in the fridge before adding the toppings.

    What Makes Them Special

    There’s something magical about the combination of that chocolatey Oreo crust creamy peppermint filling and pretty garnishes. They’re just the right size and look so festive on a holiday dessert table. Every time I make them they disappear in minutes.

    Mix It Up

    Sometimes I use graham crackers for the crust or try different extracts. A drizzle of melted chocolate over the whipped cream looks gorgeous and crushed candy canes add such nice crunch. You can really make these your own.

    Make It Easy

    I love that I can make the crust and filling ahead of time. While the cheesecakes are baking I get my whipped cream ready. The key to those pretty swirls is using a steady hand when piping. These little tricks make the whole process so much more enjoyable.

    Frequently Asked Questions

    → Can I make these in a regular cupcake tin?
    Yes, but double the crust and filling recipes, line the tin, and increase bake time to 25-30 minutes. Check for doneness by gently wiggling the pan.
    → Why should ingredients be room temperature?
    Room temperature ingredients blend more smoothly and create a creamier texture without lumps in the finished cheesecake.
    → How long do these keep?
    Store in refrigerator up to 2 days. Add whipped cream just before serving. Can be frozen up to a month if wrapped properly.
    → Why do the cheesecakes sink?
    A slight sinking in the center is normal for these mini cheesecakes and creates the perfect well for whipped cream topping.
    → Can I use different toppings?
    Yes, you can customize with different candies or toppings. Crushed candy canes or chocolate shavings work well.

    Print
    clock clock iconcutlery cutlery iconflag flag iconfolder folder iconinstagram instagram iconpinterest pinterest iconfacebook facebook iconprint print iconsquares squares iconheart heart iconheart solid heart solid icon

    Mini Peppermint Cheesecakes – Perfect Holiday Treats

    5 Stars 4 Stars 3 Stars 2 Stars 1 Star No reviews
    • Author: Hannah

    Description

    Add merriment to your holiday table with these Peppermint Cheesecakes! Mini no bake cheesecakes are filled with crunchy bits of peppermint candy and topped with whipped cream in this festive and easy dessert.


    Ingredients

    Scale

    For the Crust:

    • 20 Oreo cookies
    • 5 Tablespoons unsalted butter melted

    For the Filling:

    • 1 cup cold heavy whipping cream
    • 2 packages cream cheese, softened 8 ounce each
    • 1 1/2 cups white chocolate chips
    • 1/2 teaspoon peppermint extract
    • 1/2 cup chopped Andes Peppermint Crunch plus additional for topping
    • Whipped cream for topping

    Instructions

    • Line two 12-cup muffin tins with cupcake liners.
    • In a food processor, pulse Oreos until they are fine crumbs. Stir in the melted butter. Fill each cupcake liner with 1 1/2 tablespoons of Oreo crumbs. Press firmly with the back of a spoon to pack in.
    • In a large mixing bowl, beat the whipping cream to stiff peaks.
    • In a separate mixing bowl, beat the cream cheese until smooth.
    • Melt white chocolate chips in a double boiler, or in the microwave in 30 second increments, stirring well each time. When most of the chocolate has melted, stir until smooth.
    • Immediately stir the white chocolate into the cream cheese mixture. Gently fold in the peppermint extract, chopped peppermint candies, and whipped cream.
    • Fill the cupcake liners with the cheesecake filling, using about ¼ cup of the cheesecake batter for each one.
    • Refrigerate at least 4 hours, or overnight.
    • Top with whipped cream and chopped Andes peppermints before serving.

  • Fudgy Chocolate Cherry Thumbprint Cookies Recipe

    Fudgy Chocolate Cherry Thumbprint Cookies Recipe

    I’m so excited to share my favorite chocolate cherry cookies with you! These are seriously the ultimate chocolate lover’s dream combining fudgy chocolate thumbprints with the most incredible chocolate cherry ganache. Every time I make them people can’t believe how rich and decadent they are.

    What Makes These Special

    These cookies are pure chocolate heaven! The Dutch-process cocoa makes them so deeply chocolatey and that texture is just perfect soft and fudgy with the most amazing chew. Plus that silky chocolate cherry ganache takes them to a whole new level. They’re surprisingly easy to make too!

    Everything You Need

    • Flour: All-purpose flour provides the ideal chewy texture for the cookies.
    • Unsweetened Cocoa Powder: Dutch-process cocoa powder ensures a rich, chocolatey taste.
    • Salt and Baking Powder: Enhance flavors and help the cookies bake perfectly.
    • Unsalted Butter: Softened butter adds moisture and richness to the dough.
    • Brown Sugar and White Sugar: A mix of sugars for a sweet, chewy texture.
    • Egg Yolks: Provide fat and structure to keep the cookies tender.
    • Vanilla Extract: Adds a hint of sweetness to complement the chocolate.
    • Dark Chocolate Chunks: Use high-quality chocolate for the ganache.
    • Cherry Preserves: Sweet, tangy preserves add a fruity balance to the ganache.
    • Heavy Cream: Essential for achieving smooth, velvety ganache.

    Let’s Make Some Magic

    Step 1 – Make the Cookie Dough
    Whisk together the flour, cocoa powder, salt, and baking powder in a bowl. In a separate large bowl, cream the butter and sugars with an electric mixer. Add the egg yolks and vanilla, mixing until light and fluffy. Slowly add the dry ingredients, mixing just until combined.
    Step 2 – Form the Cookies
    Scoop tablespoon-sized portions of dough, roll them into balls, and press an indent into each using a 1/4 teaspoon. Chill the dough balls for one hour to help the cookies maintain their shape.
    Step 3 – Bake
    Preheat the oven to 350°F (175°C). Bake the cookies in batches for 10-12 minutes. Immediately after baking, gently press the centers with the 1/4 teaspoon to redefine the indents. Use a circular cutter to reshape the cookies for a perfect round look. Let cool on a wire rack.
    Step 4 – Make the Chocolate Cherry Ganache
    Add chopped chocolate to a bowl. Heat the heavy cream until just boiling, pour it over the chocolate, and stir until smooth. Mix in the cherry preserves until well combined.
    Step 5 – Fill and Set
    Spoon about 1 teaspoon of ganache into the center of each cooled cookie. Chill for 10 minutes to allow the ganache to set. Serve and enjoy!

    My Best Tips

    Here’s what I’ve learned from making these countless times: Always measure your flour carefully preferably with a scale. Don’t skip chilling the dough it really helps them keep their shape. That 1/4 teaspoon trick for making the indents works so much better than using your thumb!

    Mix It Up

    These cookies are so versatile! Try using different chocolates or preserves to create new flavor combinations. Sometimes I’ll add holiday sprinkles or a chocolate drizzle for special occasions. A little almond extract in the ganache adds an amazing cherry-almond flavor!

    Keep Them Fresh

    These cookies stay perfect at room temperature for about 3 days in an airtight container or up to a week in the fridge. You can even freeze them for up to 2 months! I love making the dough ahead and freezing it then I can bake fresh cookies whenever the craving hits.

    Common Questions

    Yes you definitely need to chill the dough it’s crucial for perfect cookies! Store-bought cherry preserves work great in the ganache. Always use good quality chocolate bars for the ganache not chips they just don’t melt as smoothly. And while the ganache is amazing you can definitely use other fillings like chocolate spread or jam for a quick version.

    Frequently Asked Questions

    → Why do we need to chill the cookie dough?

    Chilling the dough prevents cookies from spreading too much during baking and helps maintain the thumbprint indent. The cold dough also creates a better texture, allowing cookies to stay thick and chewy.

    → Can I use regular cocoa powder instead of Dutch-process?

    While you can use regular cocoa powder, Dutch-process gives these cookies a deeper, richer chocolate flavor and darker color. If using regular cocoa, add 1/8 teaspoon of baking soda to balance the acidity.

    → What can I substitute for cherry preserves?

    You can use raspberry preserves, strawberry jam, or any fruit preserve you prefer. Just ensure it’s smooth and not too chunky to maintain the right ganache consistency. Strain if needed to remove any fruit pieces.

    → Why do my thumbprints lose their shape while baking?

    This is normal and why we re-press the indents while cookies are still hot. Make sure your initial indent is deep enough, and don’t skip chilling the dough. Using a measuring spoon helps make uniform indents.

    → Can these cookies be frozen?

    Yes, you can freeze the unfilled cookies for up to 3 months. Thaw completely at room temperature, then add the ganache filling fresh before serving. The ganache-filled cookies can be frozen but may lose some texture quality.

    Conclusion

    These special thumbprint cookies feature a fudgy chocolate cookie base filled with chocolate cherry ganache. Perfect for special occasions and chocolate lovers alike.

    Print
    clock clock iconcutlery cutlery iconflag flag iconfolder folder iconinstagram instagram iconpinterest pinterest iconfacebook facebook iconprint print iconsquares squares iconheart heart iconheart solid heart solid icon

    Fudgy Chocolate Cherry Thumbprint Cookies Recipe

    5 Stars 4 Stars 3 Stars 2 Stars 1 Star No reviews
    • Author: Hannah

    Description

    Rich chocolate thumbprint cookies filled with a luxurious chocolate cherry ganache. These fudgy cookies combine dark chocolate and sweet cherries for an irresistible treat.


    Ingredients

    Units Scale

    11/2 cups (188 g) all-purpose flour, spooned and leveled.

    1/2 cup (40 g) Dutch-process cocoa powder.

    1/2 tsp baking powder.

    1/2 tsp sea salt.

    3/4 cup (168 g) unsalted butter, softened.

    3/4 cup (165 g) light brown sugar, packed.

    1/4 cup (50 g) granulated white sugar.

    2 egg yolks, at room temperature.

    1 1/2 tsp vanilla extract.

    5 oz chocolate, chopped (Endangered Species Chocolate Vibrant Cherries + Dark Chocolate).

    1/4 cup + 2 tbsp (90 ml) heavy cream.

    1/4 cup (85 g) cherry preserves.


    Instructions

    Whisk flour, cocoa powder, salt and baking powder together in medium bowl. Set aside.

    Beat butter, brown sugar, and white sugar together with electric mixer on high speed until creamy.

    Mix in egg yolks and vanilla on medium speed until light and fluffy, about 1-2 minutes.

    Add dry ingredients to wet, mix until just combined. Scoop 32 portions, roll into balls, make indent with 1/4 tsp. Chill 1 hour.

    Bake at 350°F for 9-11 minutes. Re-press centers while hot, shape with cookie cutter if desired. Cool 5 minutes on pan.

    Pour hot cream over chopped chocolate, stir until combined. Mix in cherry preserves.

    Fill each cookie with 1 teaspoon ganache. Chill 10-15 minutes to set.