Category: Breakfast

  • Easy White Chocolate Raspberry Cheesecake Balls Recipe – My Home Made Recipe

    Easy White Chocolate Raspberry Cheesecake Balls Recipe – My Home Made Recipe

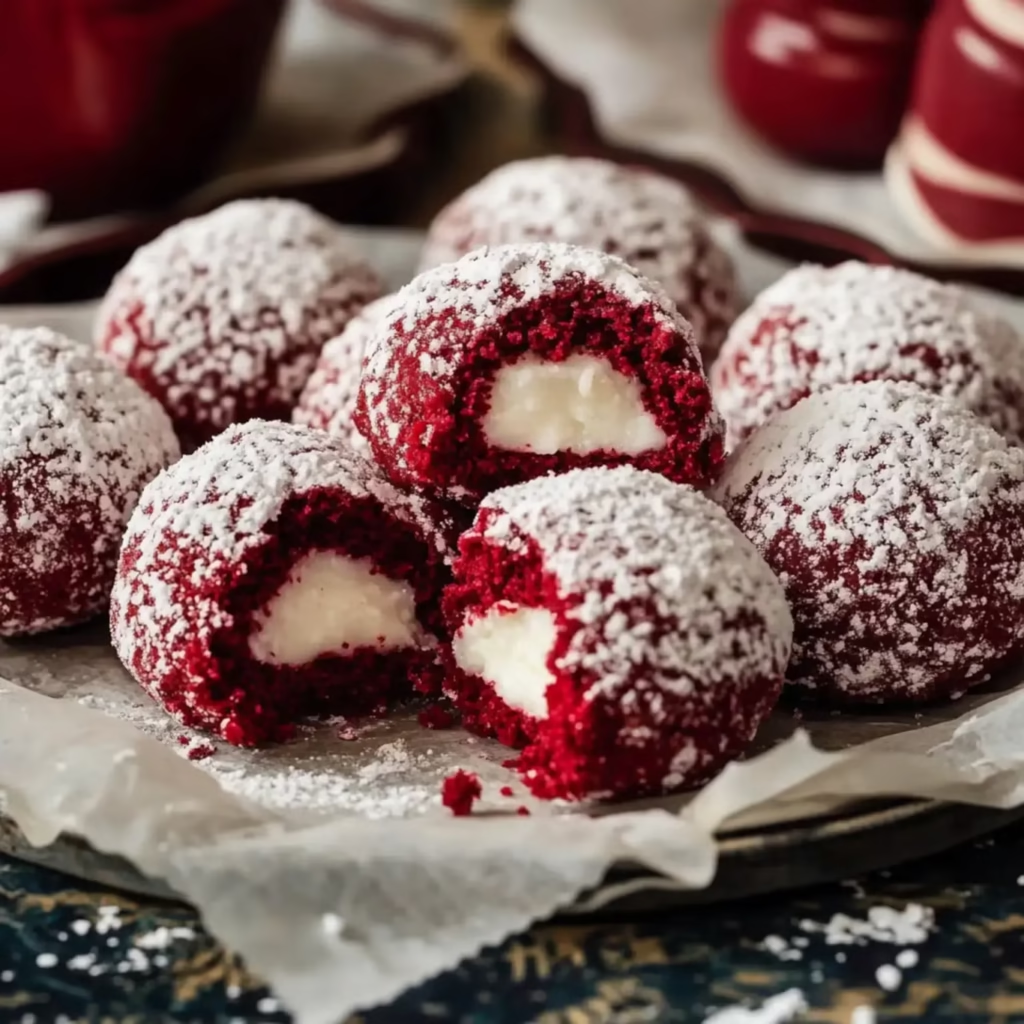
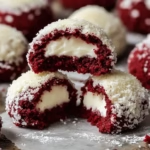
    I stumbled upon these White Chocolate Raspberry Cheesecake Balls during one of my late-night baking experiments. The silky smooth cheesecake filling bursts with fresh raspberry flavor in every bite. Wrapped in white chocolate these little treats have become my go-to dessert for everything from casual gatherings to fancy dinner parties. Trust me your friends will beg for the recipe.

    Why These Are My New Favorite Treat

    The magic of these cheesecake balls lies in their simplicity. You get all the decadence of a traditional cheesecake without turning on the oven. I love how the tart raspberries cut through the sweetness of white chocolate creating this incredible flavor balance. Plus they look absolutely gorgeous on any dessert table.

    What You Need From Your Kitchen

    • Cream Cheese: Take it out of the fridge an hour before. Room temperature cream cheese is your best friend for smooth filling.
    • Powdered Sugar: This dissolves beautifully making your filling silky smooth.
    • Vanilla Extract: Just a splash works wonders.
    • Fresh Raspberries: The star of the show. Frozen work too just make sure to drain them well.
    • White Chocolate Chips: Splurge on good quality ones. The coating makes all the difference.
    • Coconut Oil: My secret weapon for glossy chocolate coating.
    • Garnishes: Get creative with freeze dried raspberries or a white chocolate drizzle.

    Let’s Make These Together

    Mix Your Base
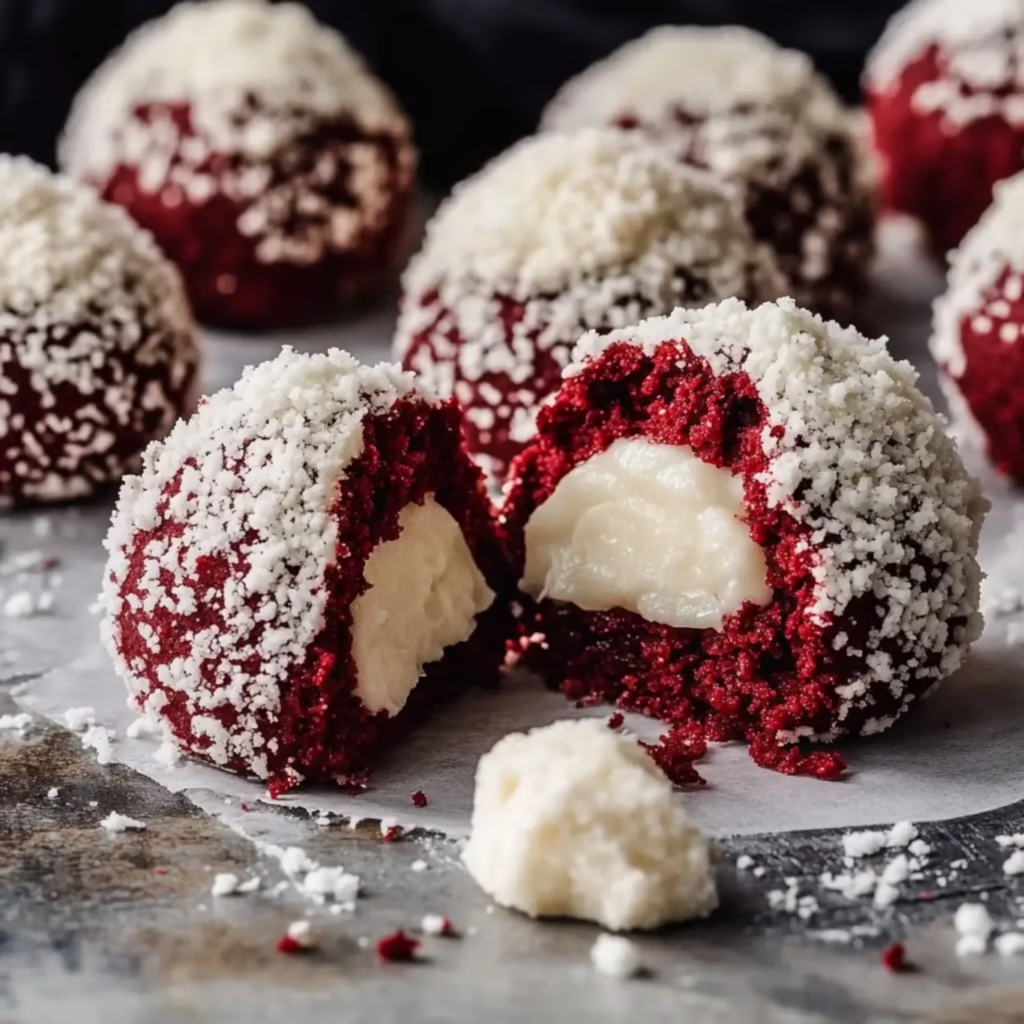
    Start by whipping your room temperature cream cheese until it’s fluffy. Mix in the powdered sugar and vanilla until smooth. The magic happens when you fold in those beautiful mashed raspberries. The pink swirls make my heart happy every time.
    Give it a Rest
    Pop your mixture in the fridge. This helps firm things up and makes rolling so much easier. I usually take this time to clean up and scroll through TikTok.
    Roll Them Up
    Use your tablespoon to scoop even amounts. Roll them between your palms into cute little balls. Line them up on parchment paper and let them chill in the freezer. Trust me they need to be really cold for the next step.
    Time for Their Chocolate Bath
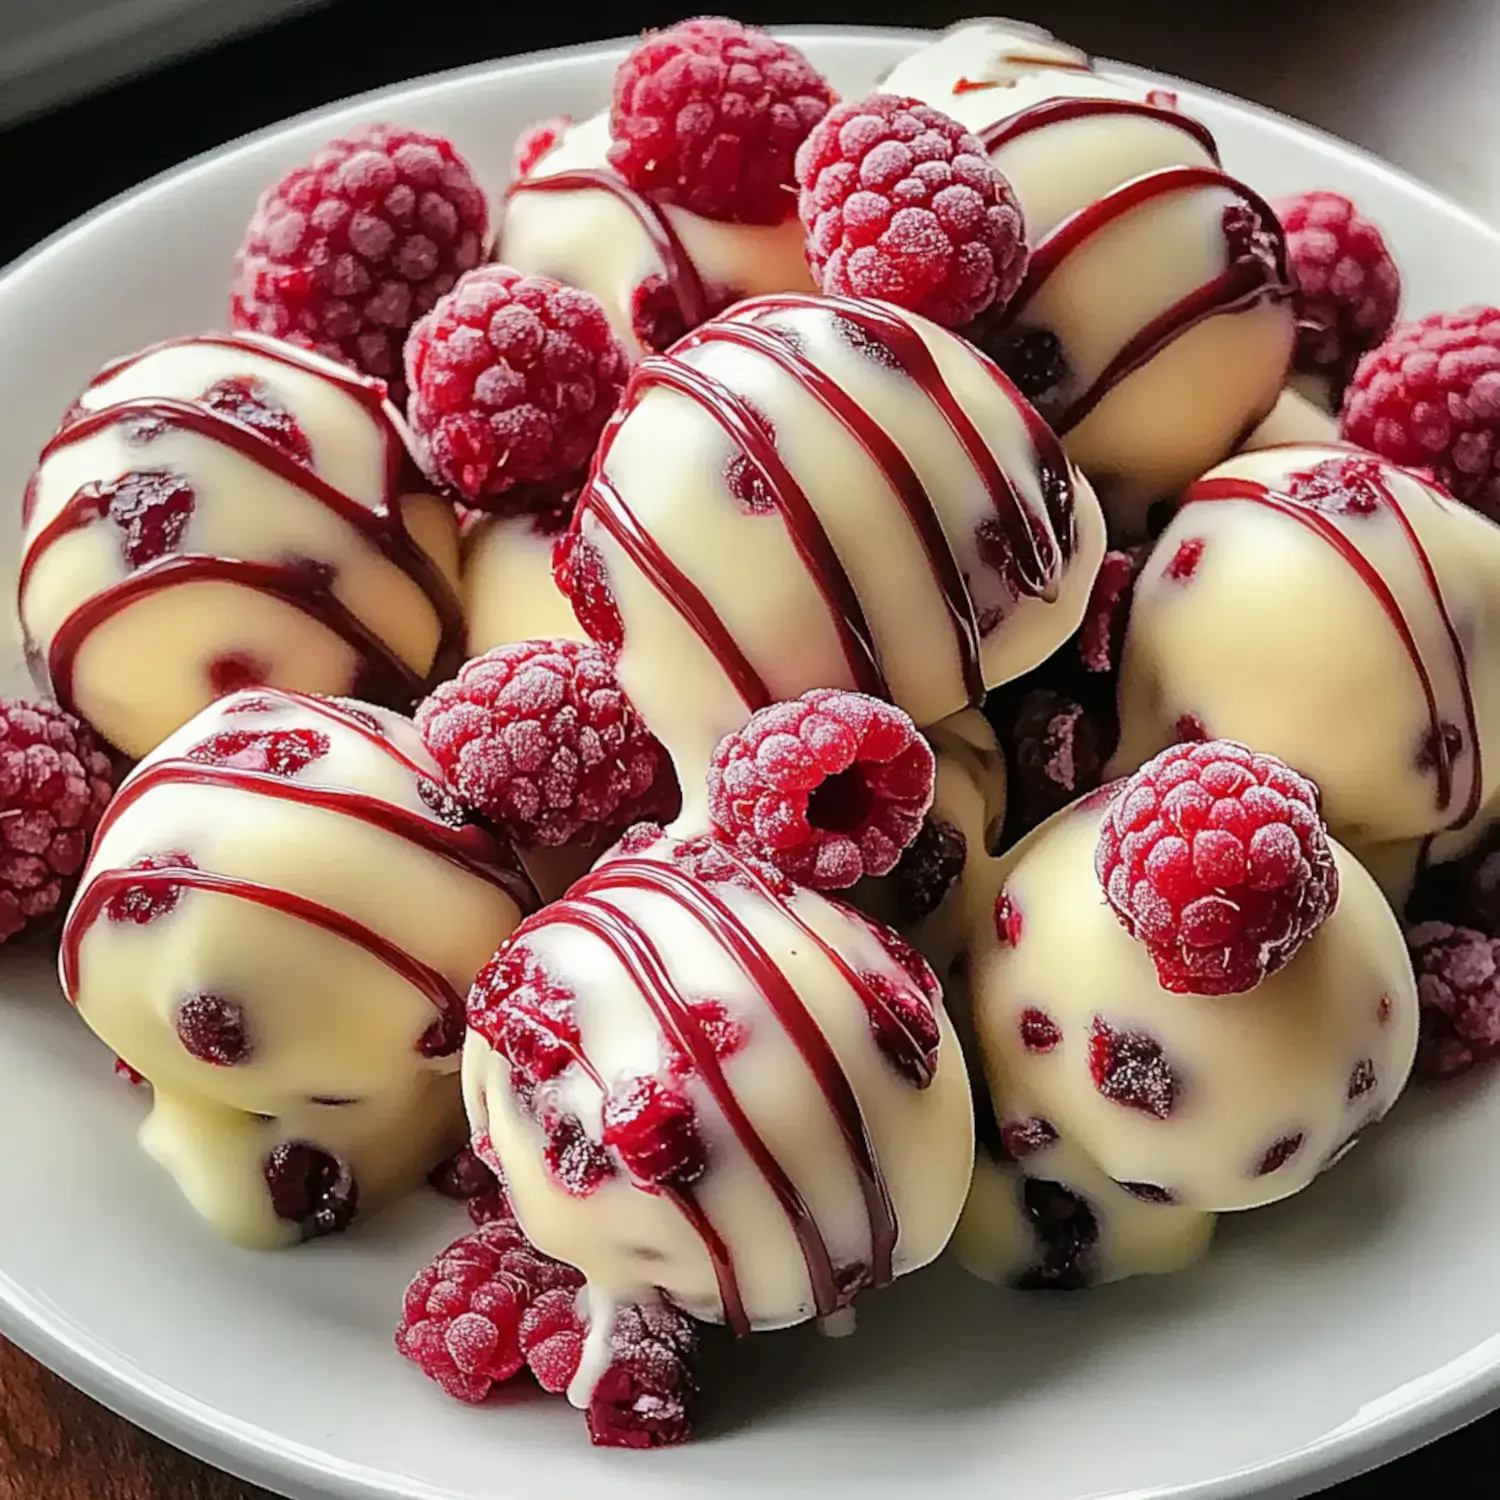
    Melt your white chocolate slowly with a touch of coconut oil. Dip each frozen ball and watch the coating turn glossy. This is my favorite part watching them transform into little jewels.
    Make Them Pretty
    While the chocolate is still wet sprinkle on your toppings. I love using crushed freeze dried raspberries. The color is just stunning.

    Make Them Your Own

    My kitchen always turns into a sprinkle wonderland when I make these. Sometimes I dust them with gold powder for fancy dinner parties. Other times I go wild with colorful sprinkles when my nieces are visiting. The possibilities are endless and that’s what makes cooking so much fun.

    My Tried and True Secrets

    After making these countless times in my kitchen I’ve learned a few tricks. Let your cream cheese soften naturally on the counter. Microwaving makes it too soft and your filling won’t set right. Work with cold balls straight from the freezer when dipping. The chocolate sets faster and looks prettier. I always keep my white chocolate warm but not hot. Once it gets too hot it turns grainy and nobody wants that.

    Keep Them Fresh and Ready

    These little treats stay perfect in your fridge for about 5 days. I store mine in an airtight container with wax paper between layers so they don’t stick together. Planning ahead for a party? You can freeze them for up to 3 months. I love serving them on my grandmother’s vintage cake stand with fresh berries scattered around. They look stunning next to a pot of coffee or a bottle of prosecco.

    Switch Things Up

    Some weeks I swap in strawberries when they’re in season and looking irresistible at the farmers market. Dark chocolate coating works beautifully too giving you this gorgeous contrast. My vegan friends go crazy when I make these with dairy free cream cheese and white chocolate. Recently I’ve started adding crushed butter cookies into the filling talk about game changer.

    Common Questions From My Kitchen

    Running my food blog I get lots of questions about these treats. If your mixture feels too sticky pop it back in the fridge. It happens especially during summer months. When using frozen berries squeeze out all the extra moisture first. My chocolate coating trick? I keep the temperature low and steady. If you see little cracks forming your chocolate might be too hot or your balls aren’t cold enough.

    Your Party Planning Best Friend

    These cheesecake balls have saved me during busy party seasons. I make the filling and shape them whenever I have a free moment. They wait patiently in my freezer until party day. A quick dip in chocolate right before the event and they’re ready to shine. My friends think I spent hours in the kitchen the day of the party. Little do they know.

    Perfect Pairings

    My favorite way to serve these is alongside fresh mint tea or a strong espresso. The creamy filling and that pop of raspberry works magic with coffee. When I’m hosting wine nights I put them next to a crisp prosecco or rosé. Something about the bubbles and white chocolate just works. The girls in my book club absolutely adore them with their afternoon tea.

    Frequently Asked Questions

    → Can I use frozen raspberries instead of fresh?

    Fresh raspberries work best for texture, but you can use thawed frozen raspberries. Make sure to drain them well and pat dry to prevent excess moisture in the mixture.

    → How long do these cheesecake balls last?

    They’ll keep for up to 5 days in the fridge in an airtight container. You can also freeze them for up to 3 months and thaw in the fridge when ready to eat.

    → Why did my white chocolate seize up?

    White chocolate can be tricky to melt. Use short bursts in the microwave and stir frequently. Adding coconut oil helps create a smoother consistency and prevents seizing.

    → Can I make these ahead for a party?

    These balls are perfect for making ahead. Prepare them up to three days before your event and store in the fridge. The flavor actually improves after a day or two.

    → What’s the best way to coat them in chocolate?

    Keep the balls frozen while dipping them in melted chocolate. Use a fork to dip and tap off excess coating. Work quickly and return them to the fridge immediately after coating.

    Conclusion

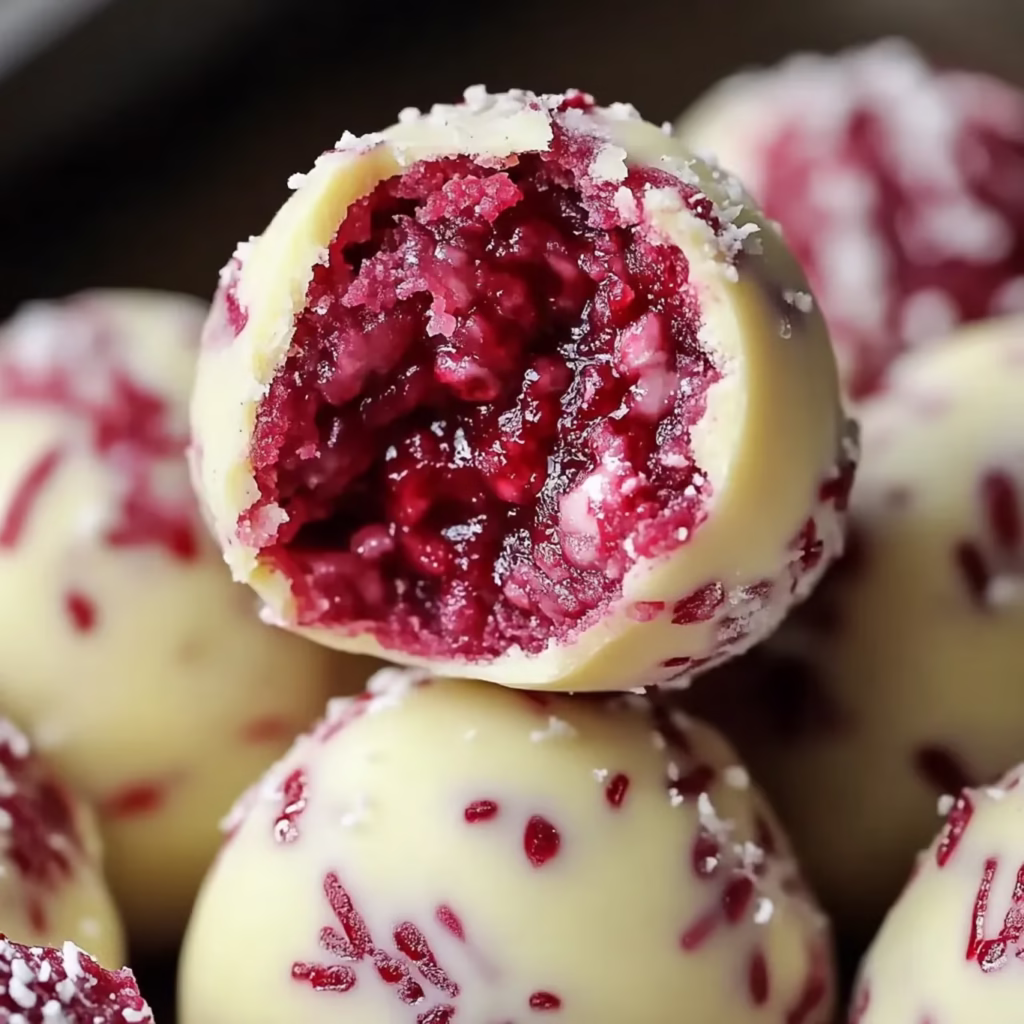
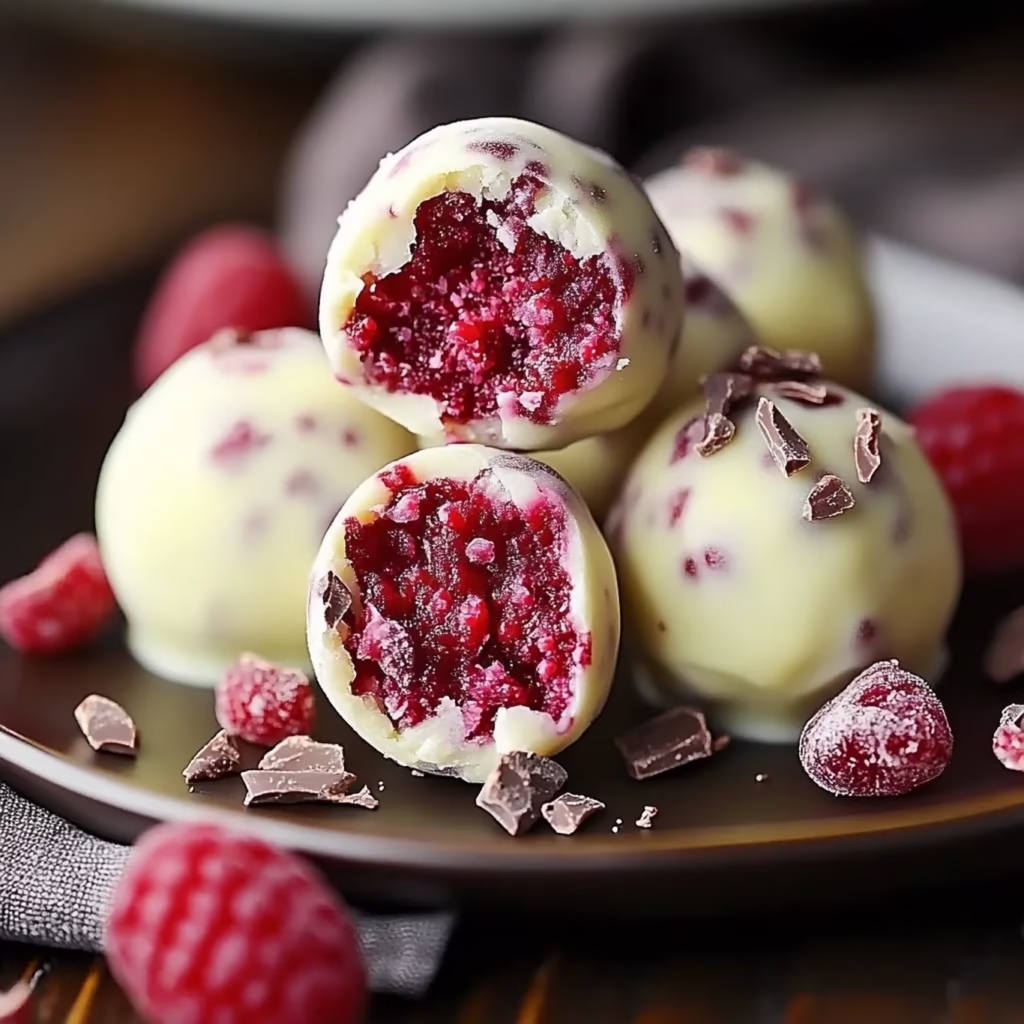
    These delightful raspberry cheesecake balls are a simple yet elegant dessert that combines the creamy richness of cheesecake with the bright flavor of fresh raspberries, all enrobed in smooth white chocolate.


    Print
    clock clock iconcutlery cutlery iconflag flag iconfolder folder iconinstagram instagram iconpinterest pinterest iconfacebook facebook iconprint print iconsquares squares iconheart heart iconheart solid heart solid icon

    Easy White Chocolate Raspberry Cheesecake Balls Recipe – My Home Made Recipe

    5 Stars 4 Stars 3 Stars 2 Stars 1 Star No reviews
    • Author: Hannah

    Description

    No-bake cheesecake truffles filled with fresh raspberry, coated in white chocolate and topped with freeze-dried raspberry powder.


    Ingredients

    Units Scale

    → Cheesecake Filling

    8 ounces cream cheese, softened

    1/4 cup powdered sugar

    1 teaspoon vanilla extract

    1/4 cup fresh raspberries, mashed (or raspberry preserves)

    → Coating

    1 cup white chocolate chips or melting wafers

    1 tablespoon coconut oil or shortening (optional)

    → Garnish

    Freeze-dried raspberry powder or crushed freeze-dried raspberries


    Instructions

    1- Beat cream cheese, powdered sugar, and vanilla until smooth. Fold in mashed raspberries. Chill 30 minutes.

    2- Roll tablespoon-sized scoops into balls. Place on parchment-lined sheet.

    3- Freeze balls for 1 hour until firm.

    4- Melt white chocolate with coconut oil in microwave in 20-second intervals, stirring between each.

    5- Using fork or toothpick, dip frozen balls in melted chocolate. Let excess drip off.

    6- While chocolate is wet, sprinkle with raspberry powder or drizzle with extra white chocolate.

    7- Refrigerate at least 30 minutes until coating sets.


  • Homemade Cinnamon Roll Cookies – Soft & Sweet Treats

    Homemade Cinnamon Roll Cookies – Soft & Sweet Treats

    In my kitchen these Cinnamon Roll Cookies have become a treasured recipe. I love how they capture all those cozy cinnamon roll flavors in a perfect little cookie. The way the buttery dough swirls with warm cinnamon sugar reminds me of Sunday morning treats but in a delightful handheld version. Every time I bake these they fill my home with the most incredible aroma.

    What You’ll Need

    • Butter: Unsalted butter creates a tender and flavorful base for the dough.
    • Flour: All-purpose flour provides structure for the cookies.
    • Sugar: Both granulated sugar and brown sugar are essential for sweetness and texture.
    • Cinnamon: Ground cinnamon adds that warm, comforting flavor to the filling.
    • Vanilla Extract: Enhances the overall flavor of the cookies.
    • Milk: A little milk helps create the smooth glaze for finishing.

    Let’s Start Baking

    First Steps
    Cream butter, sugar, and vanilla until light and fluffy to create the perfect base.
    Rolling Time
    Roll the dough gently into a perfect square before adding the cinnamon sugar filling.
    Wrap and Chill
    Roll up like a jelly roll and refrigerate; chilling makes all the difference.

    Making Cookie Magic

    Slicing the Dough
    After chilling, slice to reveal perfect swirls.
    Baking
    Bake for 10-12 minutes until golden; the house will smell amazing as they cool.
    Glazing
    Once cool, drizzle with a sweet glaze for that cinnamon roll look.

    My Baking Secrets

    Chilling is Key
    Ensure the dough chills well for easier slicing and perfect shapes.
    Even Dough
    Turn the log periodically in the fridge to maintain roundness.
    Glazing Patience
    Wait until cookies are completely cool before glazing to avoid melting.
    Freezing Extra
    Freeze extra dough logs for instant cookies whenever needed.

    Keeping Them Fresh

    These cookies stay wonderful in an airtight container for about five days. When I’m planning ahead I’ll freeze either the baked cookies without glaze or the dough logs. They taste just as fresh when thawed and glazed later.

    More Than Just Cookies

    I love sharing these cookies with friends and family. They’re perfect for holiday platters or afternoon coffee dates. Something about their swirled design and warm cinnamon flavor brings smiles to everyone’s faces.

    Sharing the Love

    When sending these cookies to loved ones I wrap them carefully between layers of parchment paper. A pretty tin and sweet note make them feel extra special. They travel surprisingly well with proper packing.

    A Special Touch

    These cookies bring back memories of weekend mornings at the bakery but with their own unique charm. Whether for special celebrations or just because they never fail to make any moment feel a bit more special.

    Frequently Asked Questions

    → Why did my cookies lose their shape?
    Rotate the dough log during chilling to maintain roundness. Use a paper towel tube as a mold, and reshape hot cookies with a round cookie cutter right after baking.
    → Can I make these ahead?
    The dough log can be frozen for up to 3 months. Wrap well in plastic wrap and defrost overnight in the fridge before slicing and baking.
    → Why isn’t my glaze setting properly?
    Make sure cookies are completely cool before glazing. Hot cookies will absorb the glaze instead of letting it set on top.
    → How thick should I slice the cookies?
    Slice the chilled dough log into 1/2-inch thick pieces using a sharp, warm knife for clean cuts and even baking.
    → Can I add other flavors?
    While traditional cinnamon is classic, you can experiment with other spices like nutmeg or cardamom, or add orange zest to the filling.

  • Traditional Rosettes Cookie Recipe – Holiday Favorite

    Traditional Rosettes Cookie Recipe – Holiday Favorite

    Every winter when I pull out my rosette iron I’m filled with such joy. These delicate Scandinavian cookies have become my signature holiday treat. The way they transform from simple batter into intricate snowflakes and stars feels like pure magic in my kitchen. A light dusting of powdered sugar makes them sparkle just like fresh snow.

    Pure Holiday Magic

    These cookies bring something truly special to every gathering.

    • Beautiful Design: Each one looks like a little work of art right from your kitchen.
    • So Versatile: I love using them as both treats and decorations on my tree.
    • Family History: Making these connects me to generations of bakers who’ve shared this tradition.
    • Light as Air: Their crispy texture makes them different from any other holiday cookie.

    Time to Cook

    Prepare the Batter
    Whisk together the flour, milk, eggs, salt, and sugar until smooth. Let it rest for 30 minutes.
    Heat the Oil
    Preheat your frying oil to 375°F in a deep, heavy-bottomed pot or deep fryer.
    Heat the Rosette Iron
    Place the rosette iron in the hot oil for 1-2 minutes until fully heated.
    Dip and Fry
    Dip the hot iron into the batter, ensuring it doesn’t go over the top edge. Submerge the coated iron into the hot oil and fry until golden, about 30 seconds to 1 minute.
    Cool and Decorate
    Gently remove the rosette from the iron and let it drain on paper towels. Once cooled, dust with powdered sugar.

    Tips for Success

    • Keep your batter smooth and free of lumps for the best results.
    • Always heat the rosette iron before dipping it into the batter to ensure it sticks properly.
    • Maintain a steady oil temperature of 375°F to avoid soggy or unevenly cooked rosettes.

    My Kitchen Secrets

    • Oil Matters: Canola oil gives me the most consistent results.
    • Watch That Heat: My candy thermometer never leaves the pot while I’m frying.
    • Hot Iron Rules: A well heated iron makes perfect shapes every time.
    • Even Color: I give each one a gentle flip for perfect golden brown.
    • Patient Sugar: Waiting until they’re completely cool before sugaring makes all the difference.

    Sweet Memories

    Making rosettes takes me right back to watching my mom and Mrs. Homer in our kitchen every December. The smell of hot lard filled our house as they chatted and fried batch after batch. Those cookies hidden in the freezer were too tempting we kids always found ways to sneak a few leaving telltale sugar trails behind.

    Keeping Them Fresh

    I’ve learned to make these ahead and freeze them between layers of wax paper. Just hold off on the sugar until you’re ready to serve them. They keep beautifully for two months this way and taste just as crisp when thawed.

    What You’ll Need

    • A sturdy rosette iron mine has both star and snowflake patterns.
    • My favorite deep pan perfect for keeping steady heat.
    • A reliable candy thermometer for perfect temperature.
    • Plenty of paper towels and my cooling rack.
    • My grandmother’s sugar shaker makes the prettiest coating.
    Frequently Asked Questions
    → Why isn’t my batter sticking to the iron?

    Make sure the iron is hot enough before dipping in batter, but wipe off excess oil. The iron should be hot but not smoking.

    → Can I make these without a rosette iron?

    No, a special rosette iron is required for the distinctive pattern. These irons can be found in kitchen supply stores or online.

    → Why are my rosettes not crispy?

    Oil temperature needs to be consistently at 375°F. Too low temperature makes them soggy, too high makes them brown too quickly.

    → How do I store rosettes?

    Store in an airtight container and freeze for up to 2 months. Don’t dust with sugar until ready to serve.

    → Why are my rosettes sliding off the iron?

    Don’t dip the iron too deep in batter – it should only go up about 7/8 of the way. Also ensure batter isn’t too thin.

    Conclusion

    Traditional rosettes are delicate, crispy fried cookies made using a special iron. These festive treats are dusted with powdered sugar and perfect for holiday celebrations.

  • Easy Cranberry Orange Icebox Cookies Recipe

    Easy Cranberry Orange Icebox Cookies Recipe

    I’ve fallen in love with these Cranberry Orange Icebox Cookies. The way fresh orange zest brightens the buttery shortbread and those sweet-tart cranberries create little jewels throughout each slice. A sparkly sugar edge and delicate orange glaze make them simply irresistible.

    Pure Cookie Joy

    These cookies have become my holiday secret weapon. The dough comes together so easily and waiting in the fridge until I need it. That perfect balance of cranberry and orange creates something truly special while the slice-and-bake method makes holiday baking feel effortless.

    What You’ll Need

    • Cookie Base: My favorite shortbread ingredients create the perfect foundation.
    • Orange Magic: Fresh zest and juice bring such wonderful brightness.
    • Dried Cranberries: These little gems add color and flavor.
    • Sparkly Sugar: Rolling the logs creates such beautiful edges.
    • Simple Glaze: Just orange juice and powdered sugar finish everything perfectly.

    Let’s Start Baking

    Mix Your Dough
    Everything comes together in one bowl creating this wonderfully fragrant mixture.
    Shape and Rest
    Rolling into logs and chilling gives us that perfect texture.
    Add Some Sparkle
    That roll in coarse sugar makes such magic.
    Time to Bake
    Slicing reveals those beautiful cranberry speckled cookies.
    Final Touch
    A drizzle of orange glaze makes them absolutely perfect.

    Pure Holiday Magic

    What I love most about these cookies is how they bring together simple ingredients in such a beautiful way. They’re perfect for sharing during the holidays and the make-ahead option means I can focus on enjoying time with family and friends.

    Keeping Them Fresh

    These beauties stay wonderful in an airtight container for about a week. Sometimes I’ll make extra dough logs and keep them in the freezer ready for unexpected guests or last-minute cookie cravings.

    Mix It Up

    Sometimes I drizzle these with white chocolate instead of the orange glaze or add lemon zest for a different citrus note. Adding chopped pecans or walnuts creates wonderful texture. That sparkly sugar coating is optional but it adds such a lovely festive touch.

    Perfect Partners

    These cookies feel right at home next to other holiday favorites on cookie platters. I love serving them with afternoon tea or coffee the bright orange flavor shines beautifully. They always catch everyone’s eye with those pretty cranberry specks throughout.

    My Kitchen Secrets

    That good chill time makes all the difference in getting clean slices. I always use fresh orange zest never dried and roll those logs in sugar right before slicing. Letting the cookies cool completely before glazing keeps everything looking picture perfect.

    The Magic of Chilling

    Chilling these cookies isn’t just about convenience it’s what gives them that perfect texture. The butter firms up creating cookies that hold their shape with slightly crisp edges and tender centers. It’s what makes icebox cookies so special.

    What Others Say

    Every time someone tries these cookies they become part of their holiday tradition too. Like Maryn who shared how gorgeous and delicious they turned out especially with that sugary edge and orange glazed top. Her excitement about making them again speaks volumes.

    Planning Ahead

    Having those prepared dough logs in the freezer feels like a gift to my future self. Just a quick thaw in the fridge and I can have fresh-baked cookies anytime. It makes holiday baking so much more enjoyable when you can spread out the work.

    Sharing the Love

    These cookies make such wonderful gifts tucked into pretty tins or boxes. Something about their festive appearance and bright flavors makes them perfect for sharing during the holidays. They’re a heartfelt way to show someone you care.Frequently Asked Questions

    → Why chill the dough?
    Chilling is mandatory as it firms up the dough for clean slicing and helps develop the orange flavor. Overnight chilling gives the best flavor results.
    → Can I make these ahead?
    Yes, the dough logs can be refrigerated for up to 5 days or frozen for 3 months. Baked cookies also freeze well for up to 3 months.
    → Can I use fresh cranberries?
    Dried cranberries work best as fresh ones would add too much moisture. Make sure to chop them finely for even distribution.
    → What’s the best way to slice them?
    Use a sharp knife and rotate the log slightly between cuts to prevent flat sides. If dough crumbles, let it warm slightly.
    → Can I substitute the orange glaze?
    Yes, you can dip in or drizzle with melted white or dark chocolate instead of the orange glaze for a different flavor combination.

    Print
    clock clock iconcutlery cutlery iconflag flag iconfolder folder iconinstagram instagram iconpinterest pinterest iconfacebook facebook iconprint print iconsquares squares iconheart heart iconheart solid heart solid icon

    Easy Cranberry Orange Icebox Cookies Recipe

    5 Stars 4 Stars 3 Stars 2 Stars 1 Star No reviews
    • Author: Hannah

    Description

    Buttery shortbread-style cookies filled with dried cranberries and orange zest, finished with a simple orange glaze. Perfect for make-ahead baking.


    Ingredients

    Units Scale

    3/4 cup unsalted butter, softened.

    2/3 cup granulated sugar.

    1 large egg, room temperature.

    1 teaspoon vanilla extract.

    2 cups plus 2 tablespoons all-purpose flour.

    1/4 teaspoon salt.

    2 tablespoons orange juice.

    1 teaspoon orange zest.

    3/4 cup finely chopped dried cranberries.

    Coarse sugar for rolling.

    1 cup confectioners’ sugar.

    2 tablespoons orange juice for icing.


    Instructions

    Beat butter and sugar until creamy. Add egg and vanilla. Mix in flour and salt, then orange juice, zest, and cranberries.

    Form dough into two 7-8 inch logs, about 2.5 inches diameter.

    Wrap logs in plastic and refrigerate at least 3 hours or up to 5 days.

    Heat oven to 350°F. Line baking sheets with parchment.

    Roll logs in coarse sugar if desired.

    Cut each log into 12 slices. Bake 13-15 minutes until edges are light brown.

    Cool 5 minutes on pan, then transfer to wire rack.

    Whisk confectioners’ sugar and orange juice. Drizzle over cooled cookies.


    Notes

    Dough can be made ahead and frozen.

    Longer chill time enhances orange flavor.

    Can substitute chocolate for glaze.

  • Red Velvet Snowball Cookies – White Chocolate Surprise Inside – My Home Made Recipe

    Red Velvet Snowball Cookies – White Chocolate Surprise Inside – My Home Made Recipe

    One bite of these Red Velvet Snowball Cookies takes me back to snowy winter days in my grandmother’s kitchen. The deep red cookies dusted with powdered sugar look just like tiny snowballs and when you bite into one that creamy white chocolate center melts in your mouth. Pure winter magic in cookie form.

    Sweet Winter Memories in Every Bite

    I created these cookies one snowy afternoon while watching my kids play outside. Something about their rosy cheeks coming in from the cold inspired me to combine classic snowball cookies with rich red velvet and a surprise white chocolate center. Now they beg for these every time snowflakes start falling.

    What Makes These Cookies Special

    • Festive Look: That gorgeous red color peeking through snowy powdered sugar makes everyone smile at first sight.
    • Surprise Filling: The white chocolate center melts into pure creamy bliss with each warm bite.
    • Easy to Make: My teenage daughter makes these by herself now—they’re that simple.
    • Perfect for Sharing: Watch faces light up when you bring these to cookie swaps or package them as gifts.

    My Best Baking Secrets

    • Chill That Dough: Pop it in the fridge for easier shaping—your hands will thank me later.
    • Gel Food Coloring: This gives you that stunning red color without making the dough weird.
    • Quality White Chocolate: Splurge on good white chocolate chips—trust me on this one.
    • Snow Bunny Coating: Really roll those cookies in powdered sugar and coconut until they look like perfect little snowballs.

    Ways to Enjoy

    Pour yourself a mug of hot cocoa and curl up with these cookies on a cold day. I love tucking them into pretty boxes with ribbon for teacher gifts. They always steal the show on my holiday cookie platters too.

    Creating Kitchen Magic

    Some of my favorite memories are making these cookies with my kids. The way their eyes light up when they discover that melty center never gets old. Baking together turns ordinary afternoons into treasured moments.

    Everything You Need

    • All-Purpose Flour: Start with fresh flour—it makes such a difference in texture and taste.
    • Cocoa Powder: Dark cocoa gives these that irresistible red velvet flavor.
    • Gel Food Coloring: My secret for that perfect holiday red without messing up the dough.
    • Butter: Always use room temperature butter for the dreamiest cookie texture.
    • Sugar: Regular granulated works perfectly here.
    • Buttermilk: This gives that classic red velvet tang I crave.
    • White Chocolate Chips: Get good quality ones—they’re the star of the show.
    • Powdered Sugar and Coconut: For that snowy coating that makes everyone smile.

    Putting It All Together

    Mix Your Dough
    Cream that butter and sugar until fluffy, add your color, then mix in dry ingredients and buttermilk. The dough needs a quick nap in the fridge.
    Create Your Snowballs
    Roll small dough balls, push in a white chocolate chip, and roll again until smooth.
    Time to Bake
    Give them a good coating of powdered sugar and coconut before popping in a 350°F oven for about 10 minutes.
    Almost Ready
    Let them cool just enough so you don’t burn your tongue on that melty center.

    Keeping These Little Treasures Fresh

    Store your cookies in a container with a tight lid and they’ll stay perfect for 5 days right on your counter. Want to make them ahead? Pop them in the freezer for up to 3 months. Just let them come to room temp before serving.

    Fun Ways to Mix It Up

    • Switch the Center: Sometimes I use cream cheese filling when I want something tangy.
    • Skip the Coconut: Not everyone loves coconut—just double up on that powdered sugar coating.
    • Tiny Treats: Make them bite-sized for parties—they disappear even faster.

    Spreading Cookie Joy

    Nothing makes me happier than sharing these cookies. Pack them up for teachers, neighbors, or friends. Every time someone takes that first bite and finds the surprise center, their whole face lights up. That’s what holiday baking is all about.

    Frequently Asked Questions

    → Why chill the dough?
    Chilling makes the dough easier to handle and helps prevent the cookies from spreading too much while baking.
    → Can I use different filling?
    Yes, try dark chocolate chips or even candy melts. Just ensure the filling is completely enclosed in dough.
    → Why brush with water or syrup?
    The moisture helps the coconut stick to the cookies while keeping the coating fresh and white looking.
    → Can I make these ahead?
    Yes, store in an airtight container up to 5 days. The center will remain soft but not melted.
    → What type of coconut works best?
    Use sweetened or unsweetened shredded coconut, not flaked. Finely shredded coconut adheres better.

    Print
    clock clock iconcutlery cutlery iconflag flag iconfolder folder iconinstagram instagram iconpinterest pinterest iconfacebook facebook iconprint print iconsquares squares iconheart heart iconheart solid heart solid icon

    Red Velvet Snowball Cookies – White Chocolate Surprise Inside – My Home Made Recipe

    5 Stars 4 Stars 3 Stars 2 Stars 1 Star No reviews
    • Author: Hannah

    Description

    Cocoa-rich red velvet cookies filled with white chocolate and rolled in coconut for a festive snowball effect.


    Ingredients

    Units Scale

    11/2 cups all-purpose flour.

    1/4 cup unsweetened cocoa powder.

    1 teaspoon baking powder.

    1/4 teaspoon salt.

    1/2 cup unsalted butter, softened.

    3/4 cup granulated sugar.

    1 large egg.

    1 teaspoon vanilla extract.

    1 tablespoon red food coloring.

    1/4 cup buttermilk.

    1/2 cup white chocolate chips.

    1/2 cup shredded coconut.

    Sugar syrup for coating.


    Instructions

    Preheat oven to 350°F. Line baking sheet with parchment.

    Whisk flour, cocoa powder, baking powder, and salt.

    Beat butter and sugar until fluffy, 2-3 minutes.

    Mix in egg, vanilla, and food coloring.

    Alternate adding dry ingredients and buttermilk.

    Refrigerate dough 30 minutes.

    Make indent in dough balls, add chocolate, seal and roll.

    Bake 10-12 minutes until edges set.

    Brush warm cookies with syrup, roll in coconut.