Author: Hannah

  • Strawberry Lemonade Cupcakes

    Strawberry Lemonade Cupcakes


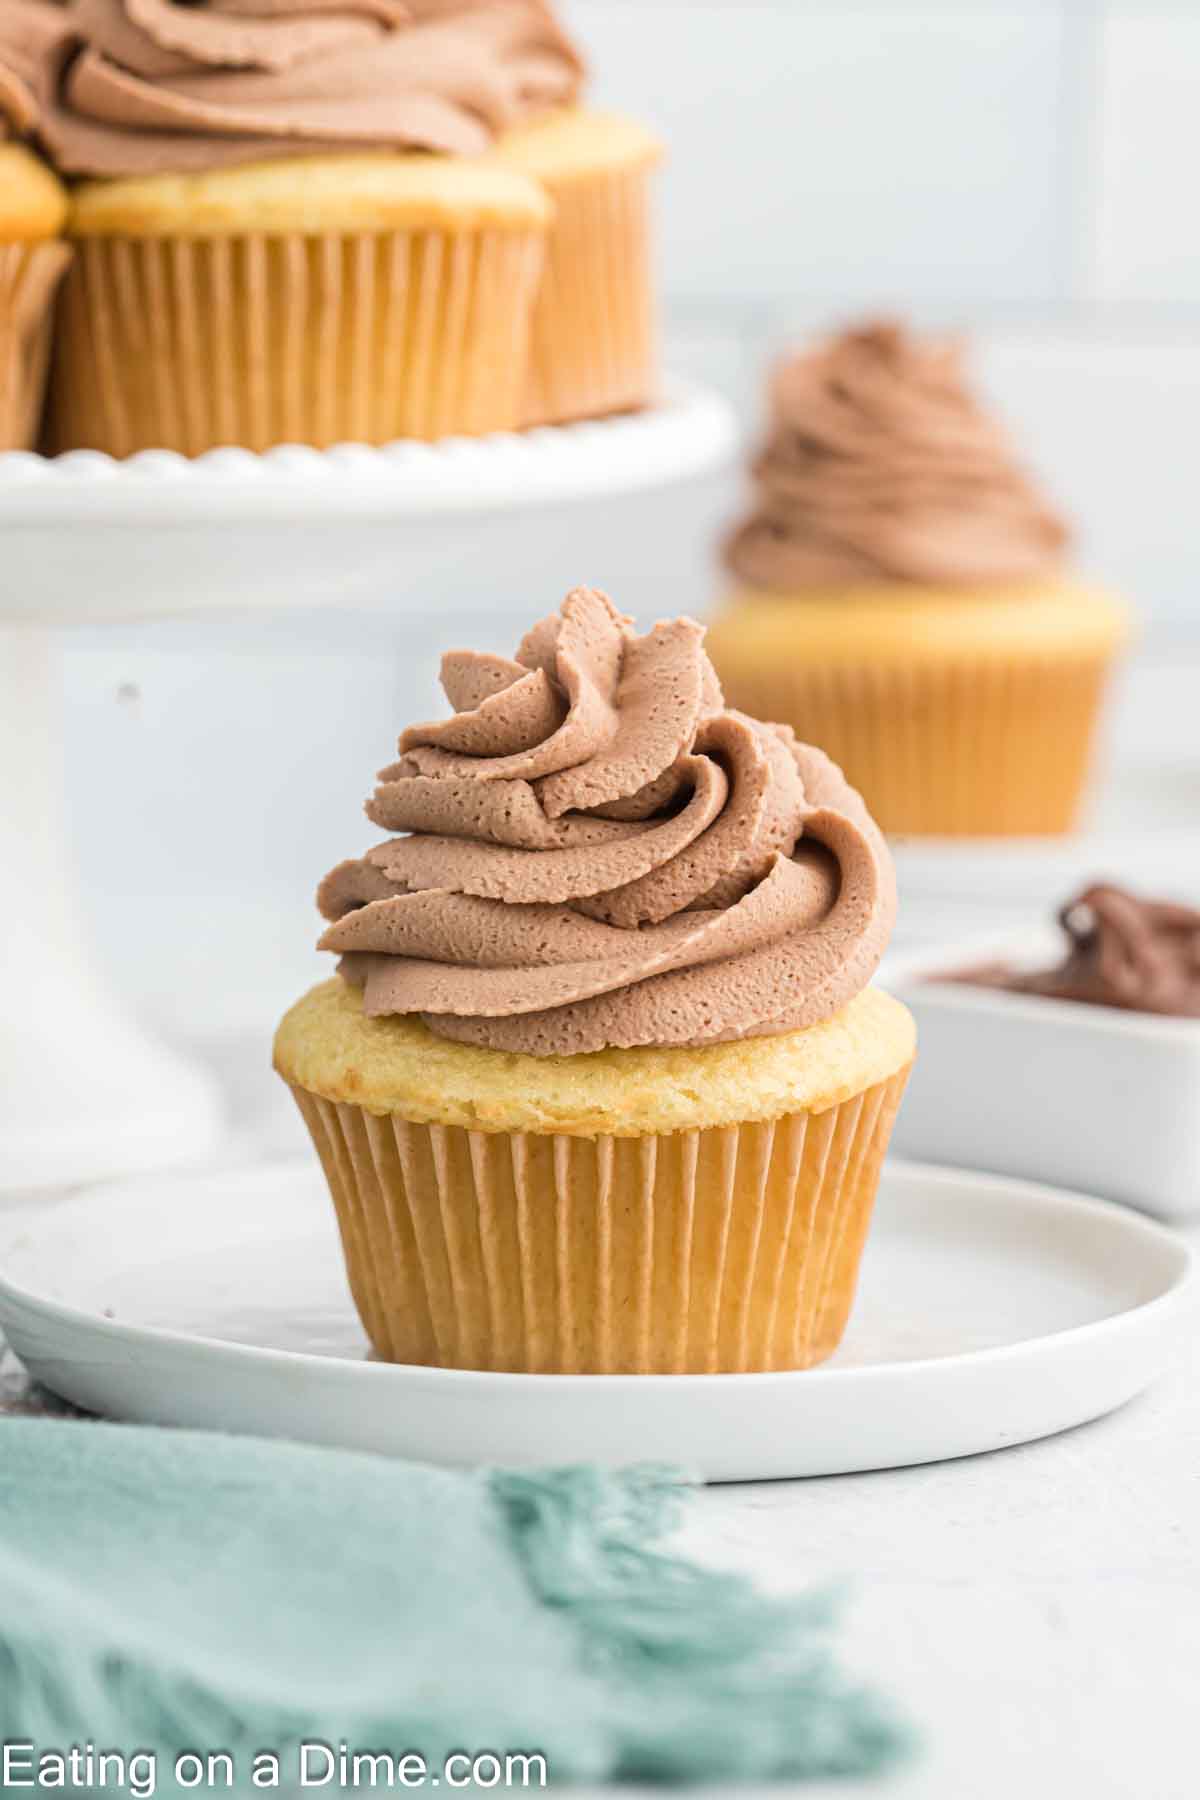
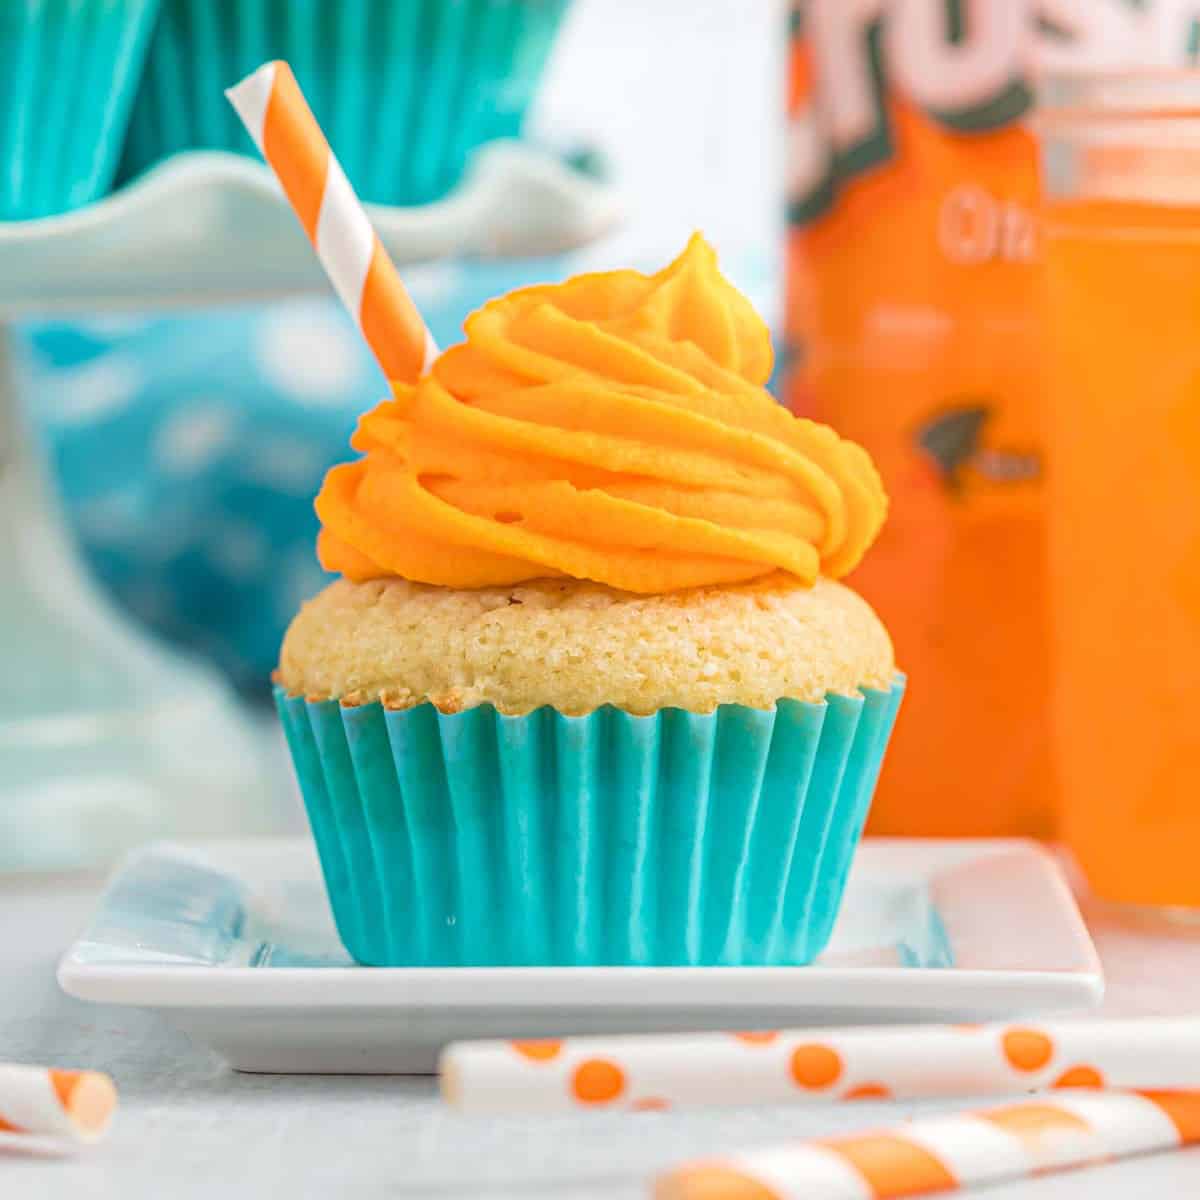
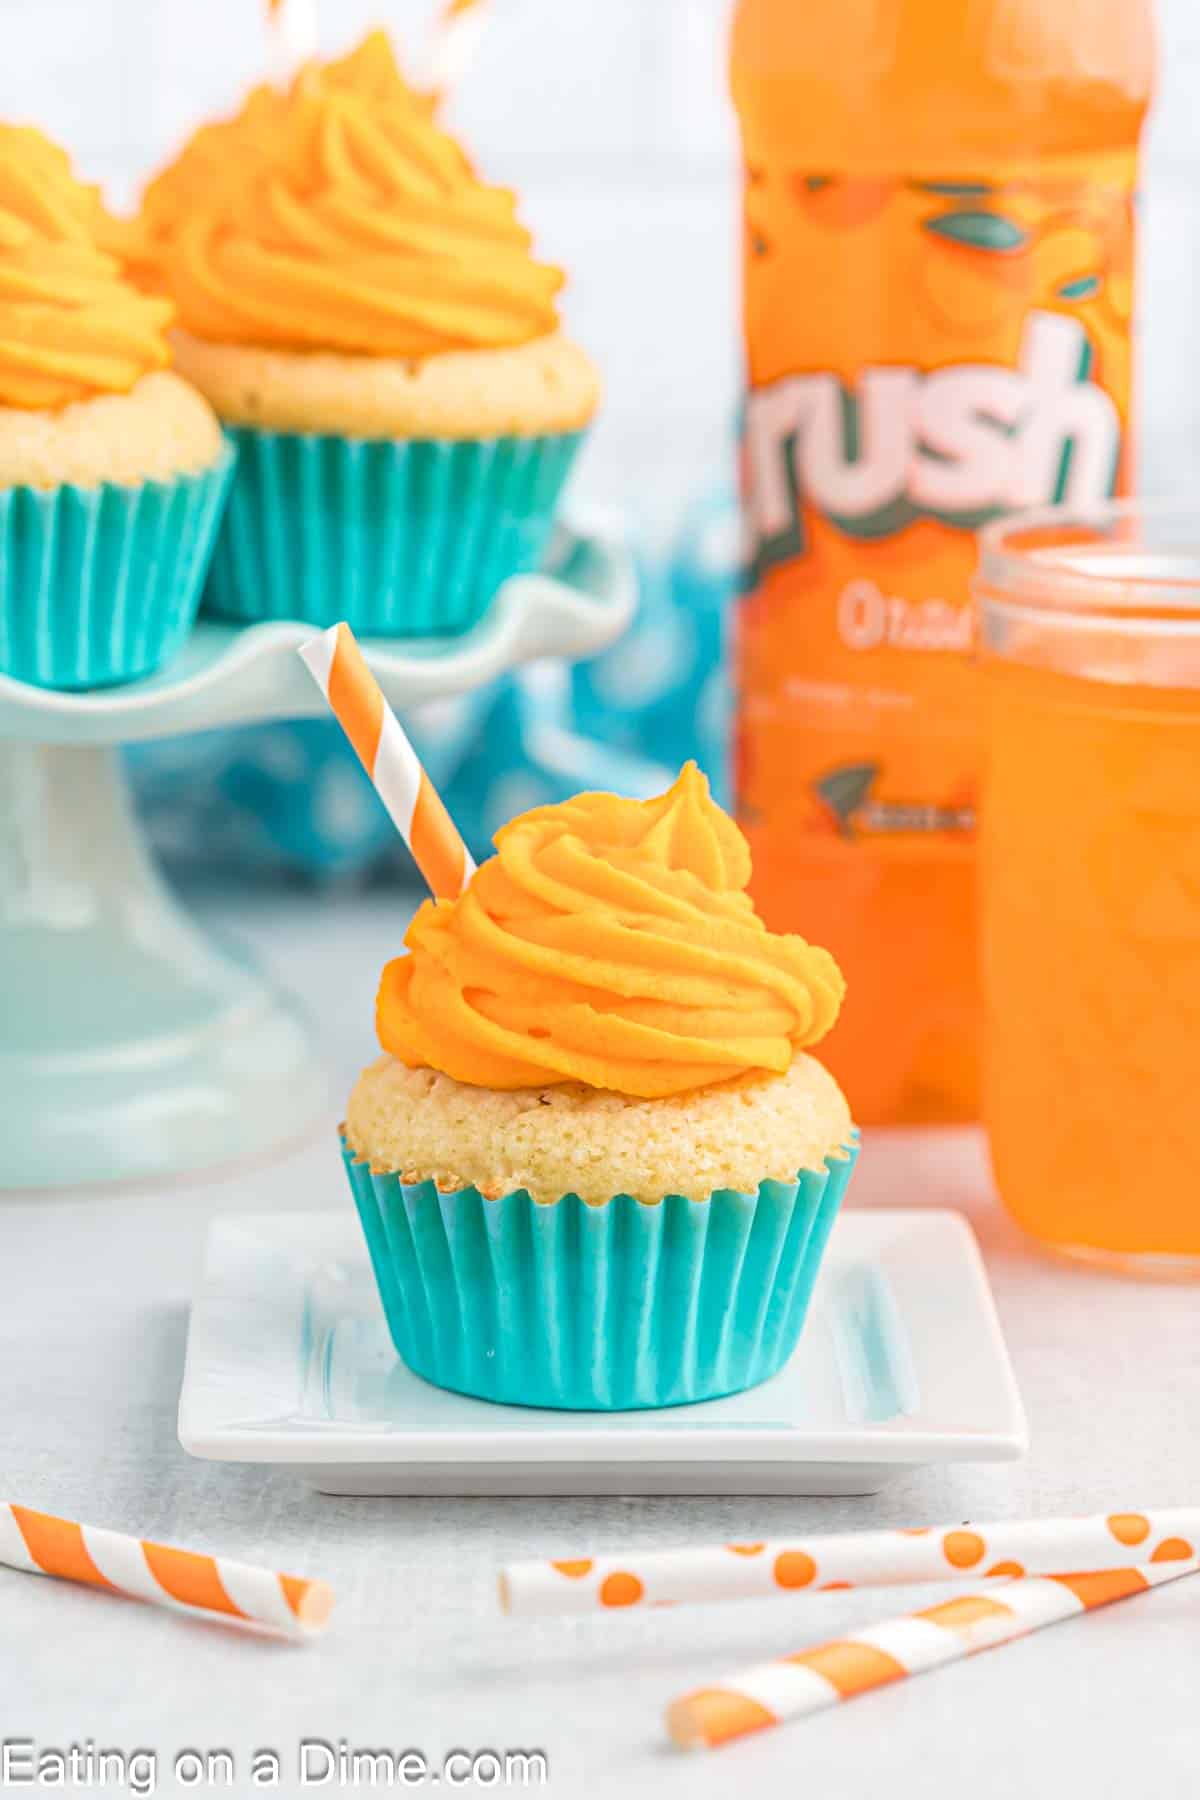
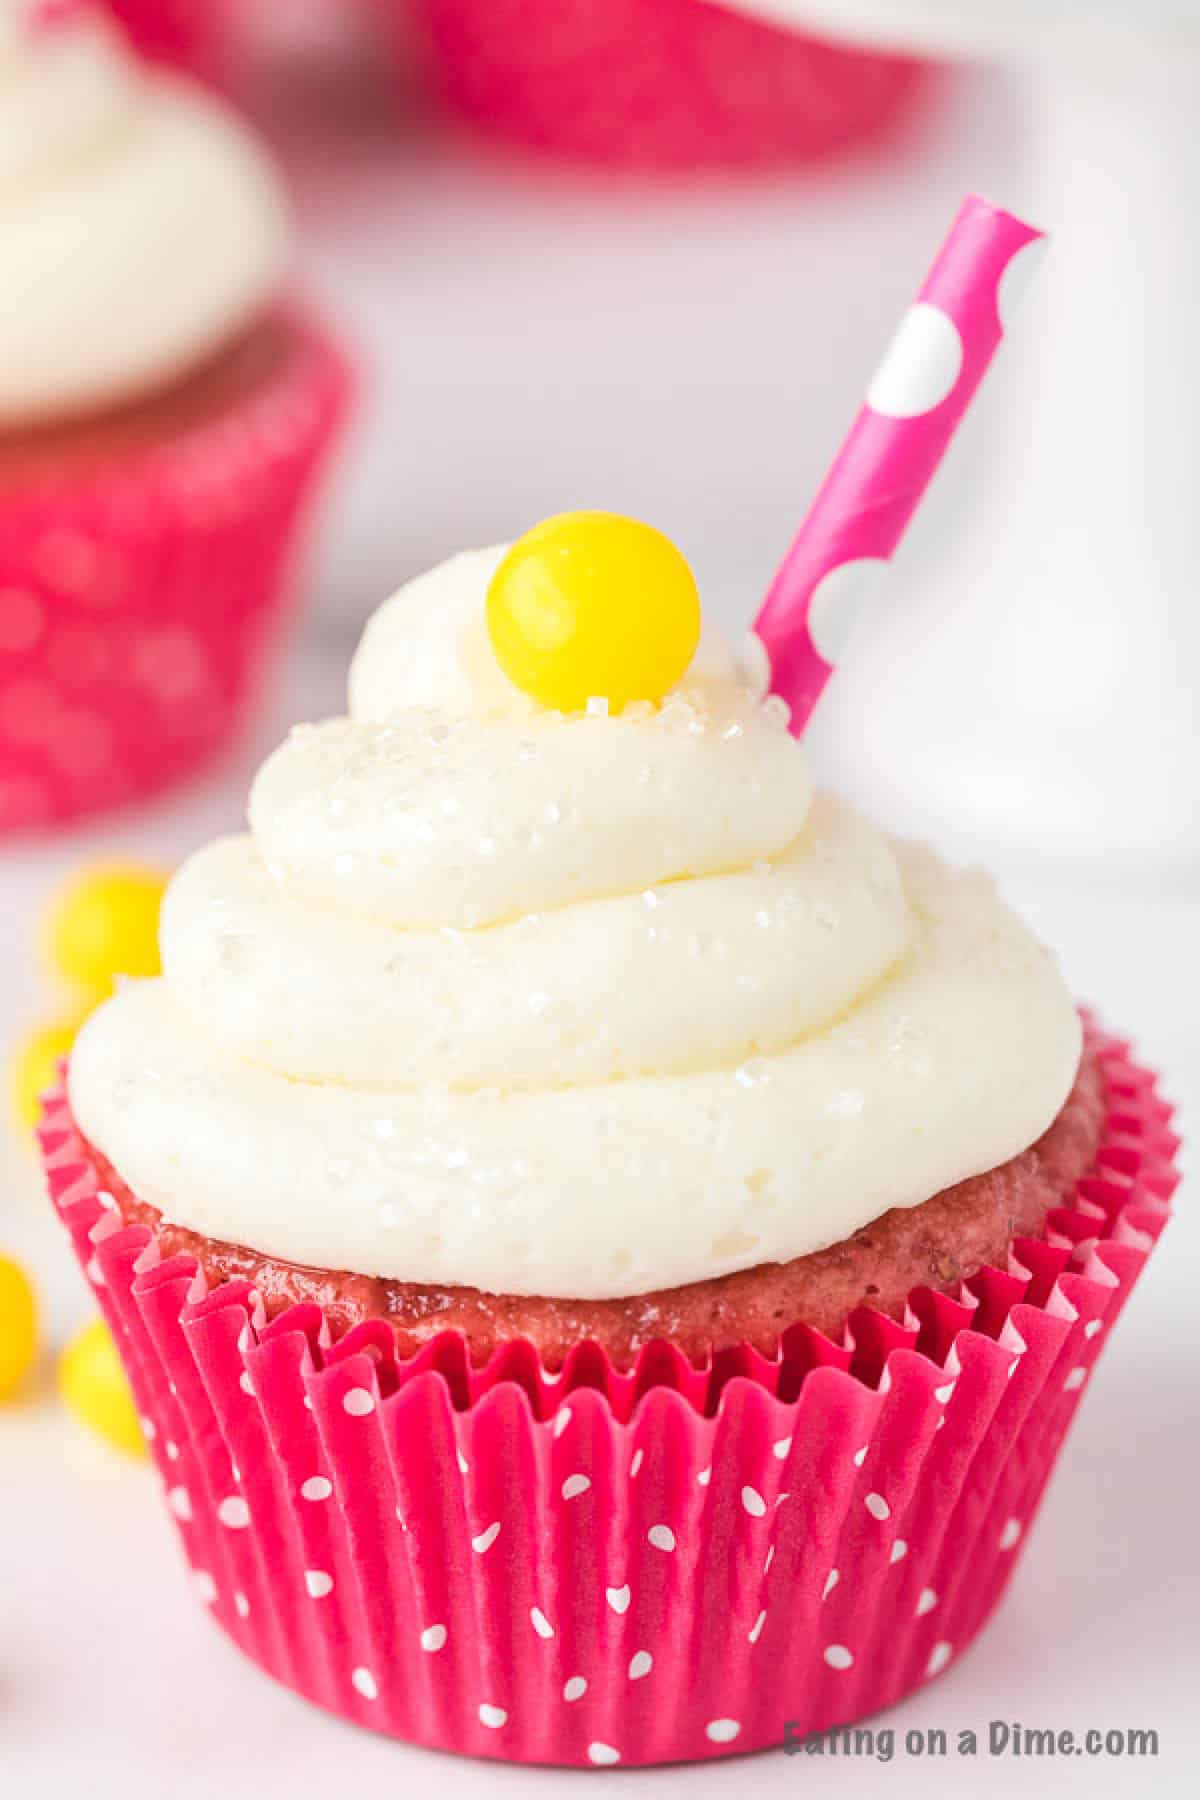
    Get ready for a burst of flavor when you make Strawberry Lemonade Cupcakes. The combination of real strawberries and lemonade make these cupcakes so tasty and really fabulous.  Each cupcake is decorated with homemade icing for the perfect dessert.

    I have a fun and delicious cupcakes recipe for you – Strawberry Lemonade Cupcakes.  They start with a cake mix but we jazz things up with a few little extras so they taste bakery quality. I can’t wait for you to try this. It also makes an Easy Valentine’s Day Recipes to share with your loved ones.

    For even more tasty ideas, try all of our delicious easy cupcake recipes. You must try these Delicious Key Lime Cupcakes or Pink Velvet Cupcakes for another family favorite.

    Why We Love This Recipe

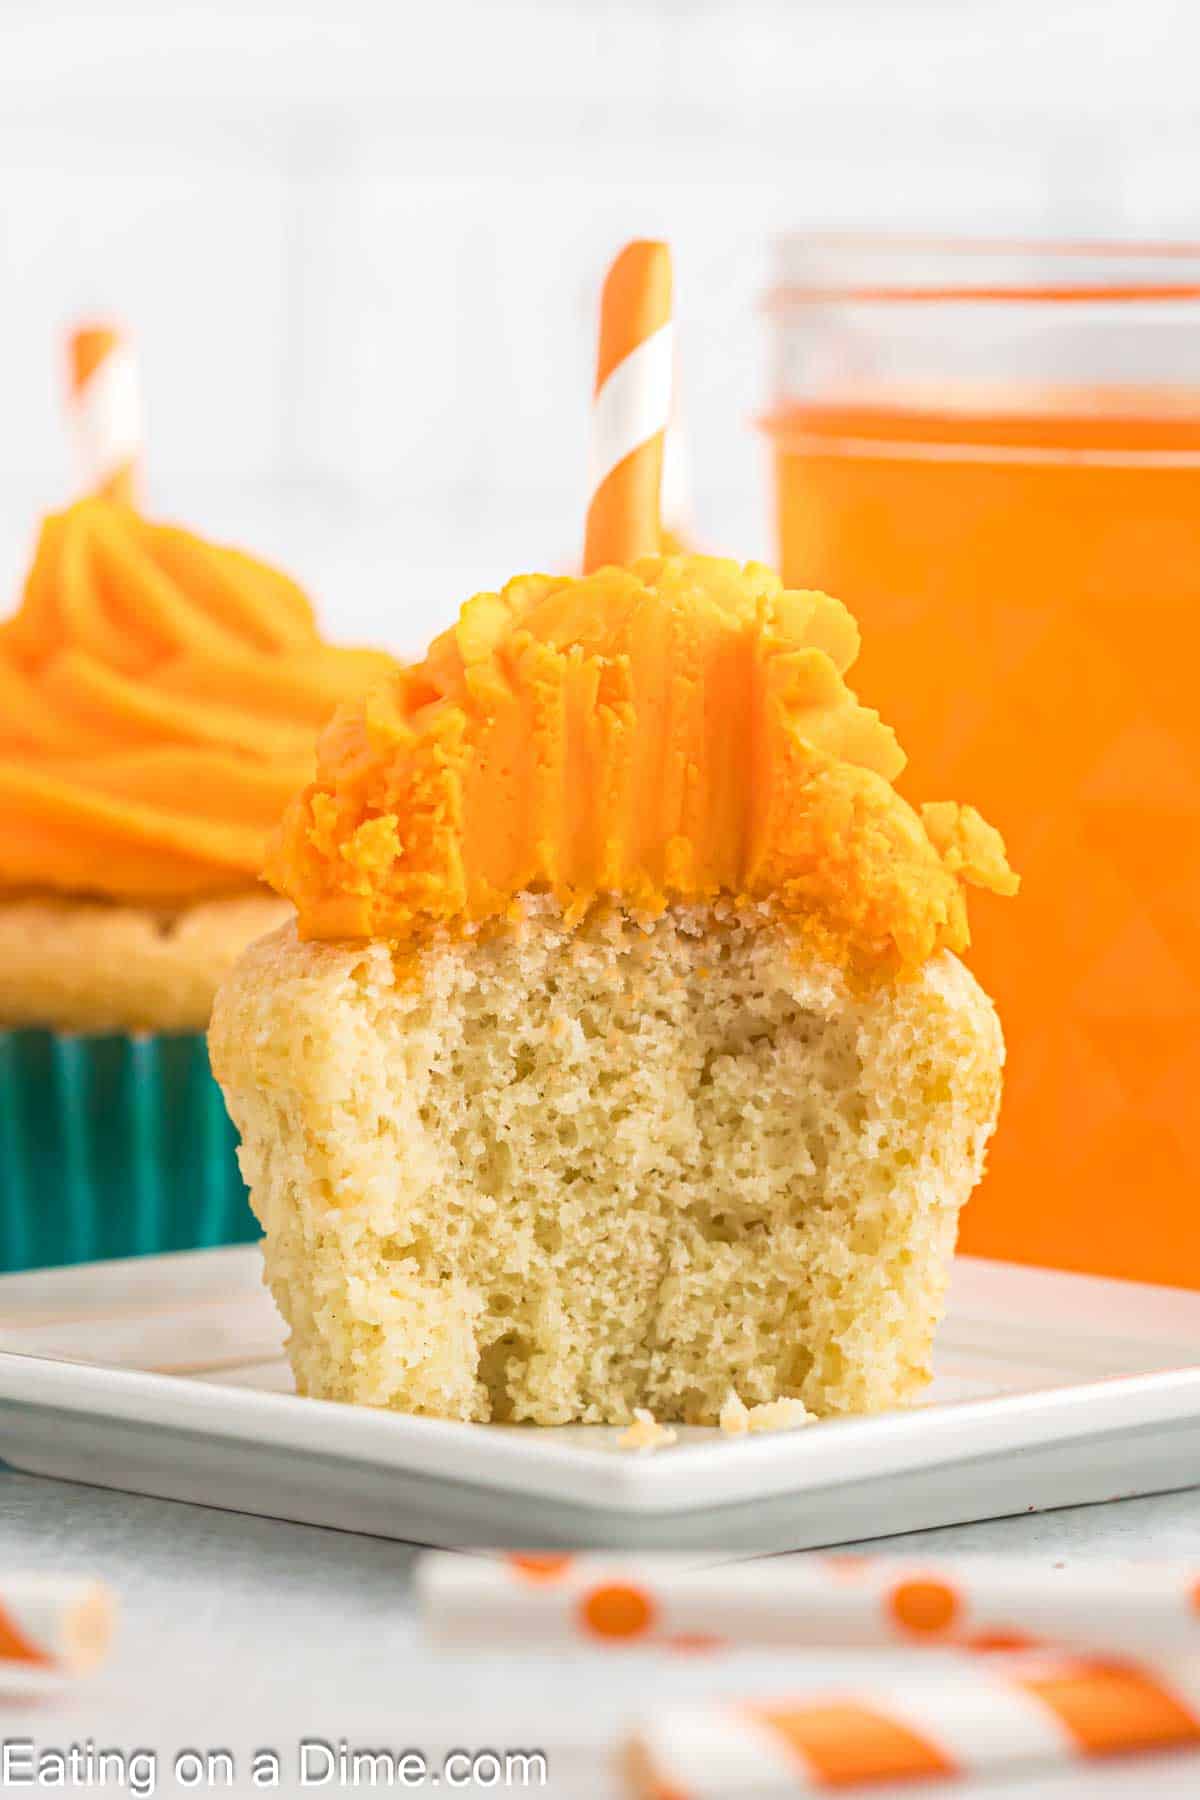
    Once you are finished making these, you will wonder why you didn’t make them sooner. The combination of lemonade and strawberries really make this so moist.

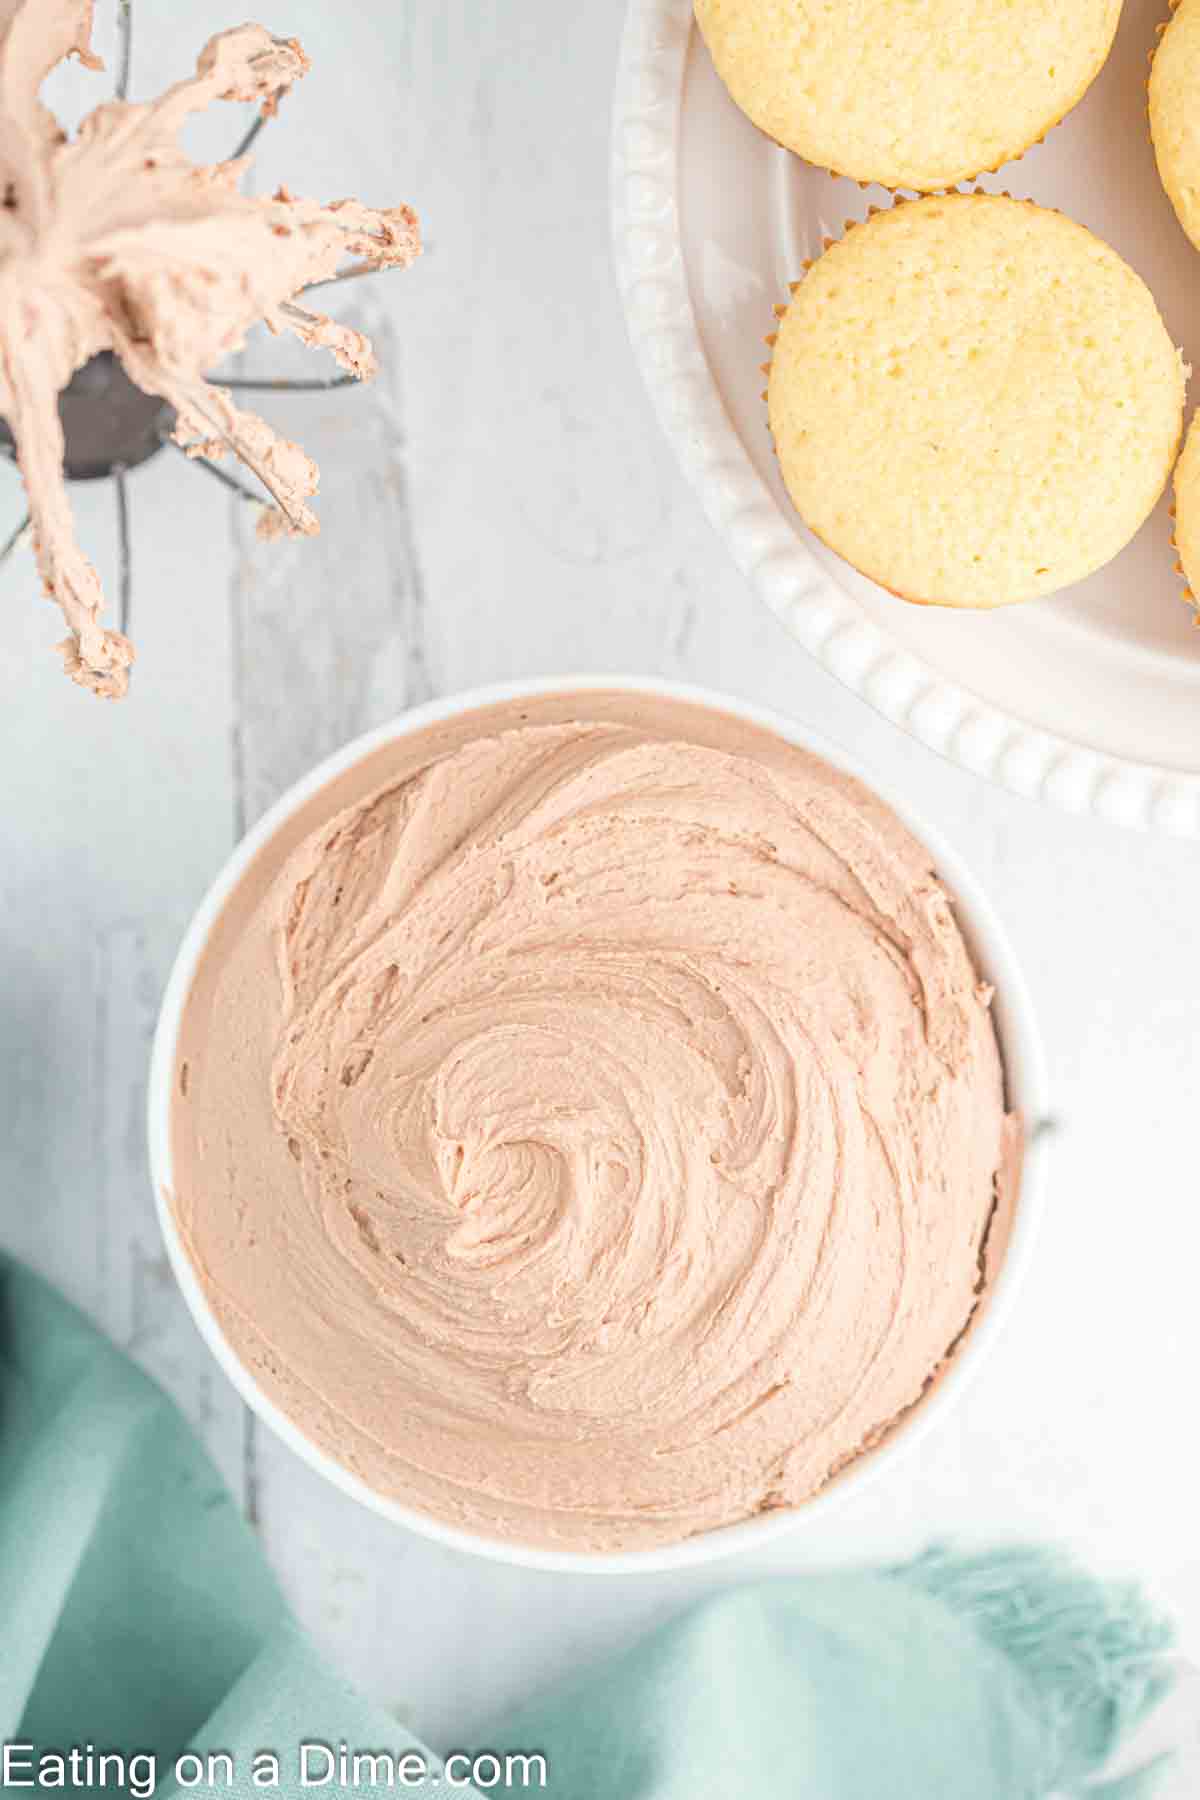
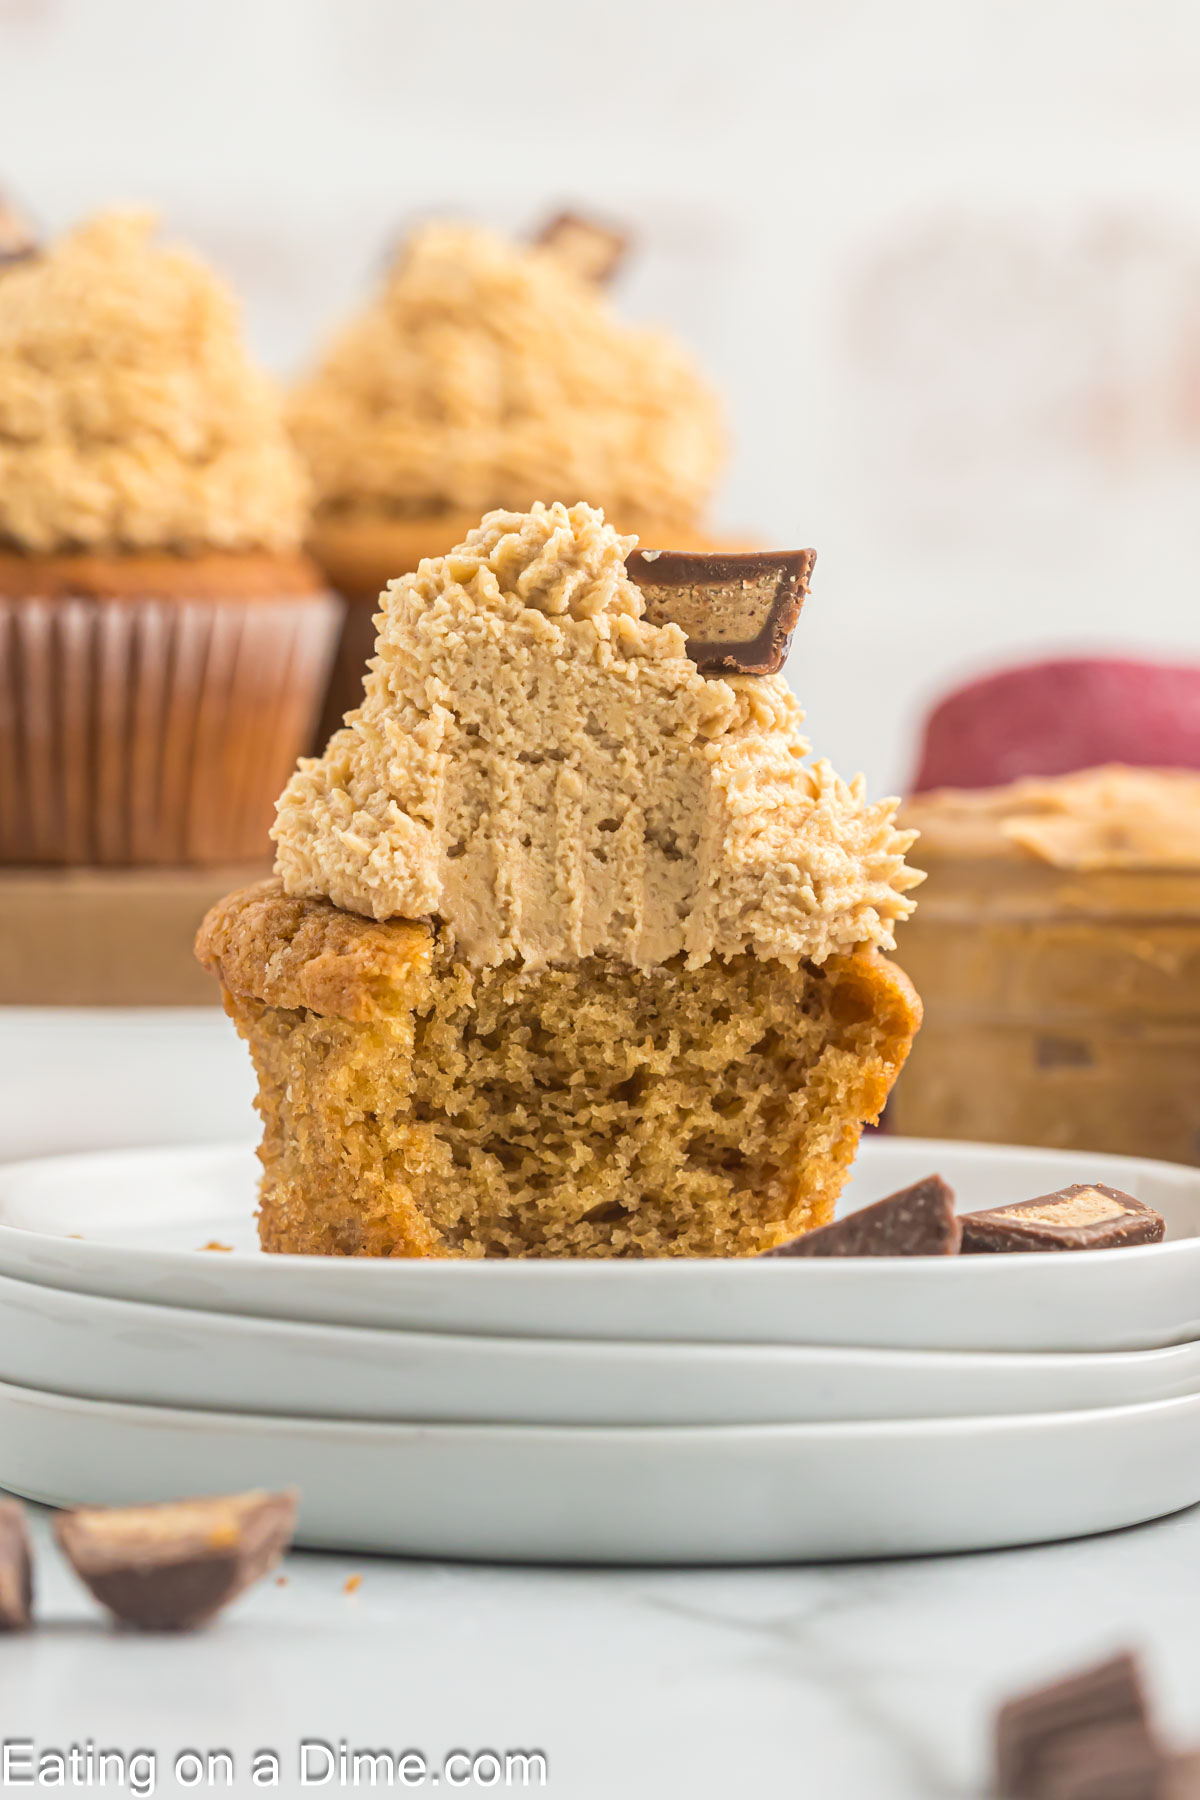
    The frosting is so light and fluffy and made with simple ingredients.  Not only are the cupcakes delicious, but the icing is made with lemonade mix too.

    You are going to love the lemon flavor combined with strawberry flavor for a crowd pleasing cupcake recipe.
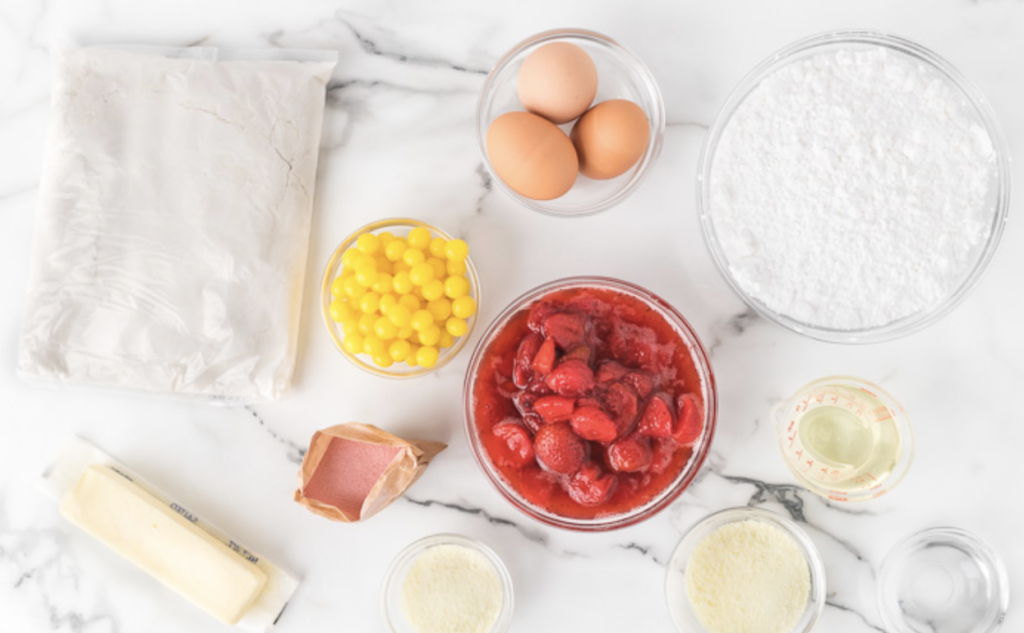
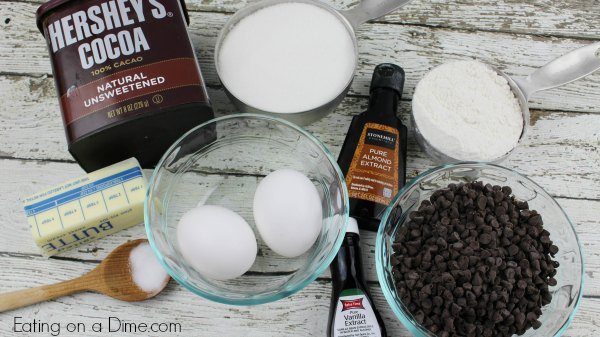
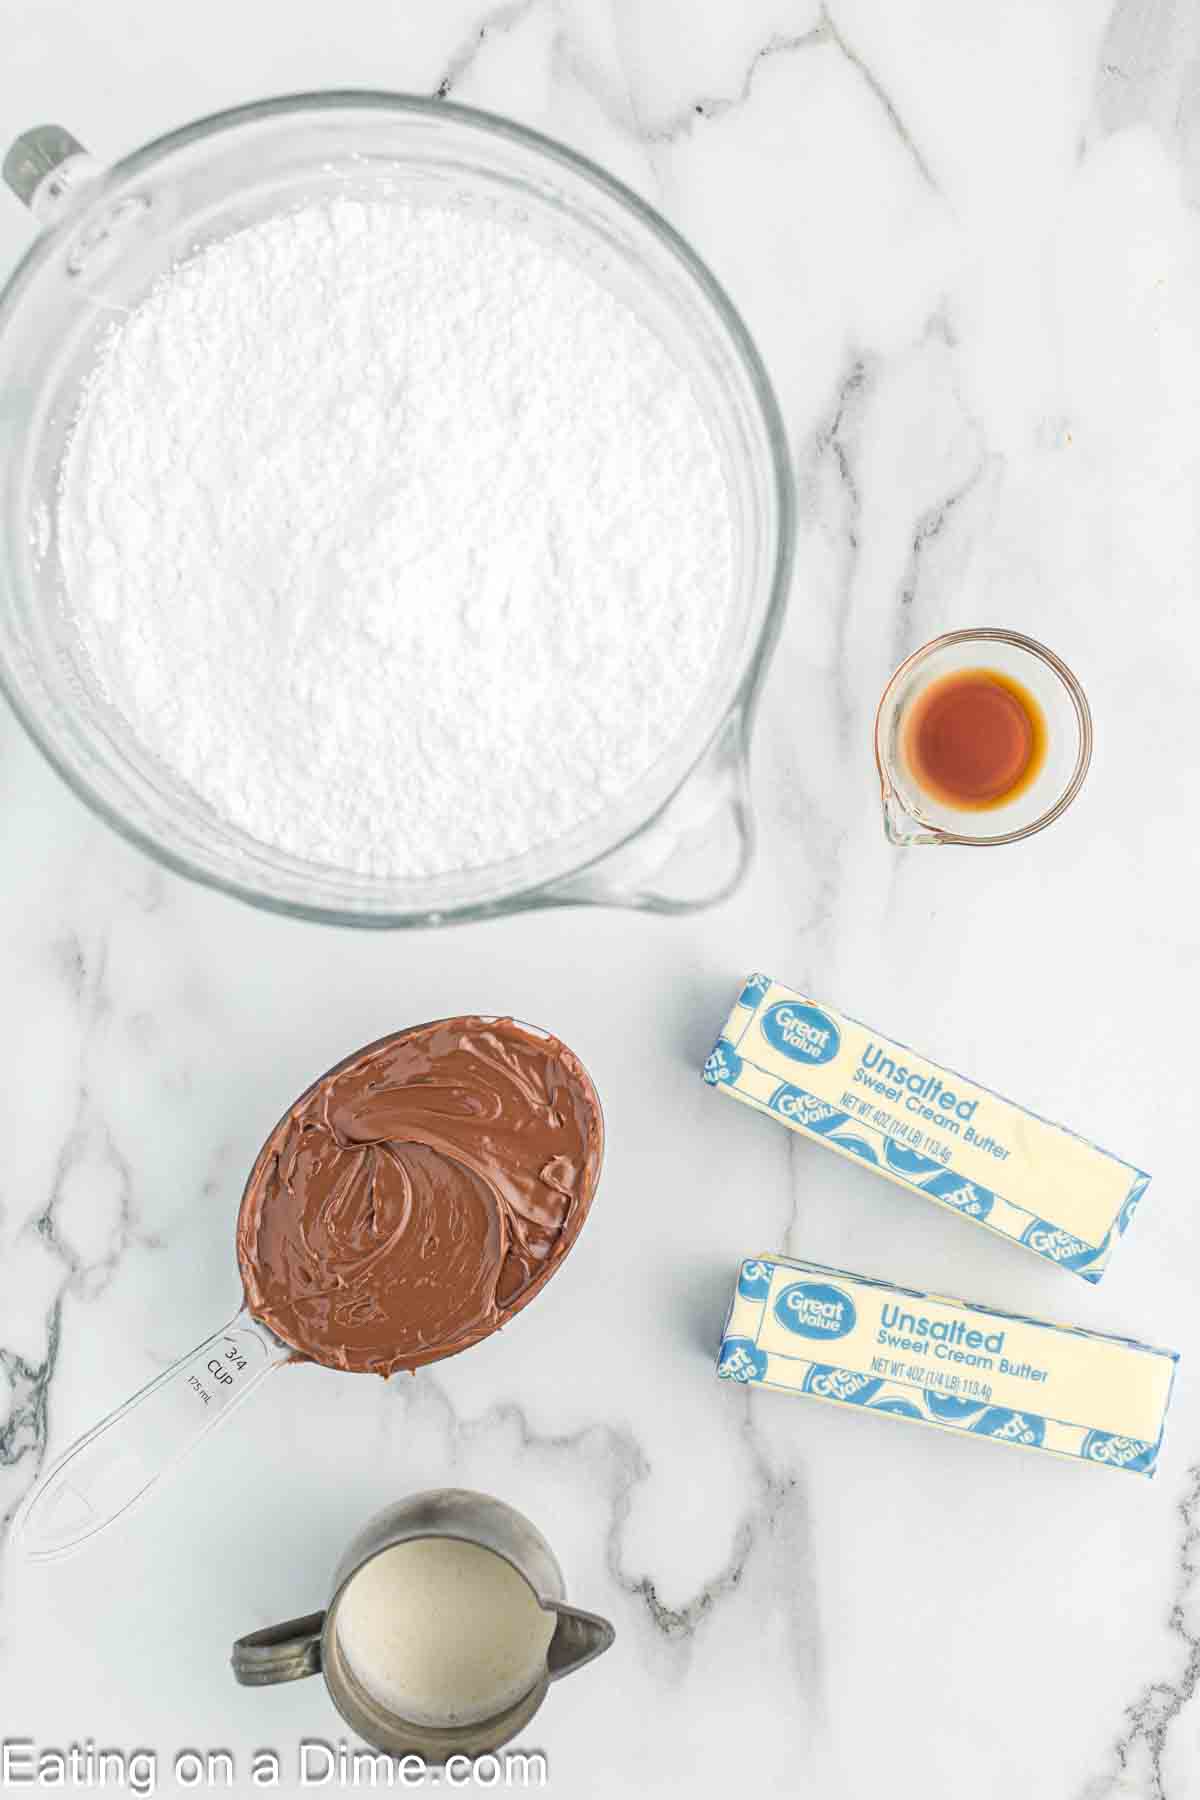
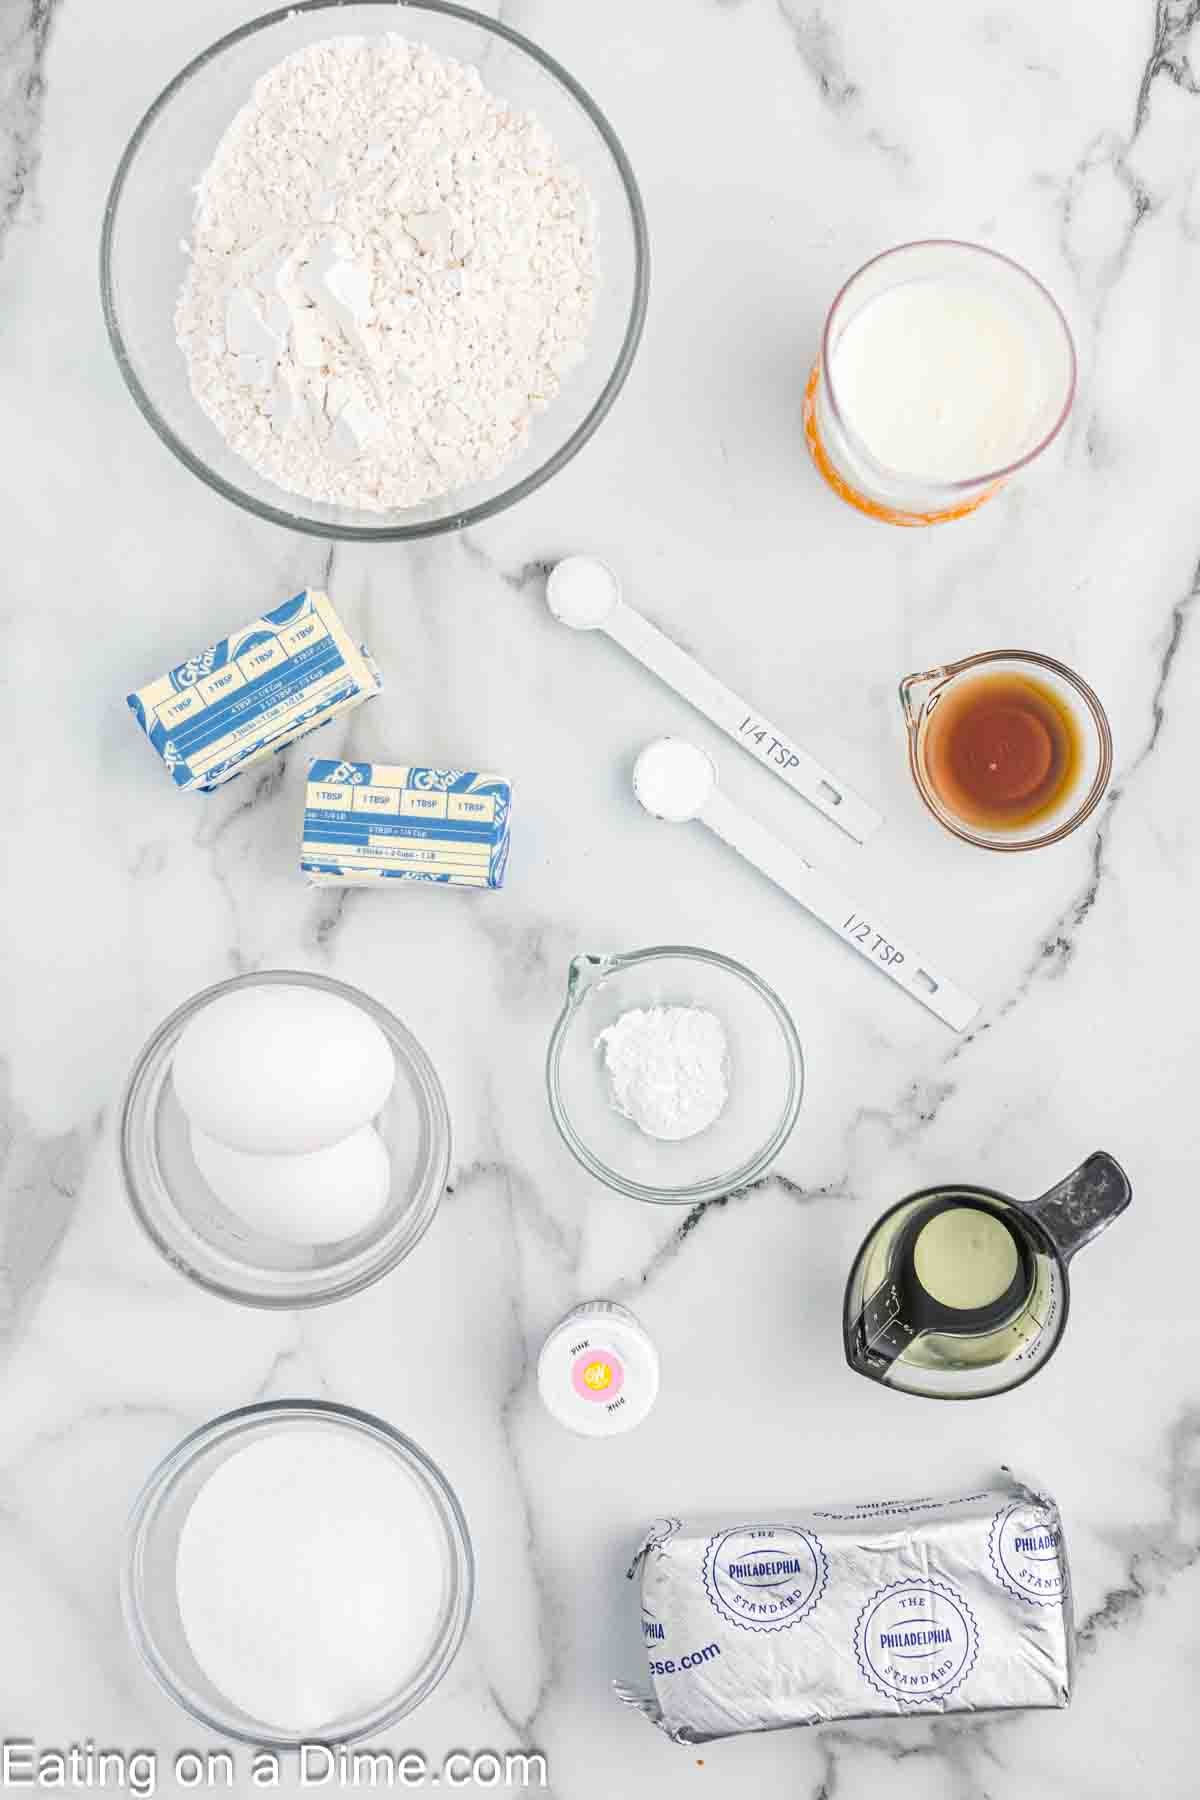
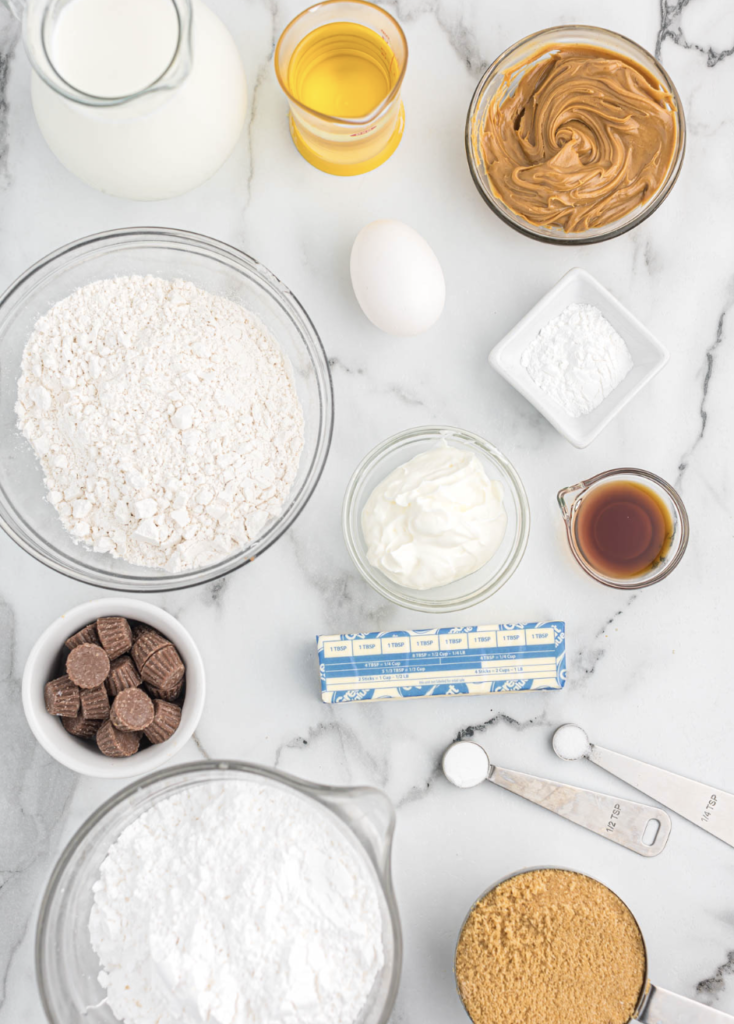
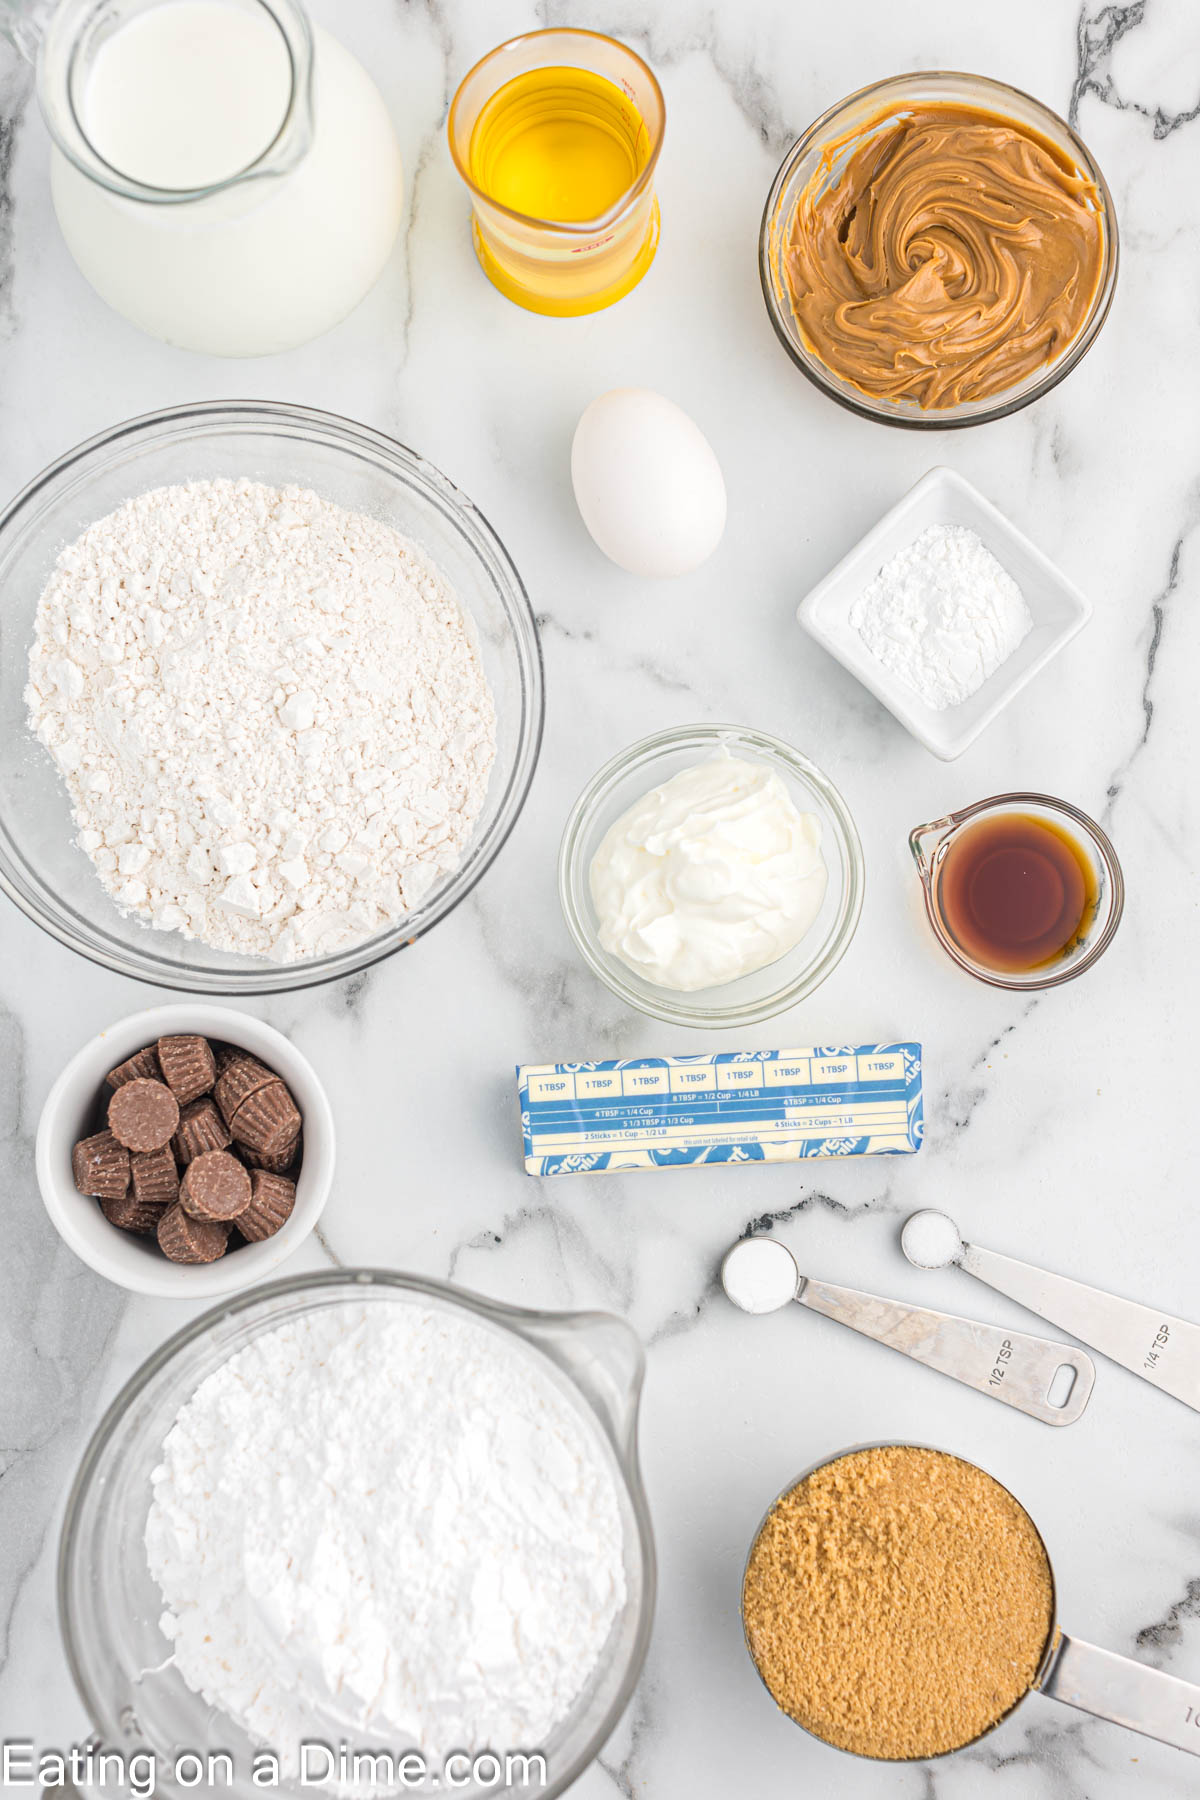
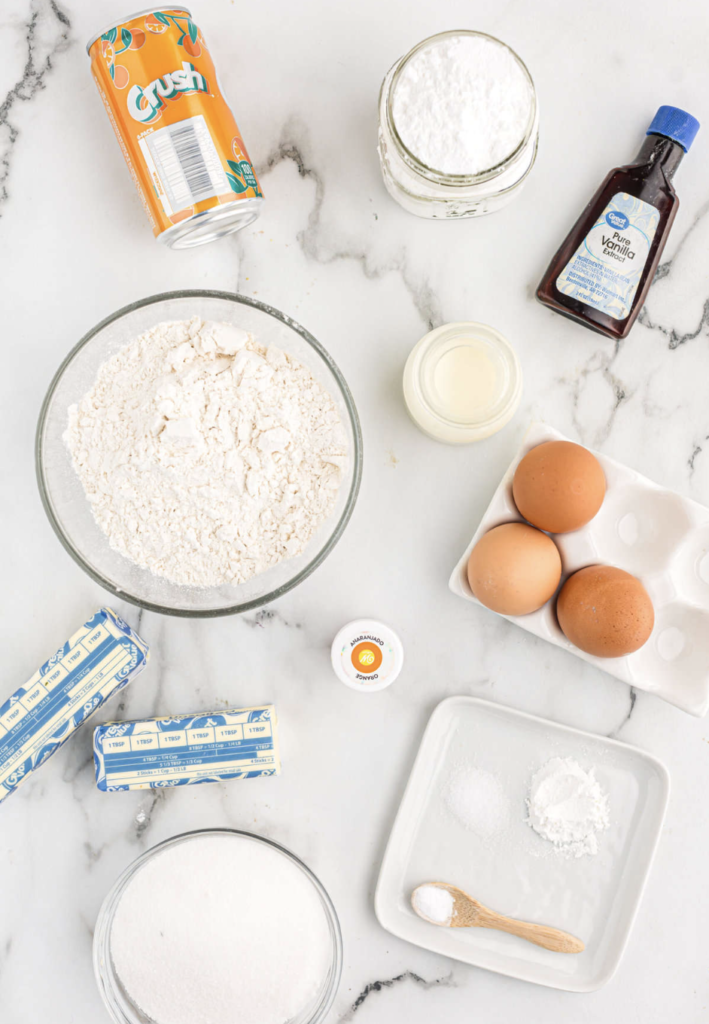
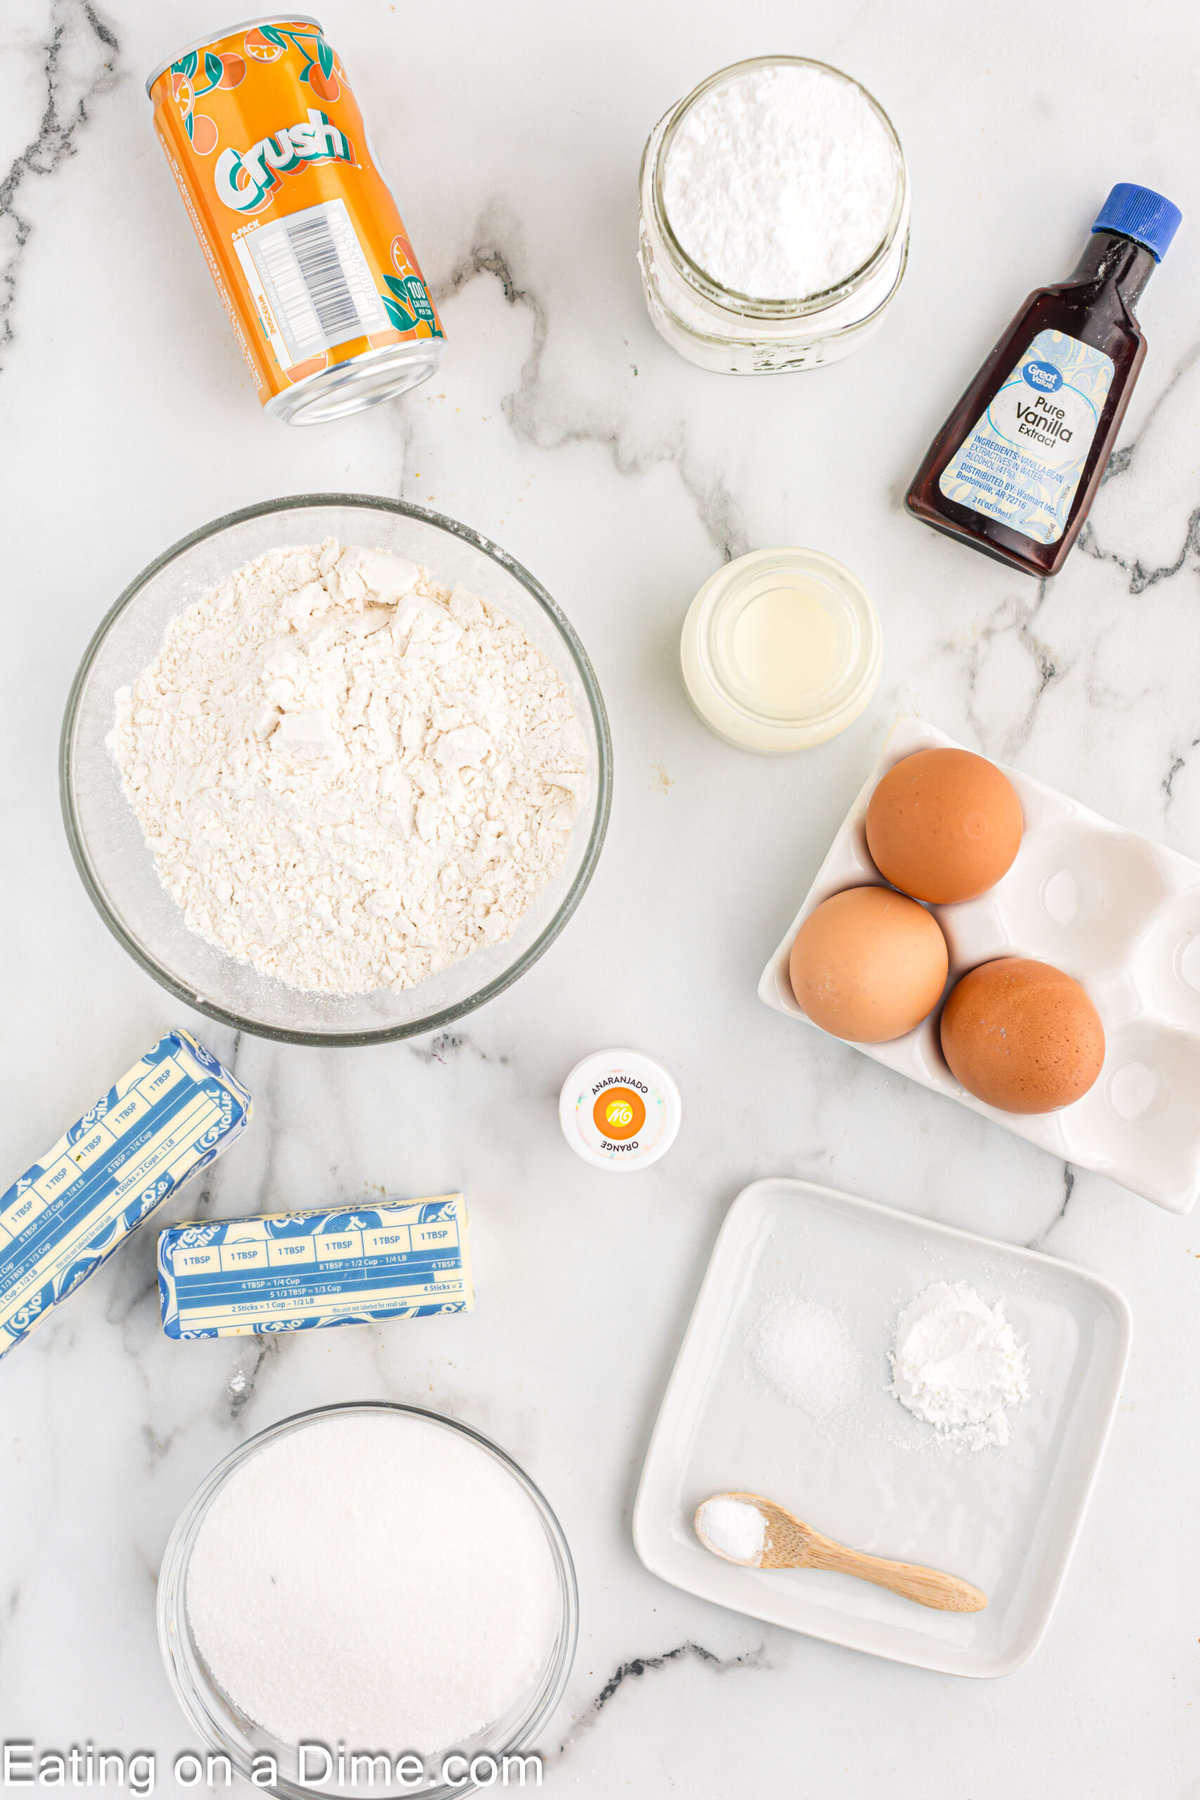
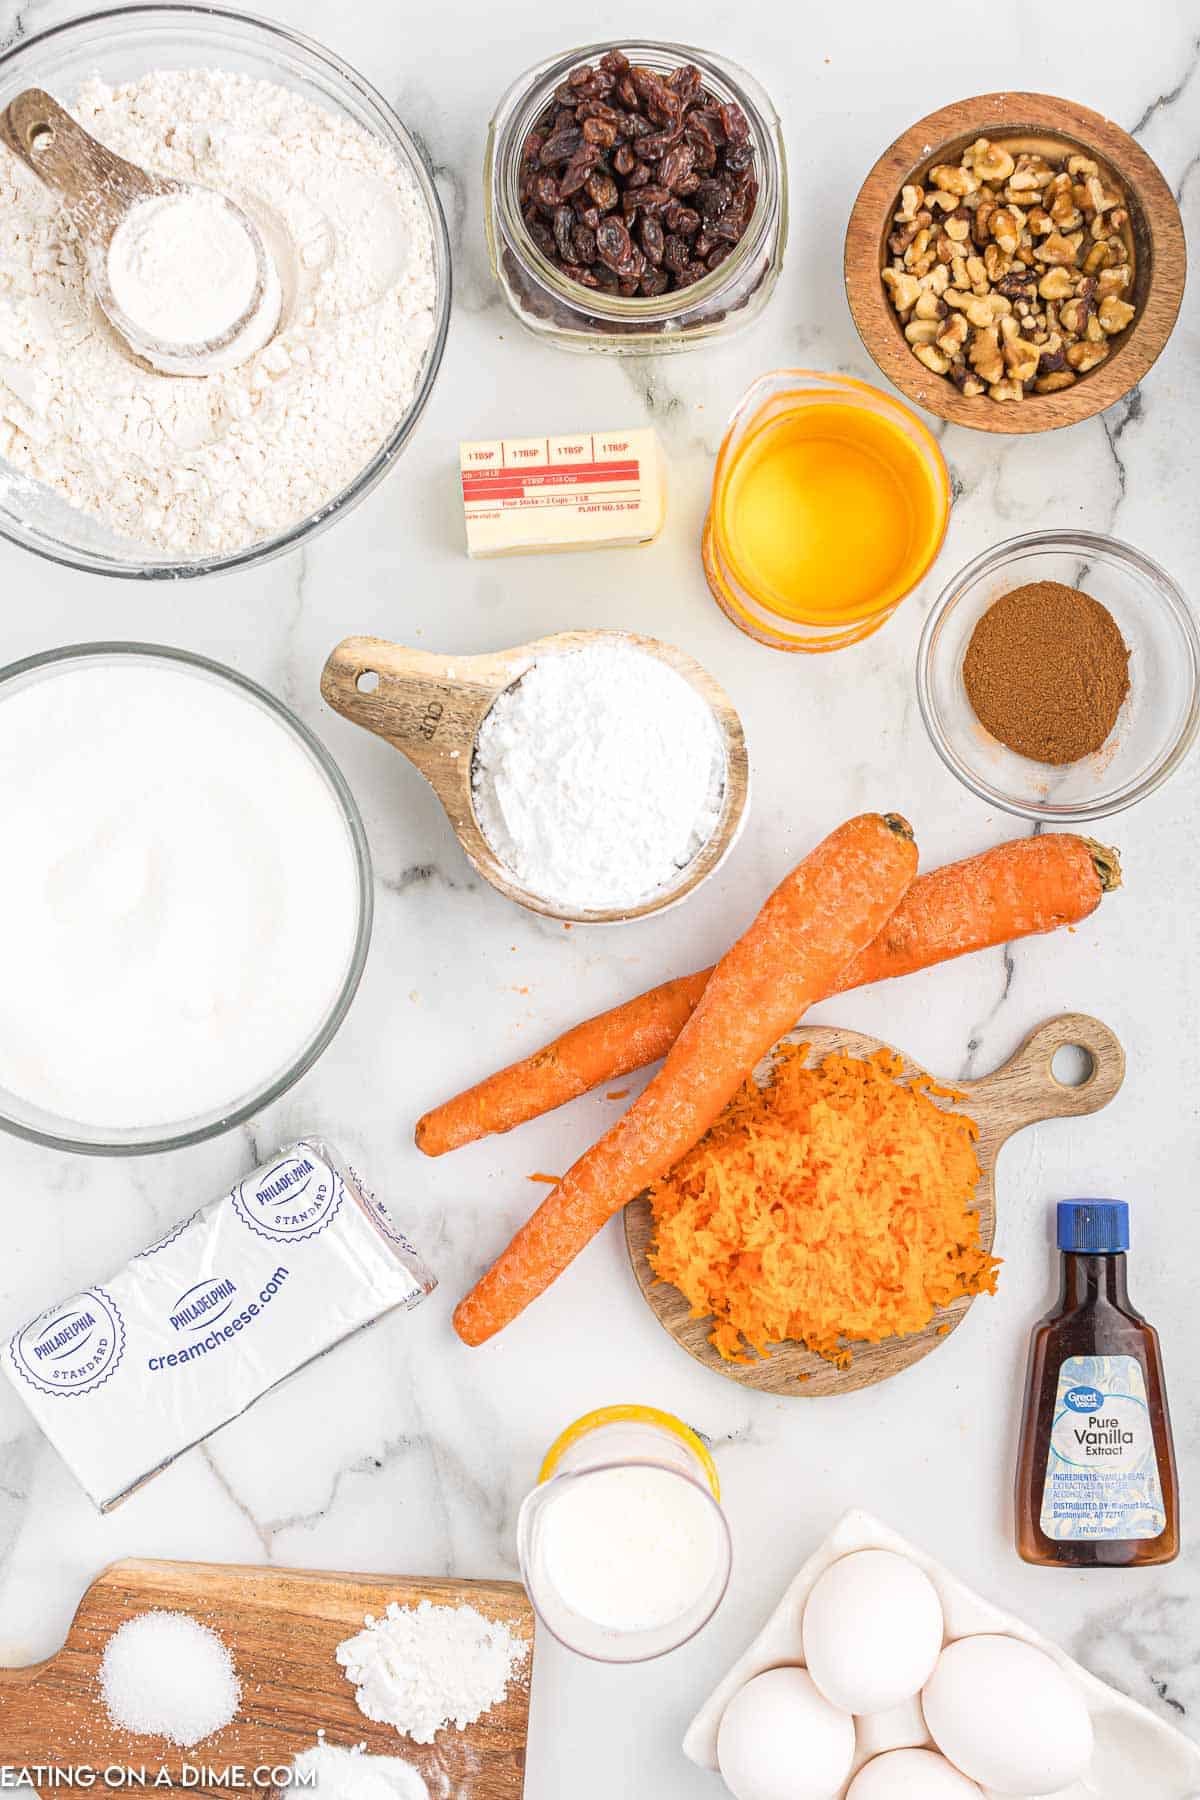
    Ingredients


    • White Cake Mix
    • Strawberry Jello
    • Sweetened Lemonade Mix
    • Strawberries

    For the full recipe and ingredients, scroll to the bottom to see the recipe card.

    Variations Ideas

    • Strawberries – When I made this strawberries were not in season so I used frozen and that is one option. However, once Strawberries start to get in season and are so cheap, I like to use fresh.  Feel free to use whatever you have.
    • Cake Mix – Feel free to change the cake mix to what you prefer. This recipe would even delicious with Moist Lemon Cupcakes with fresh squeeze lemon juice and lemon zest. Even better topped with a lemon cream cheese frosting.
    • Jello – You can easily change the jello pudding mix for another flavor. Try it with blueberry or raspberry for a delicious variation. Then puree fresh or frozen fruit make these cupcakes your own.

    Step by Step Instructions


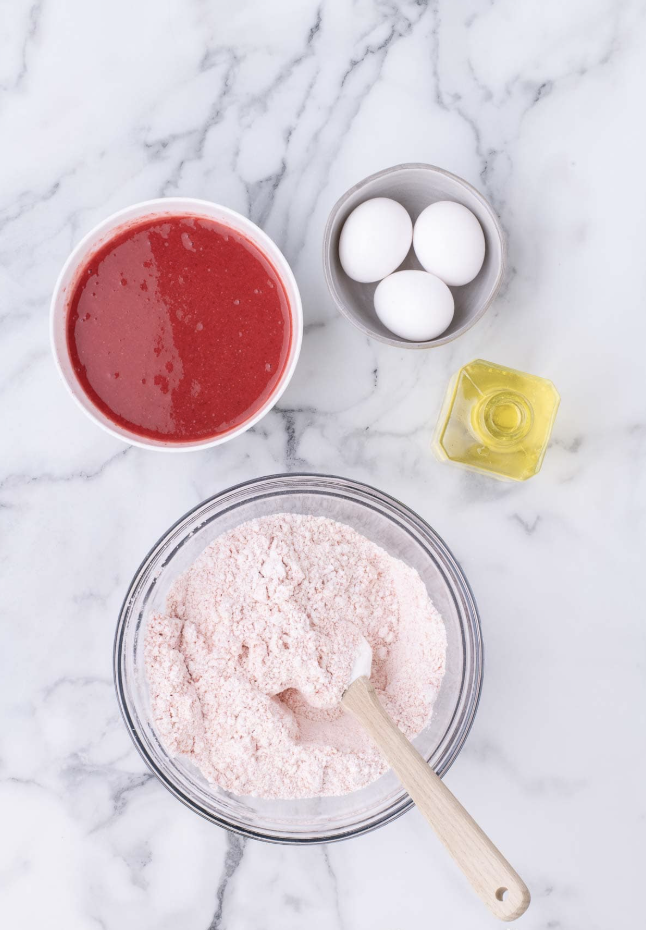
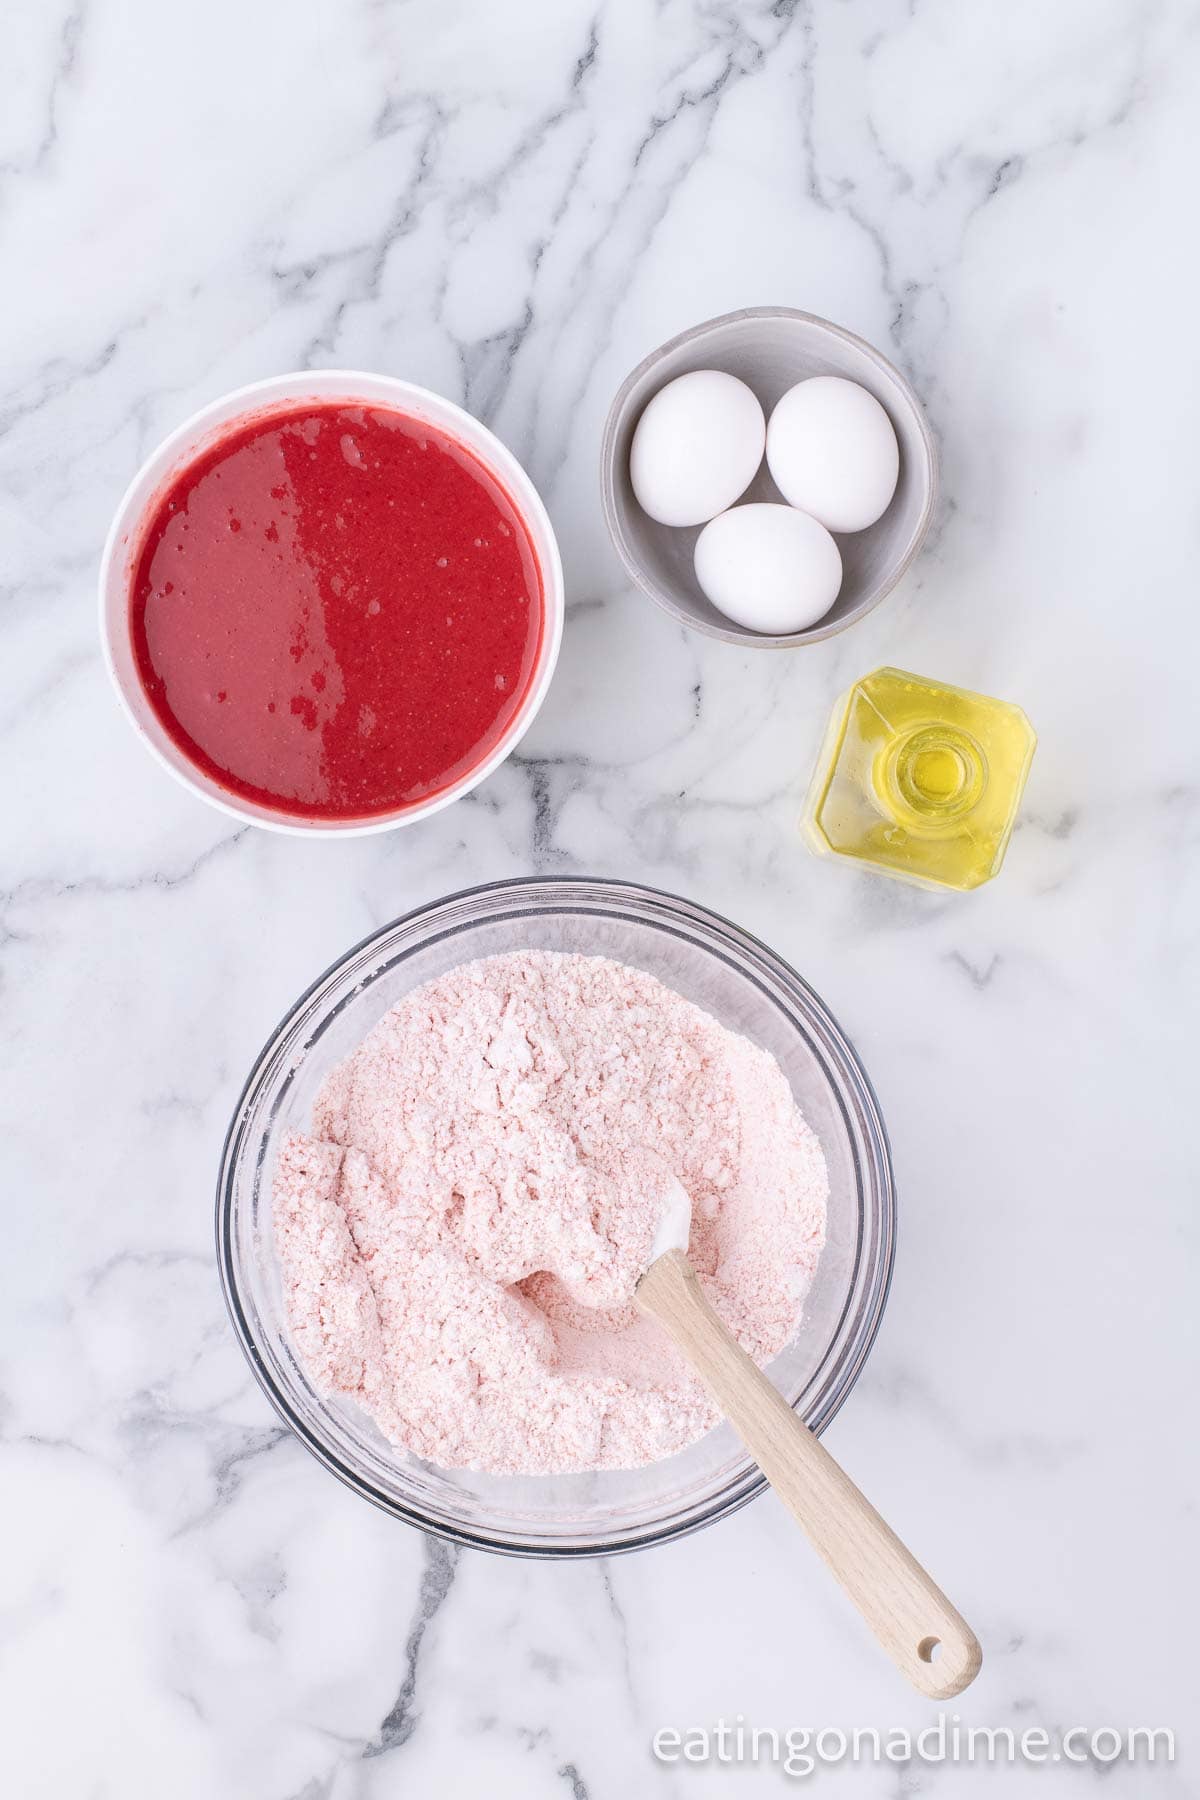
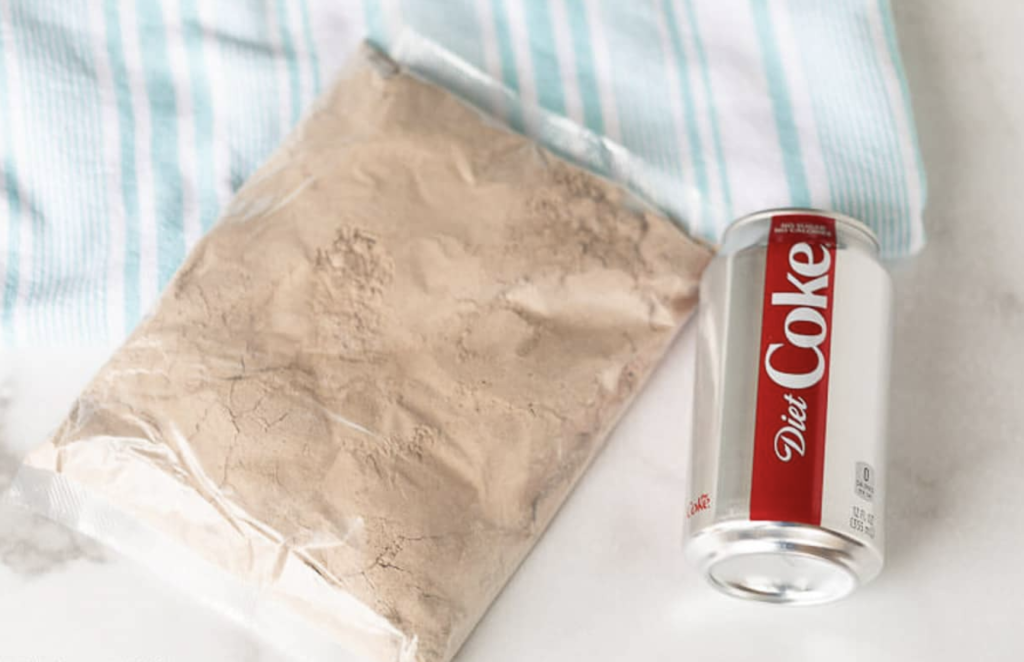
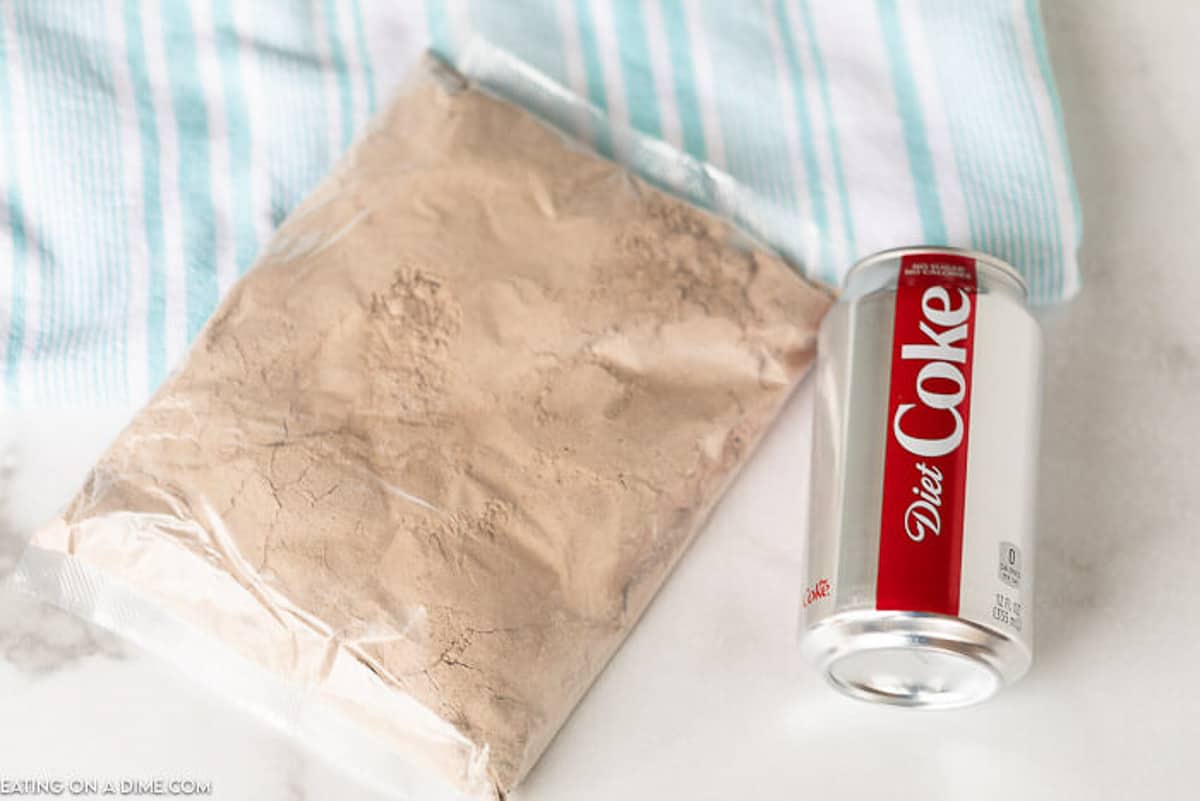
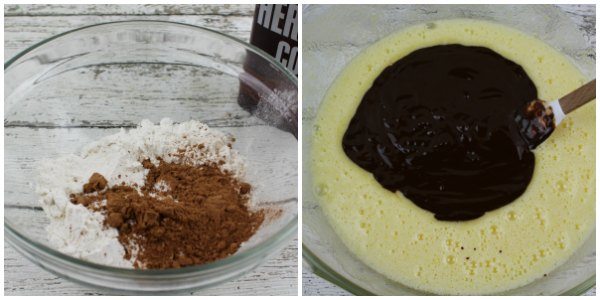
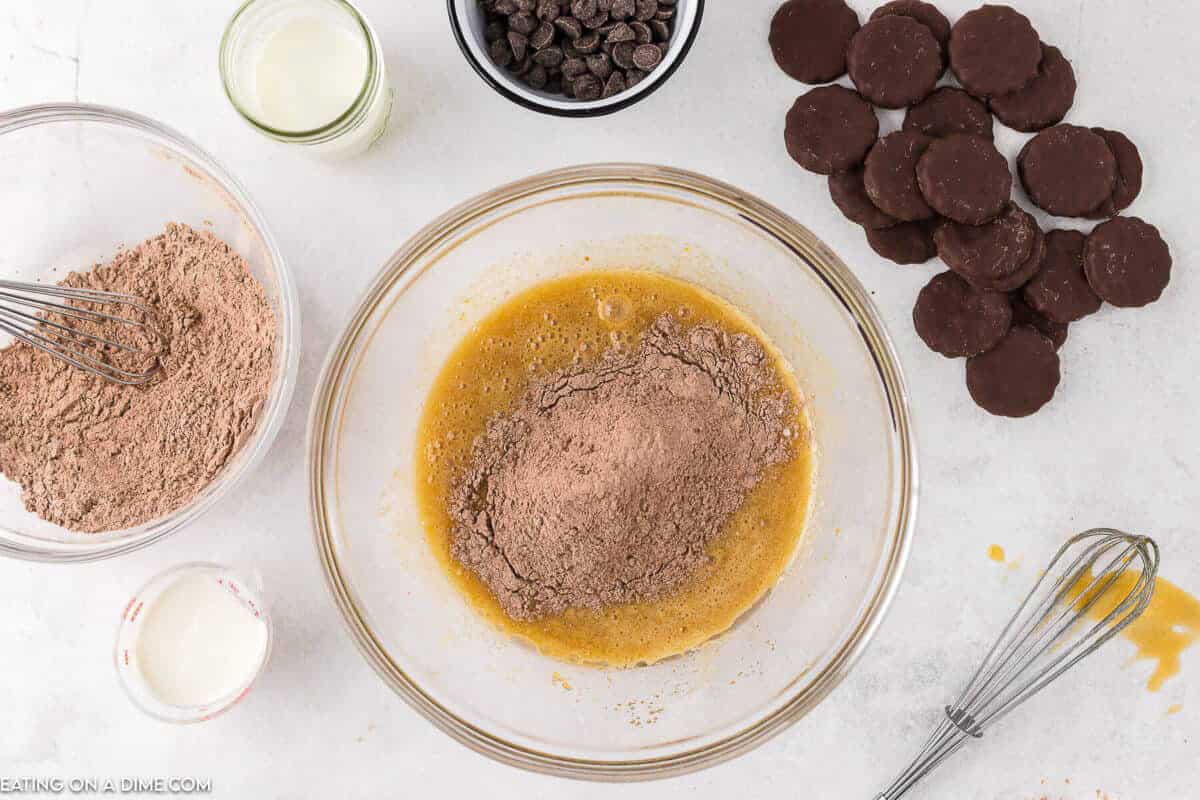
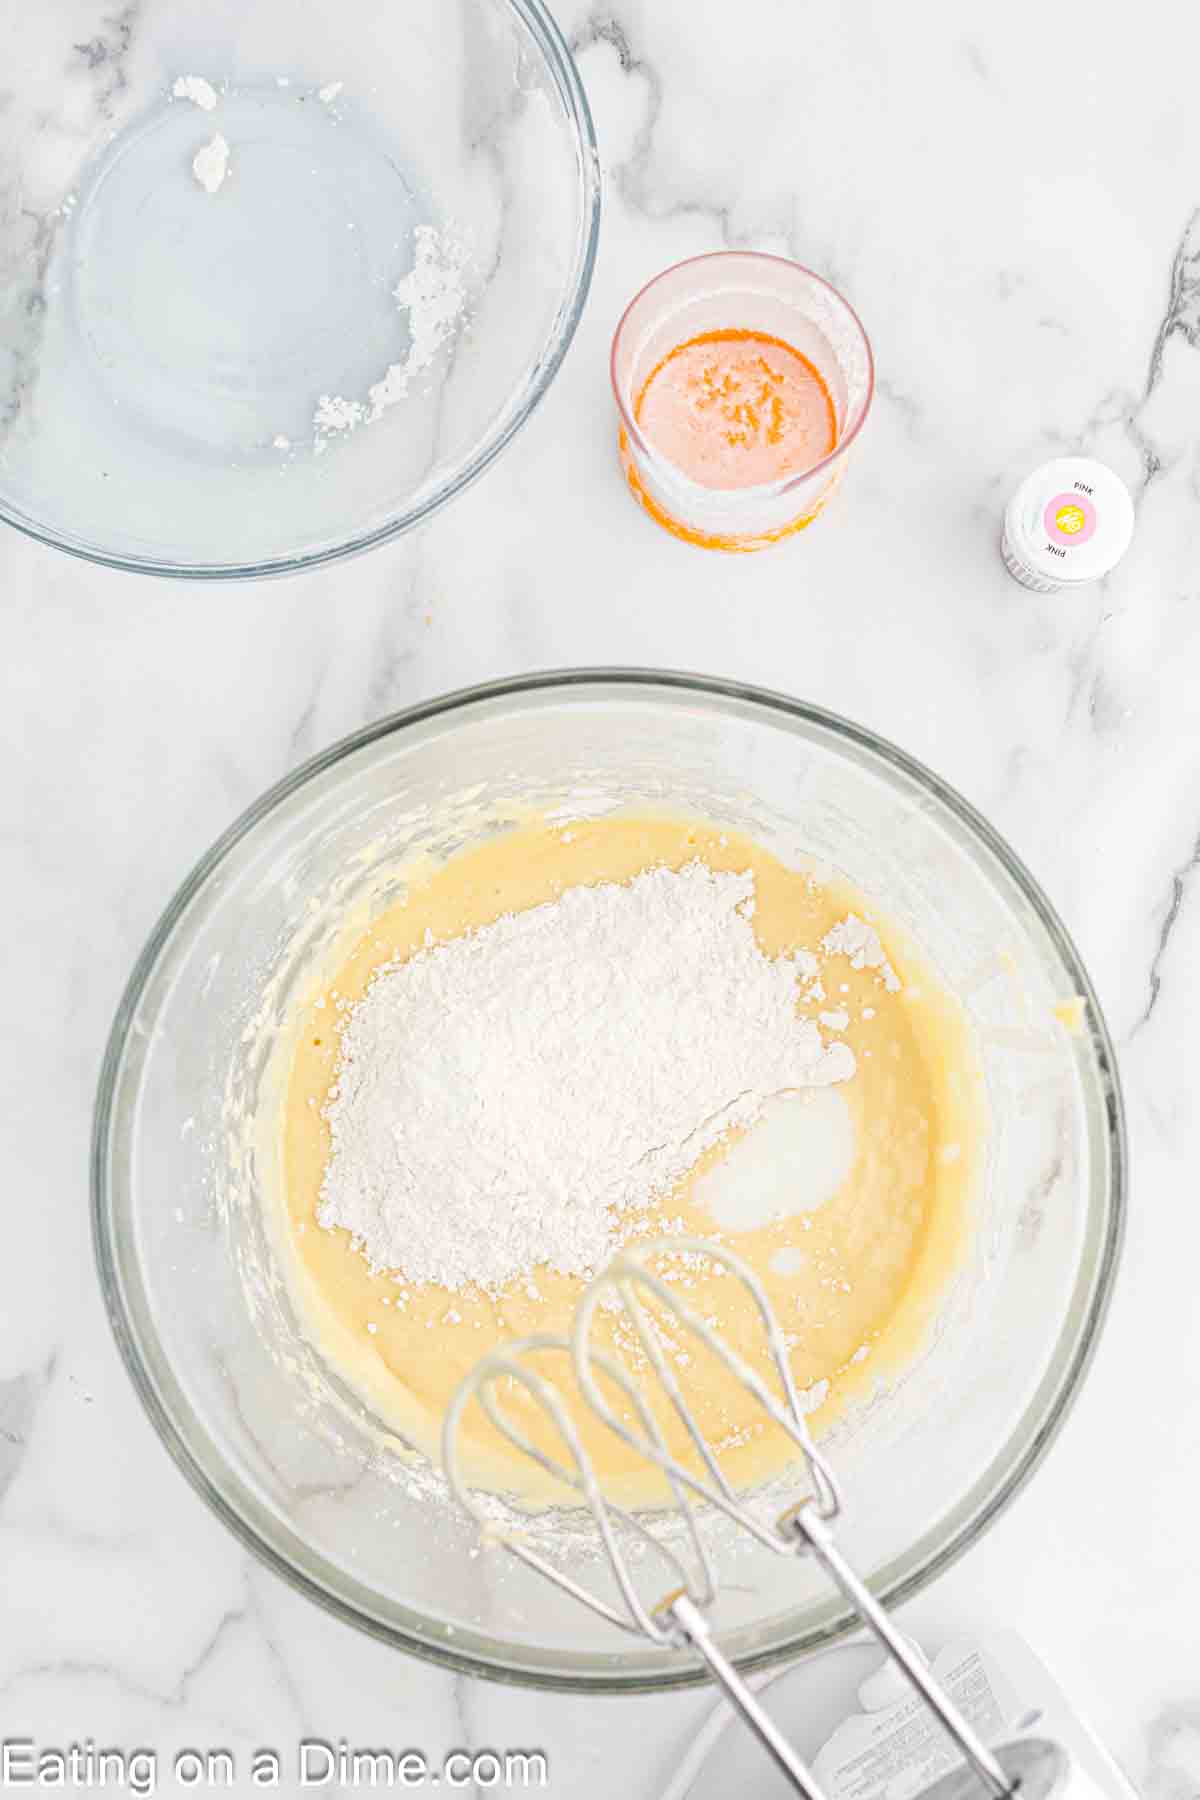
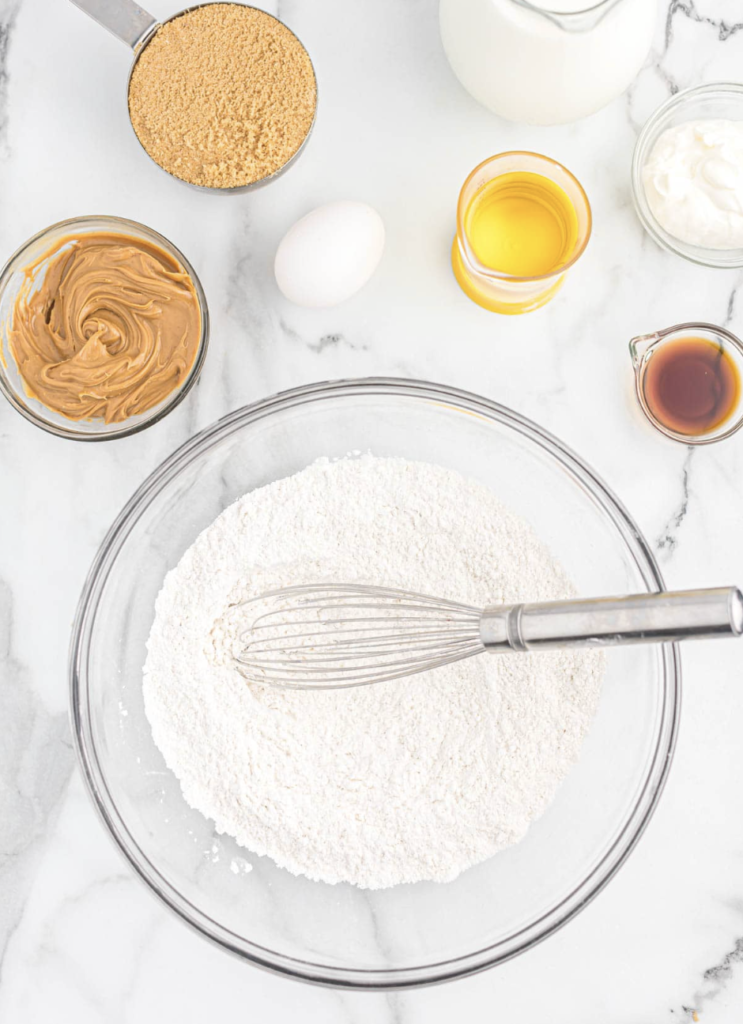
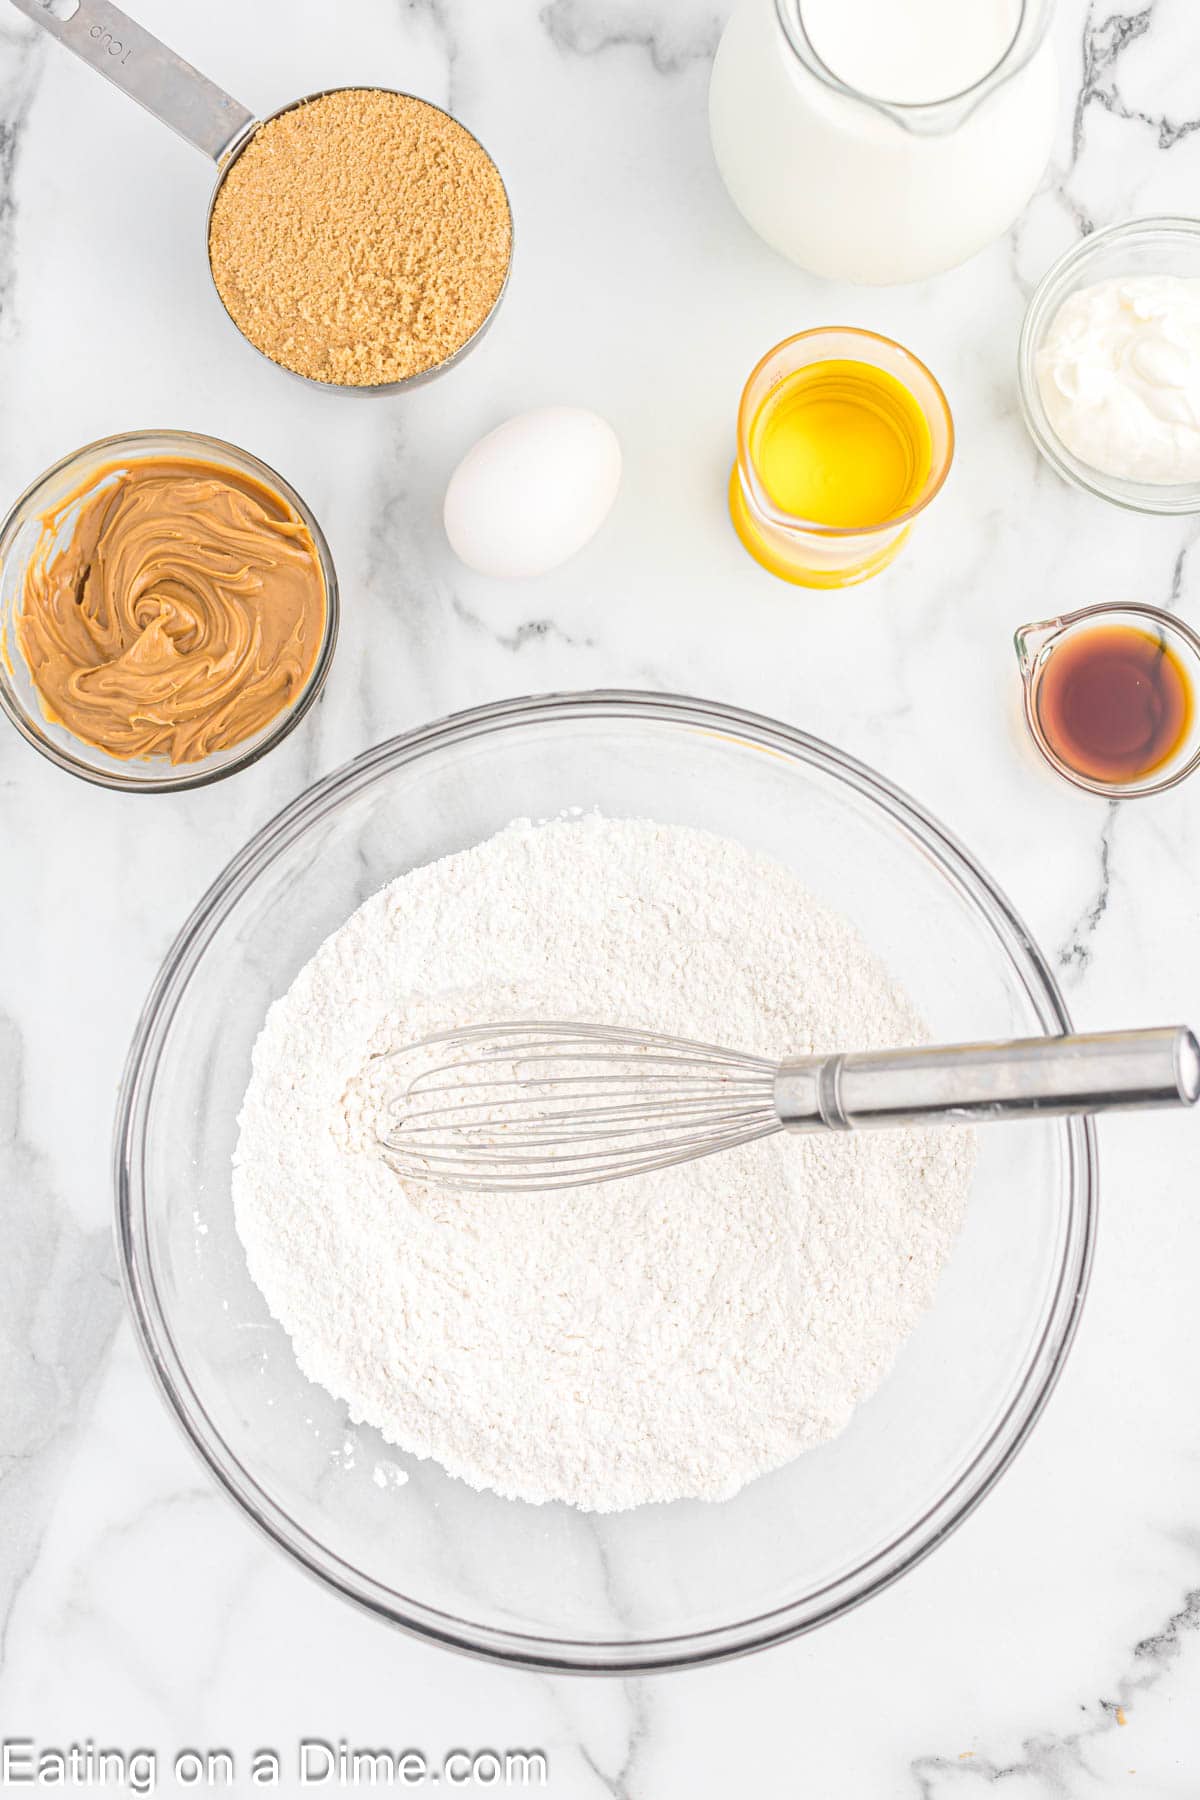
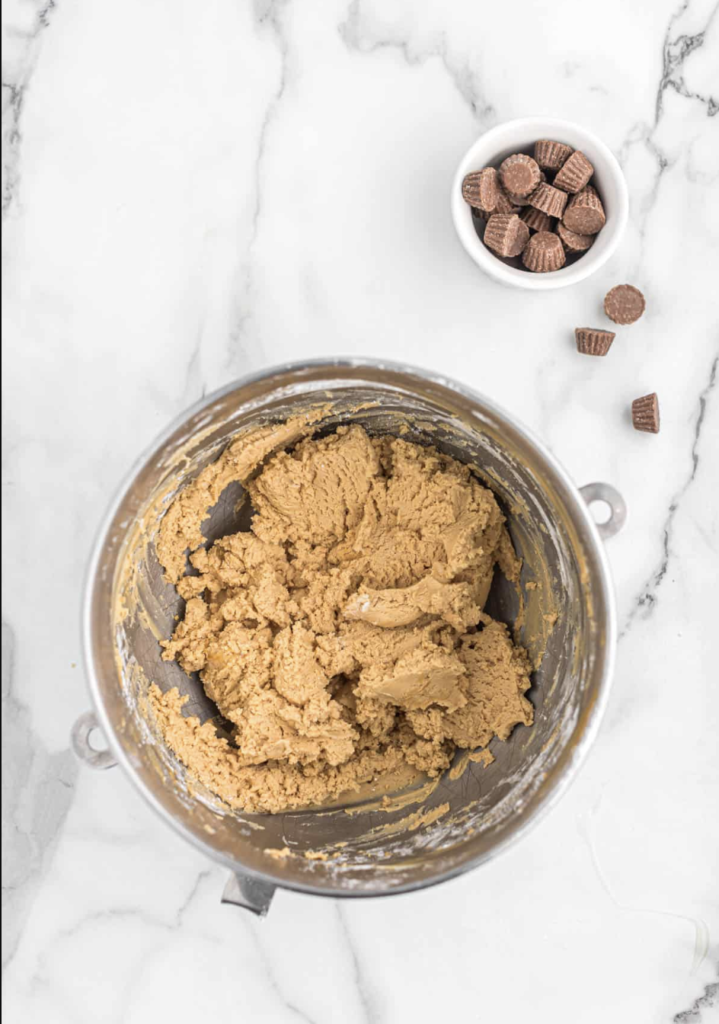
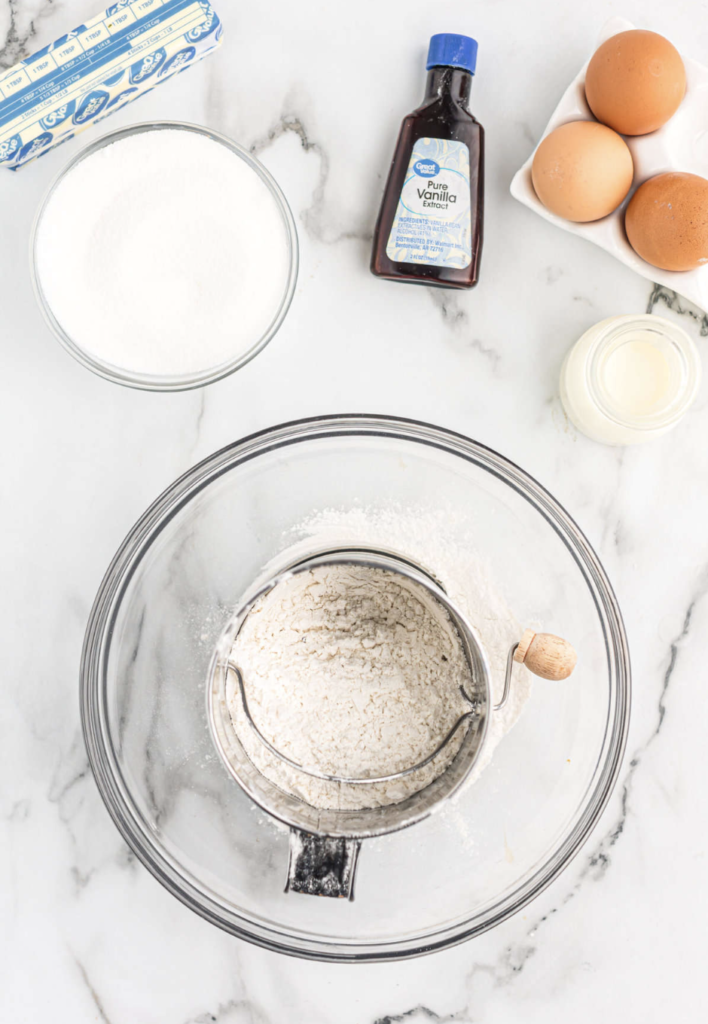
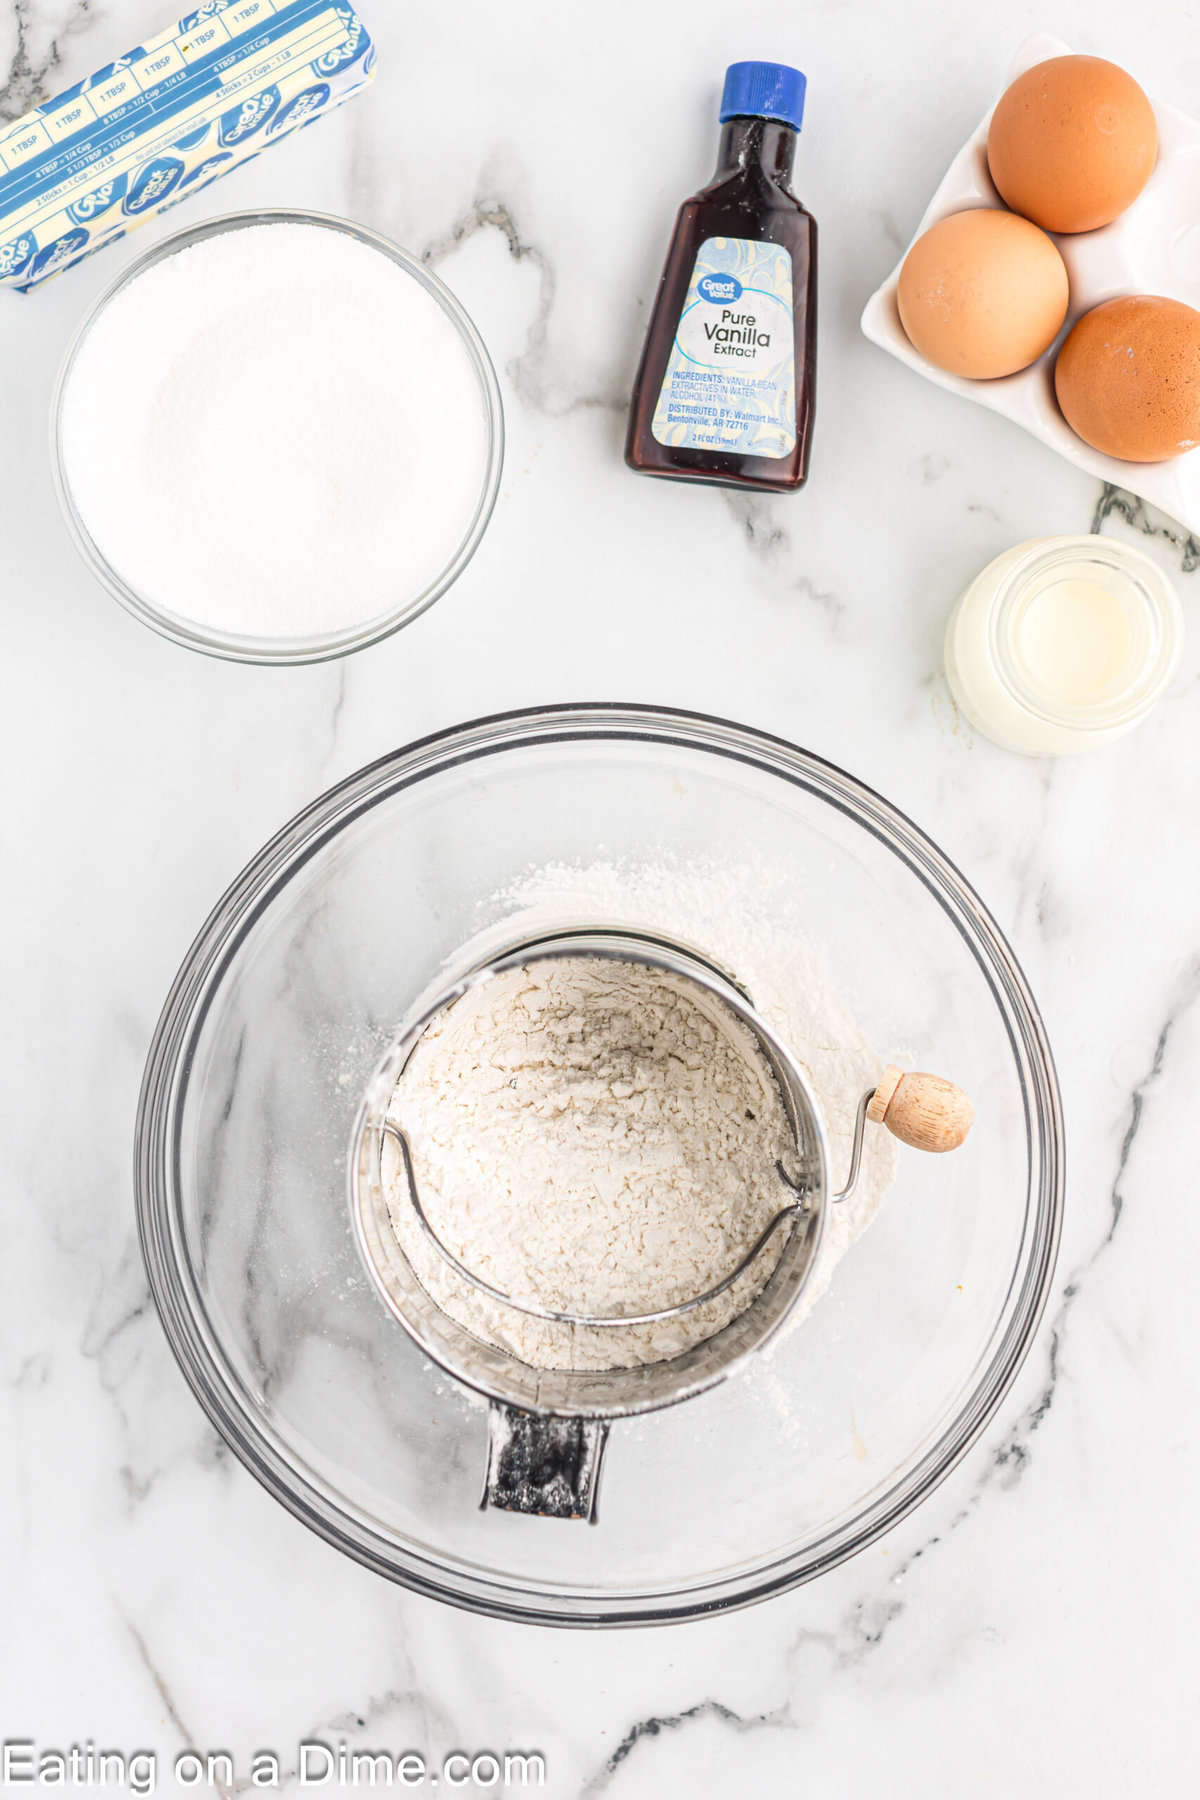
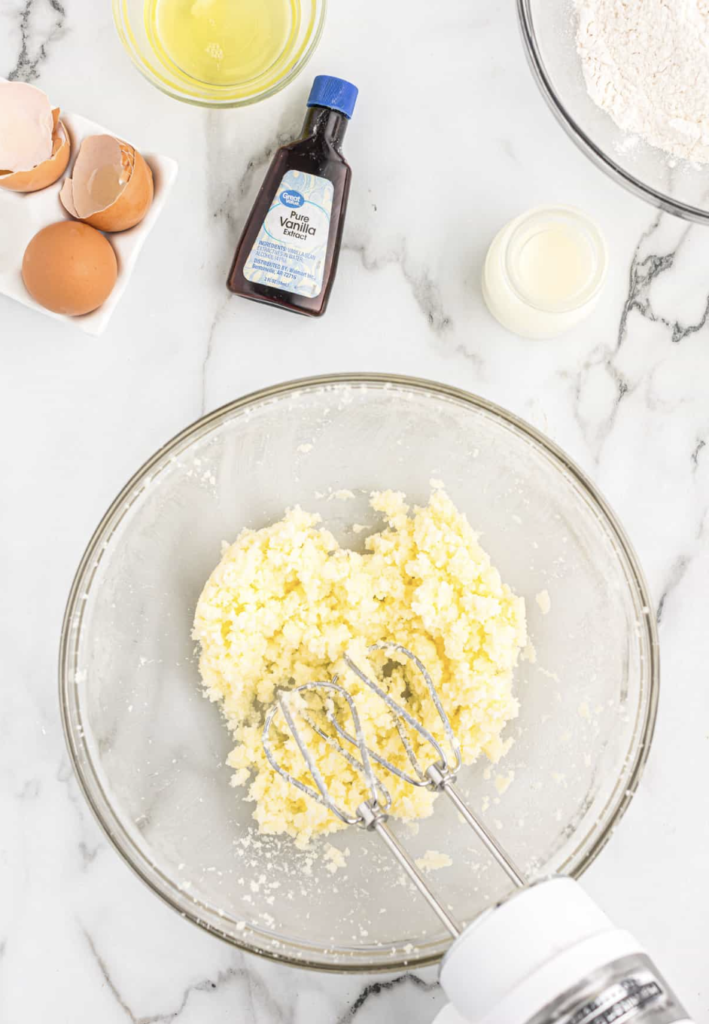
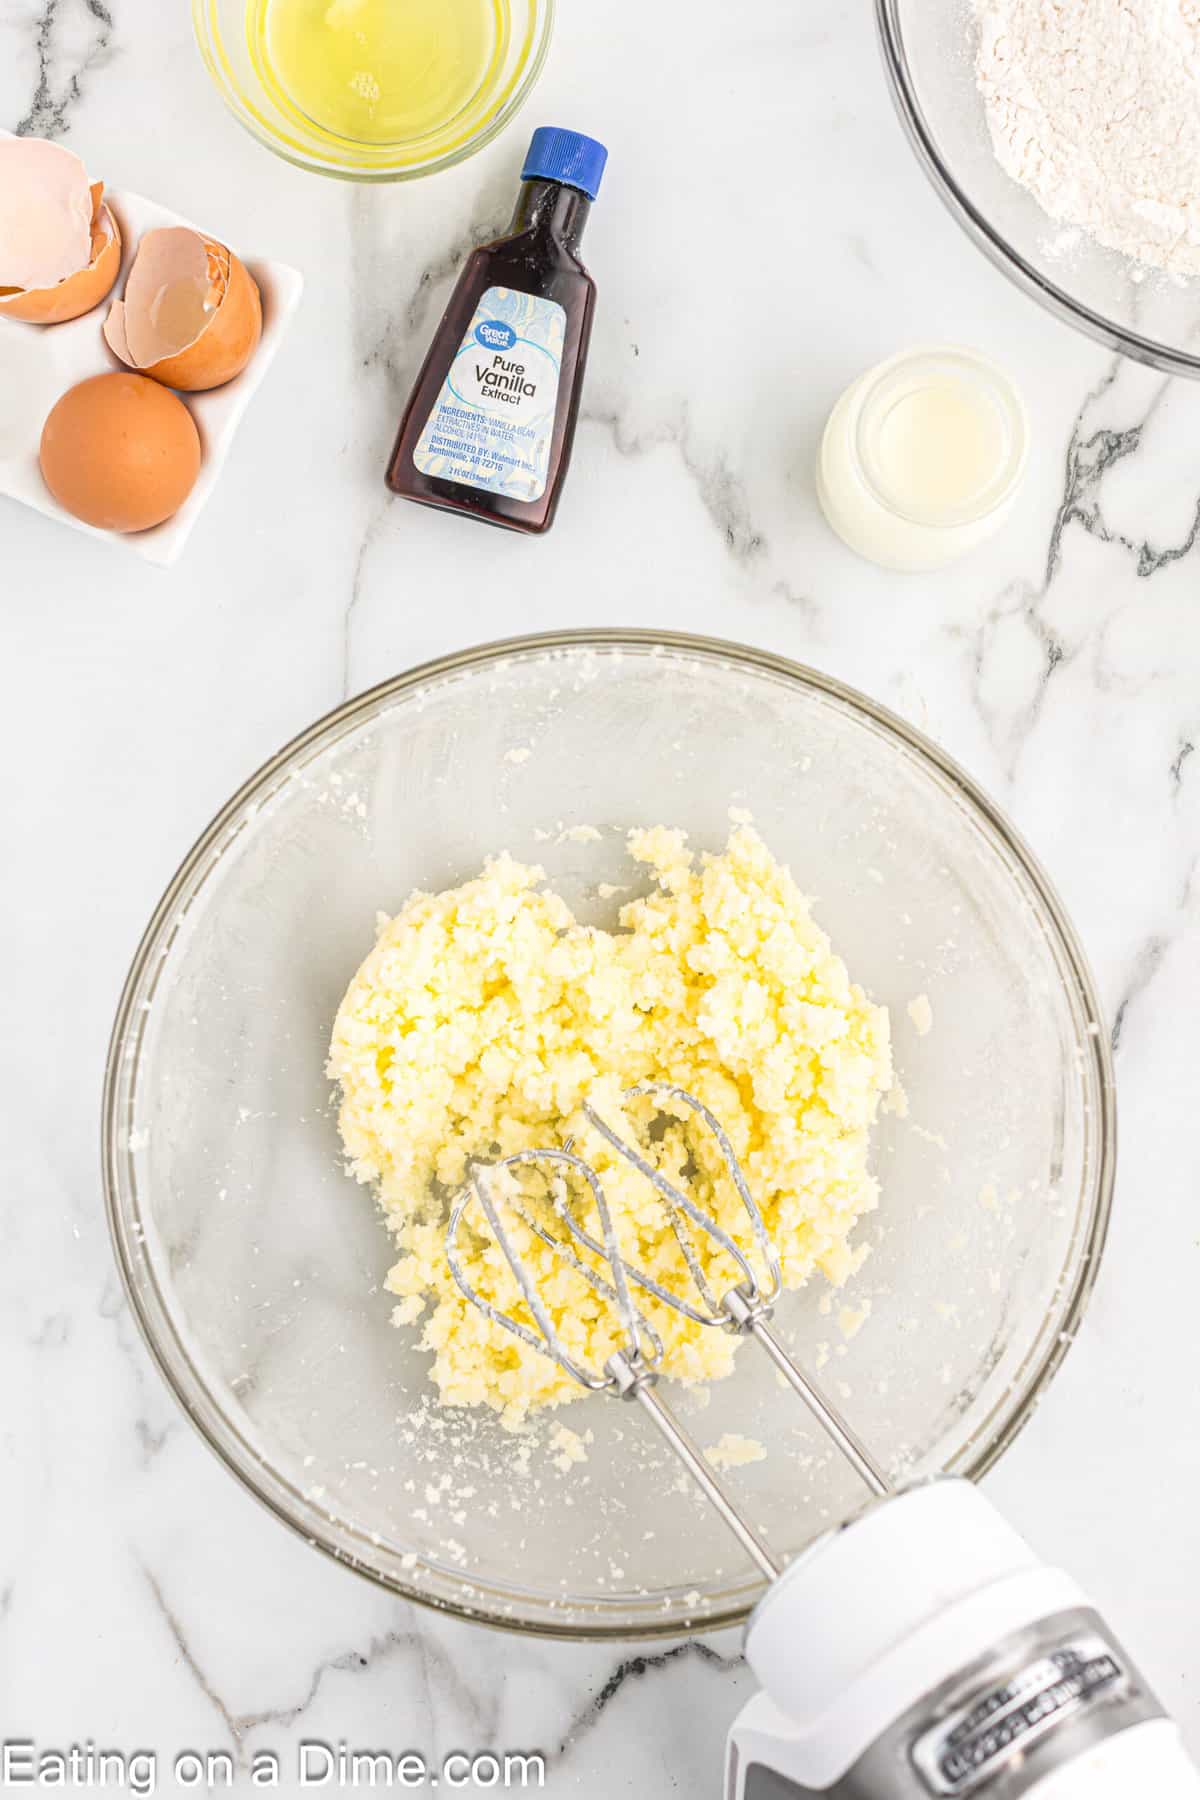
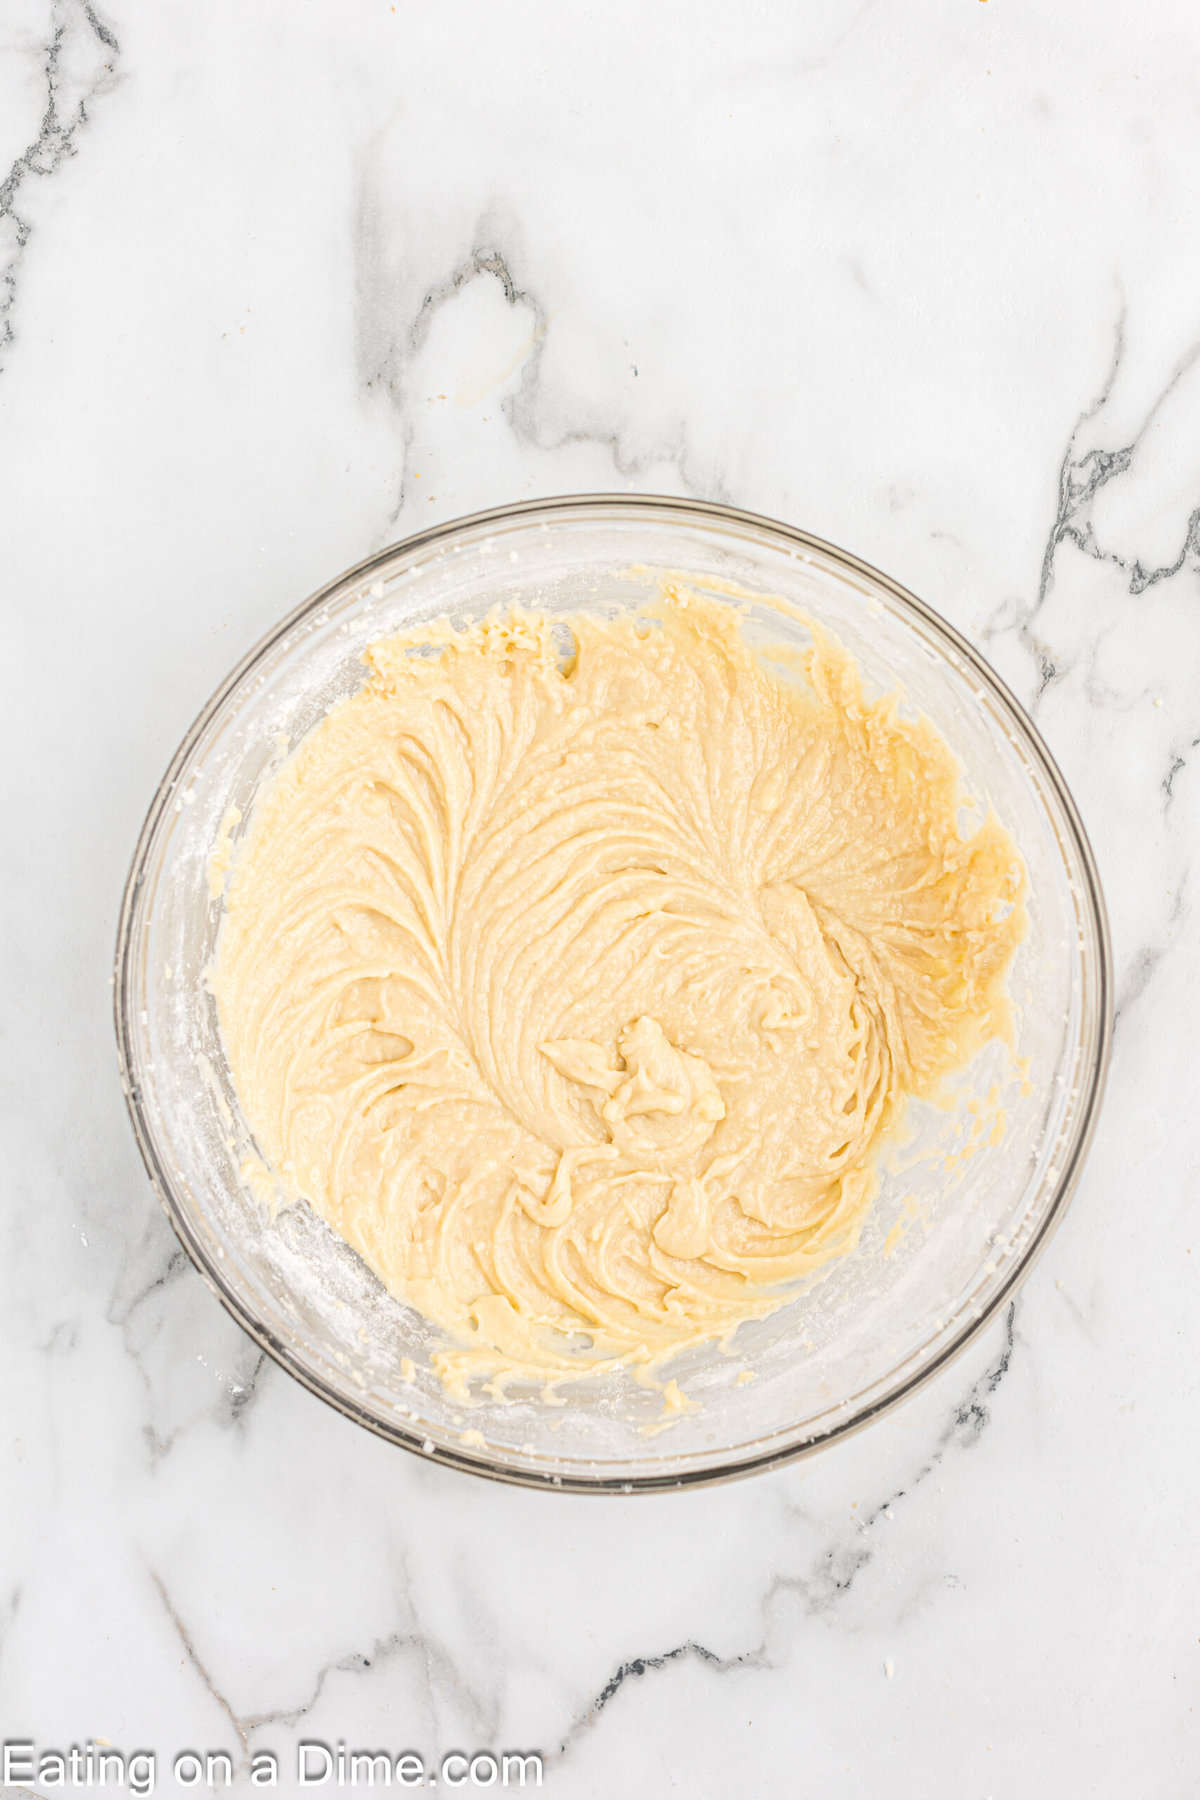
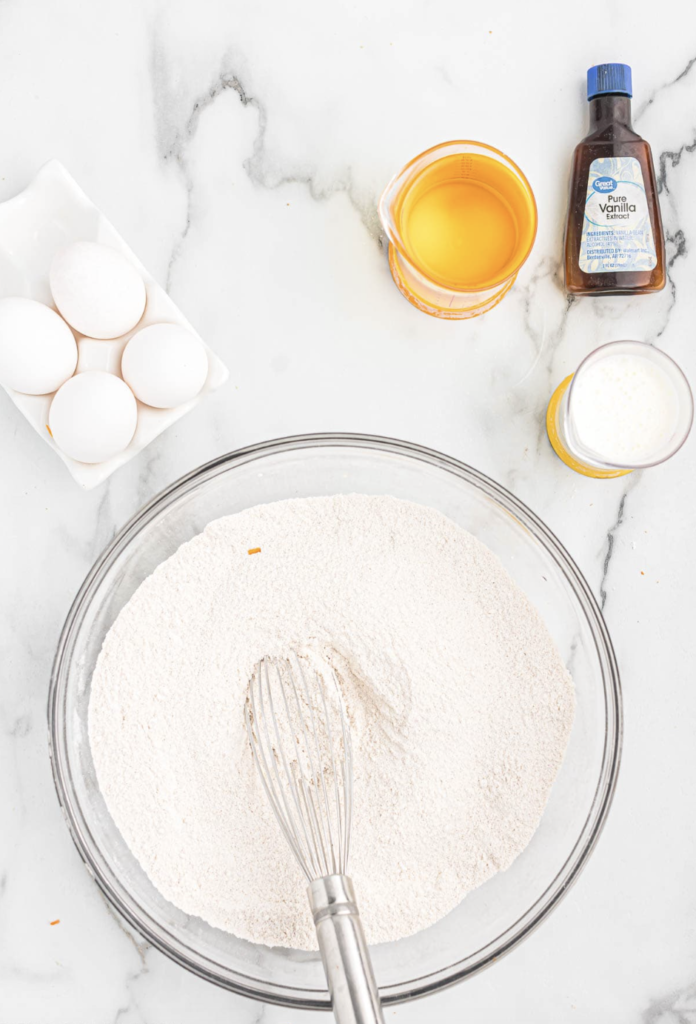
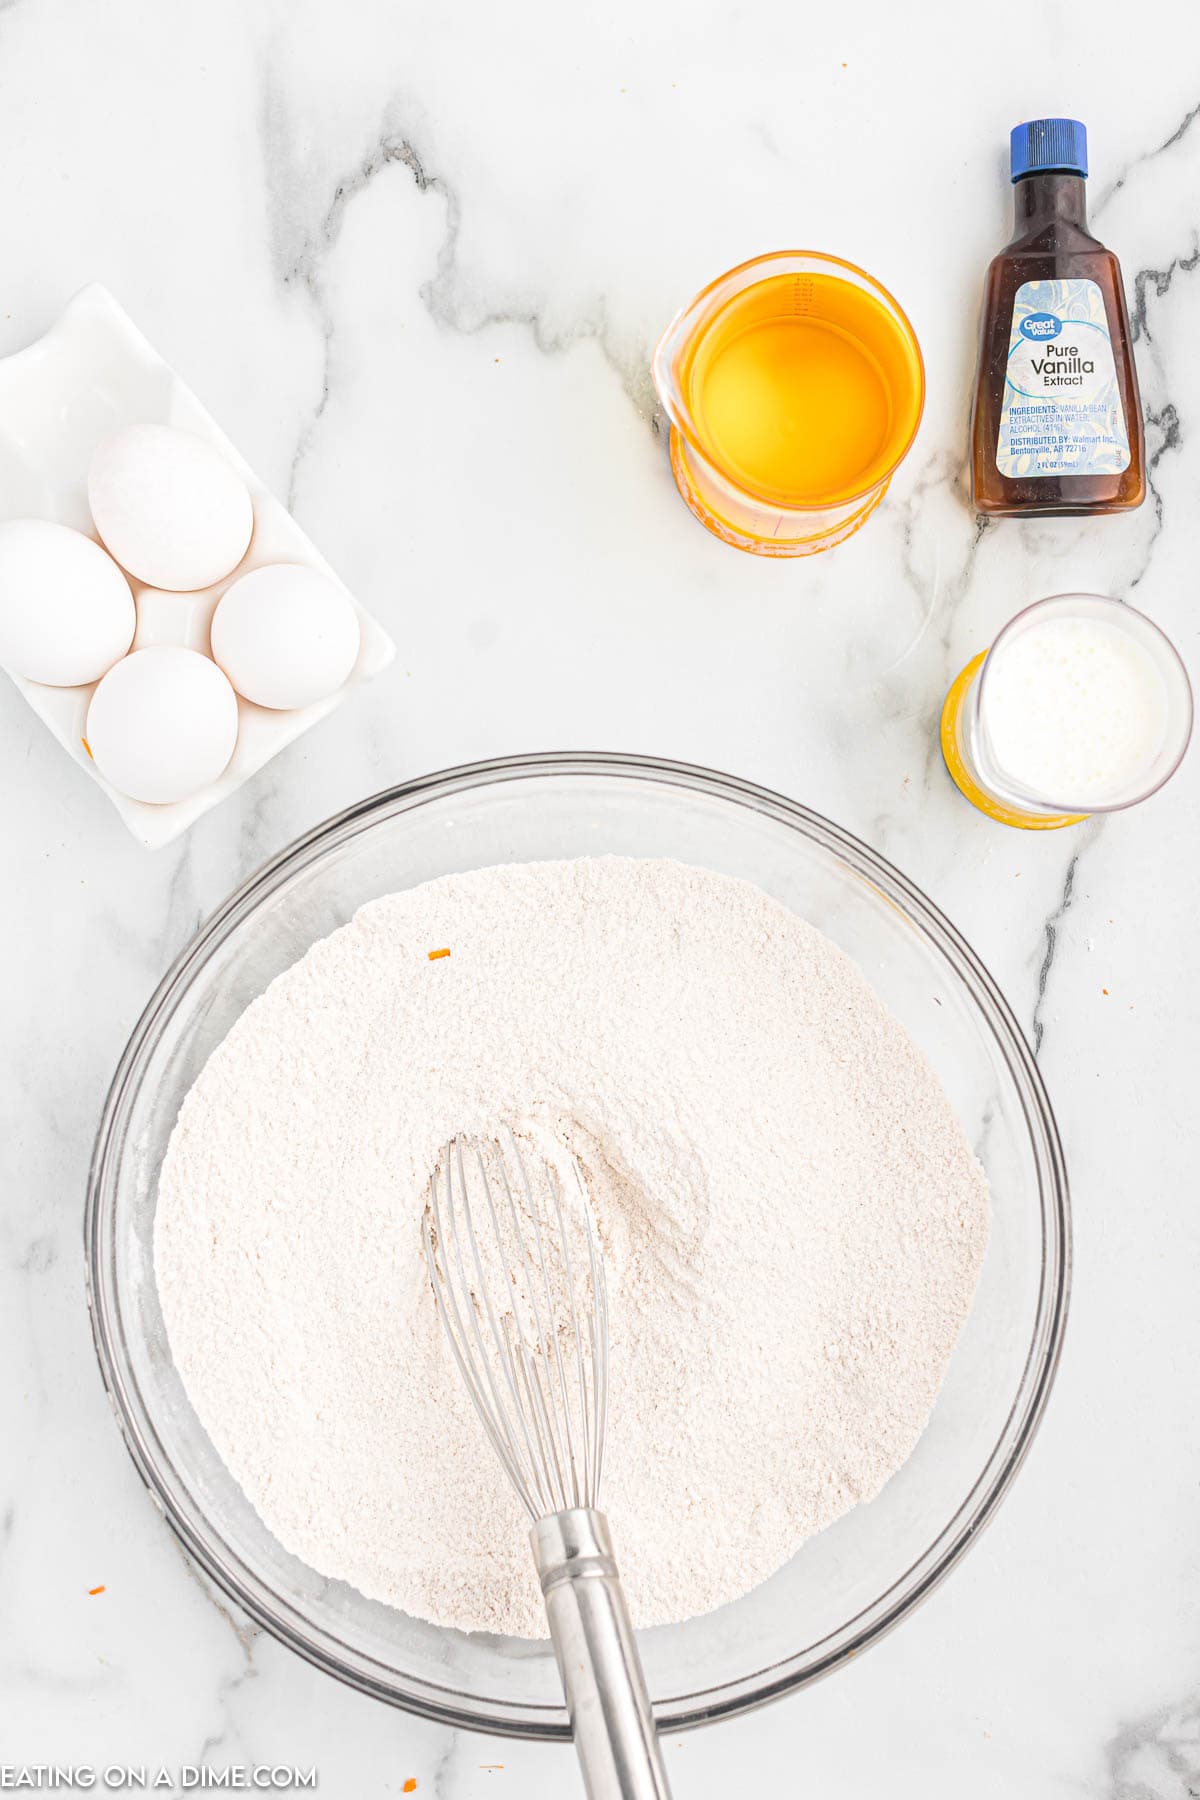
    Step 1 – Mix together the cake mix, dry Jello and 2 tablespoons of the lemonade.  Go ahead and also preheat the oven too.


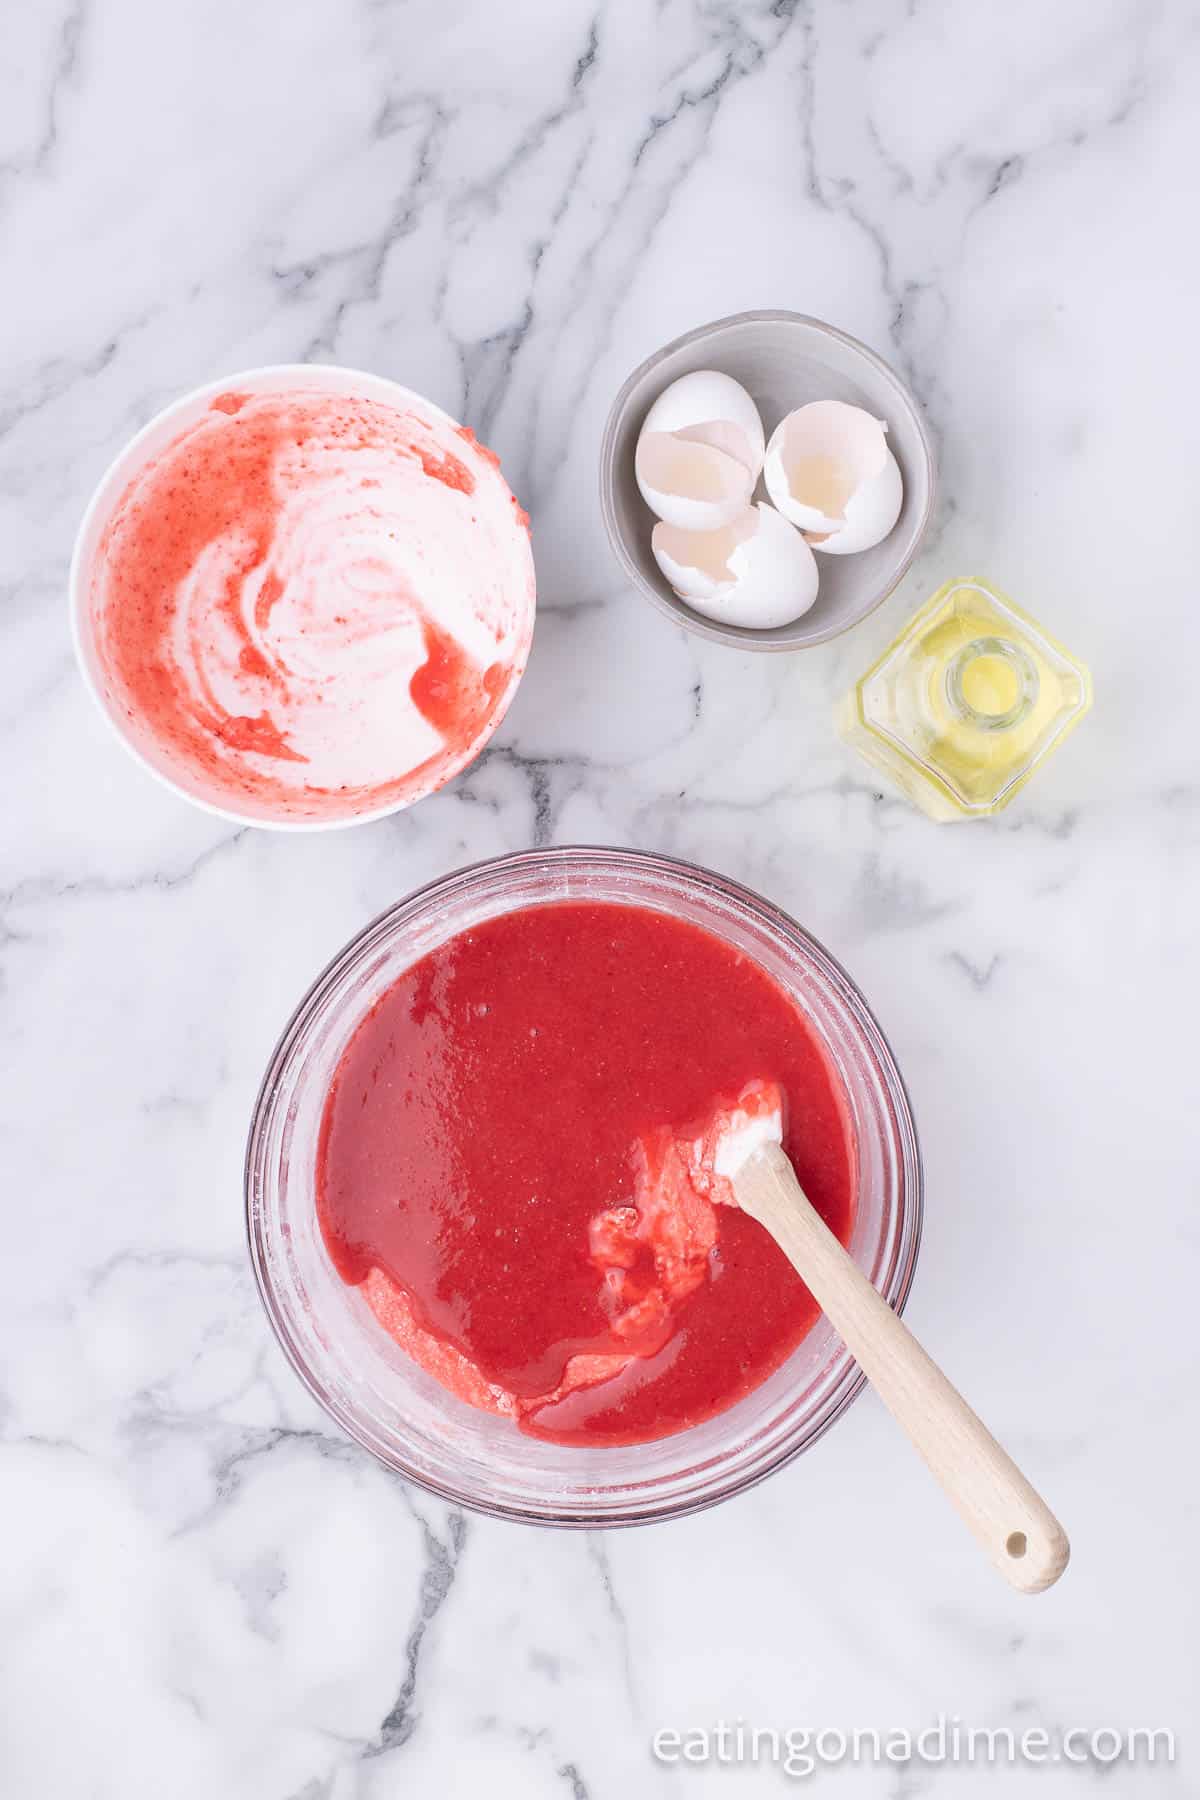
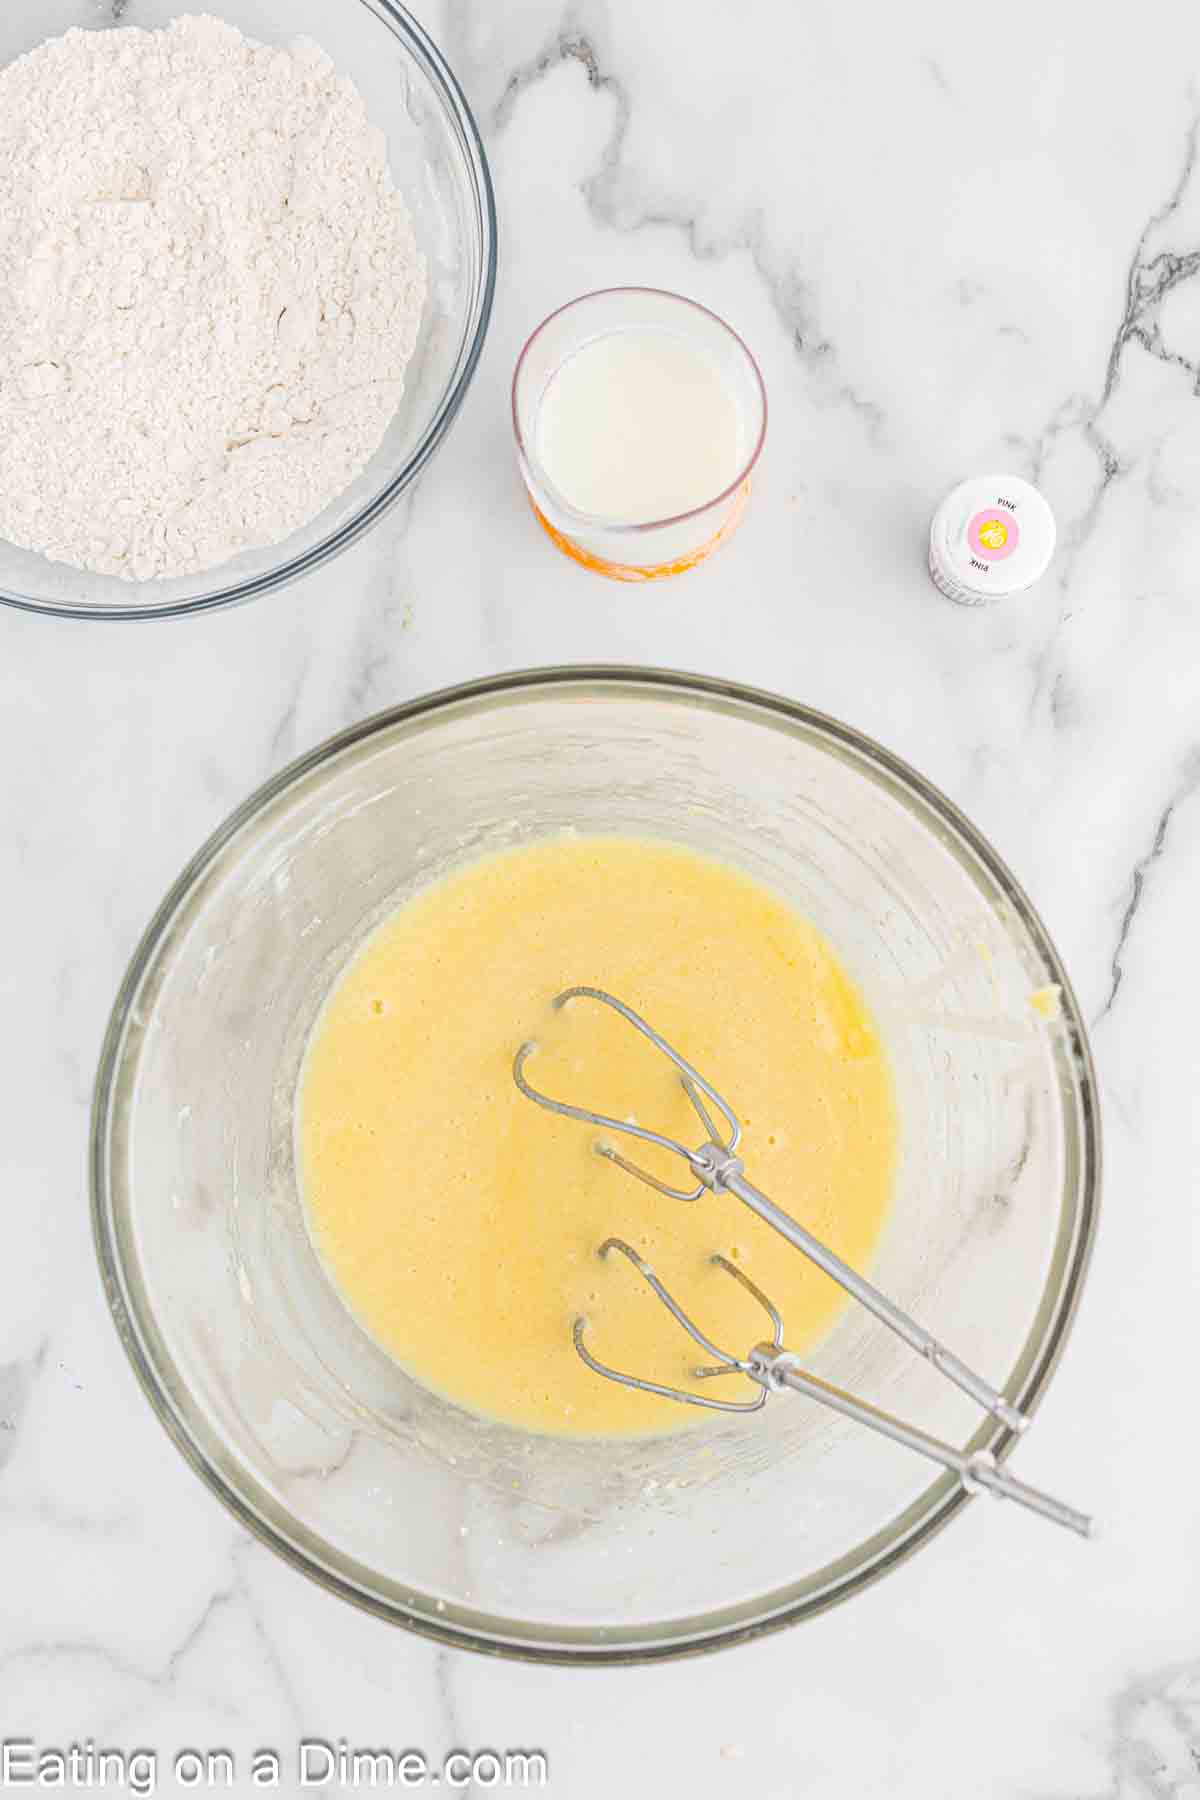
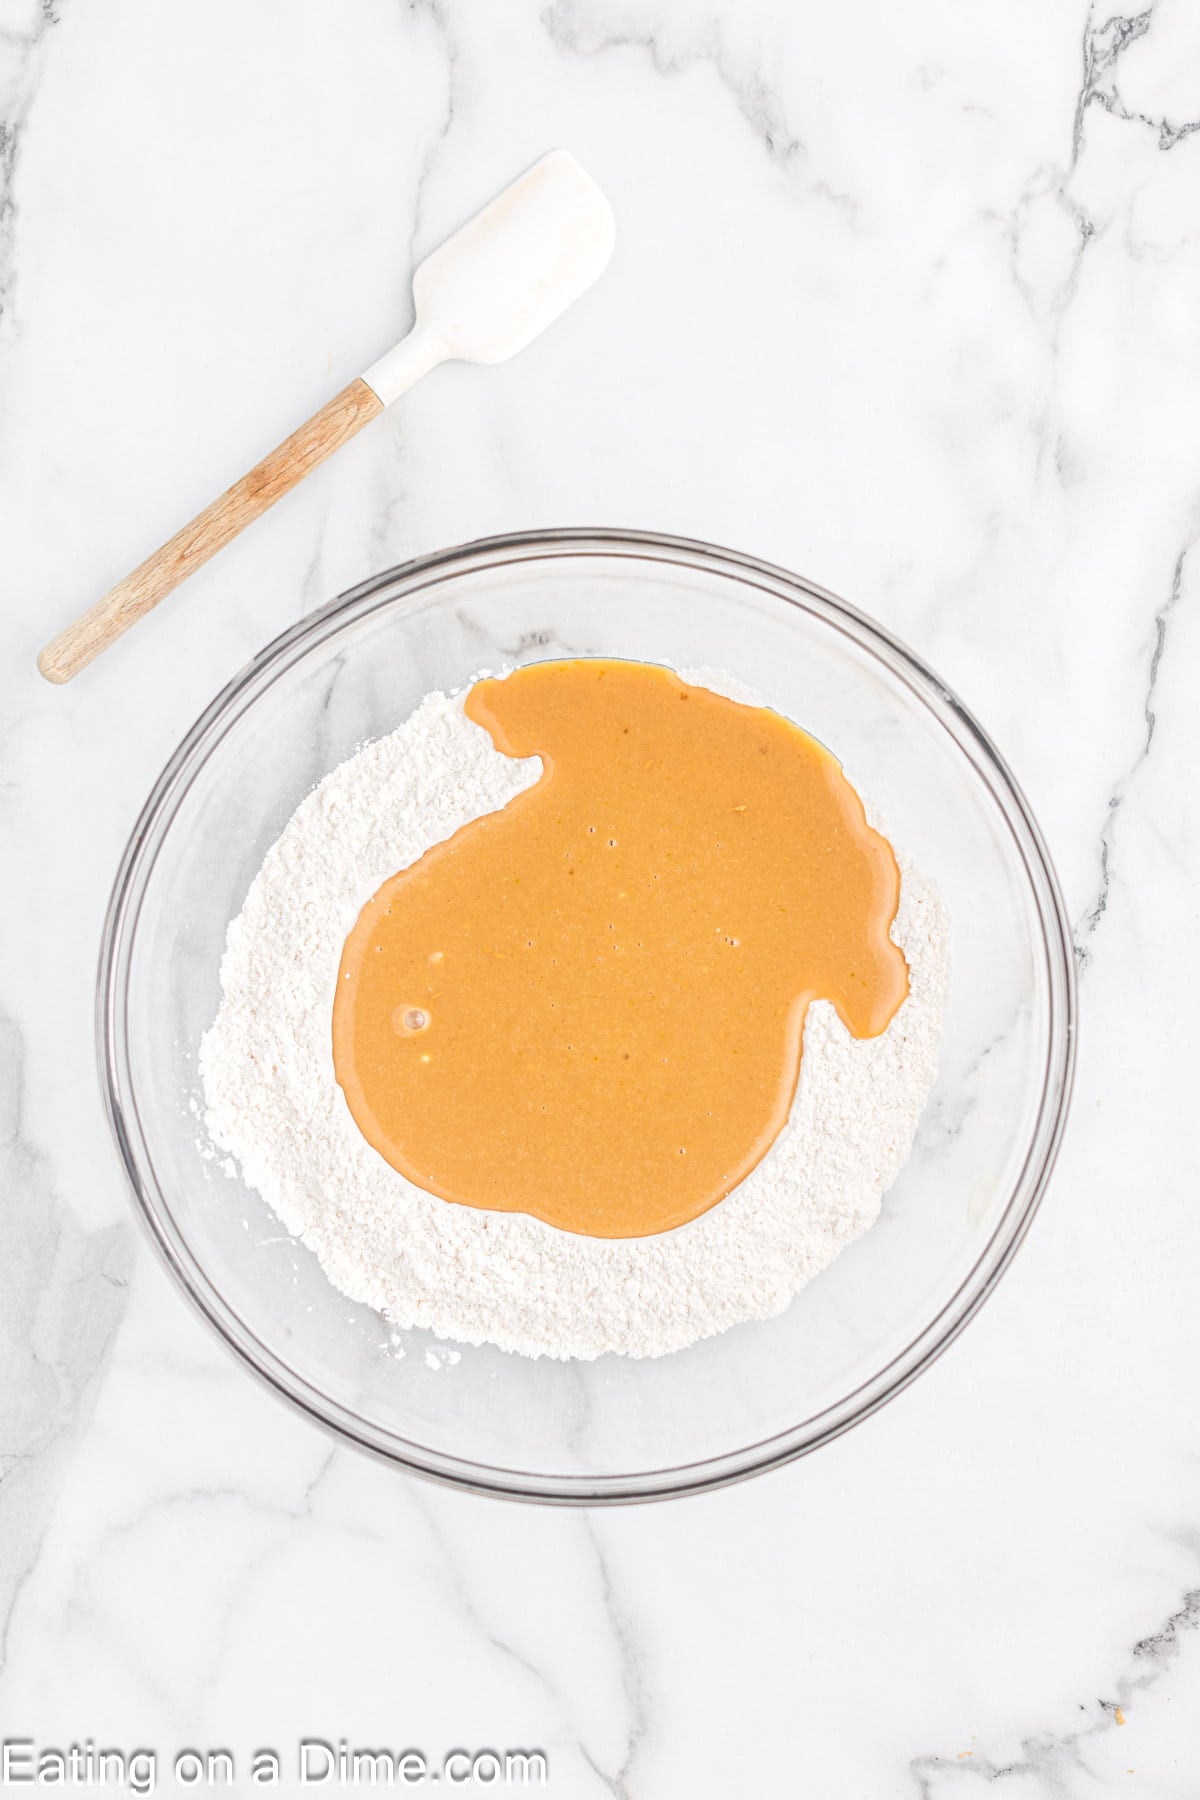
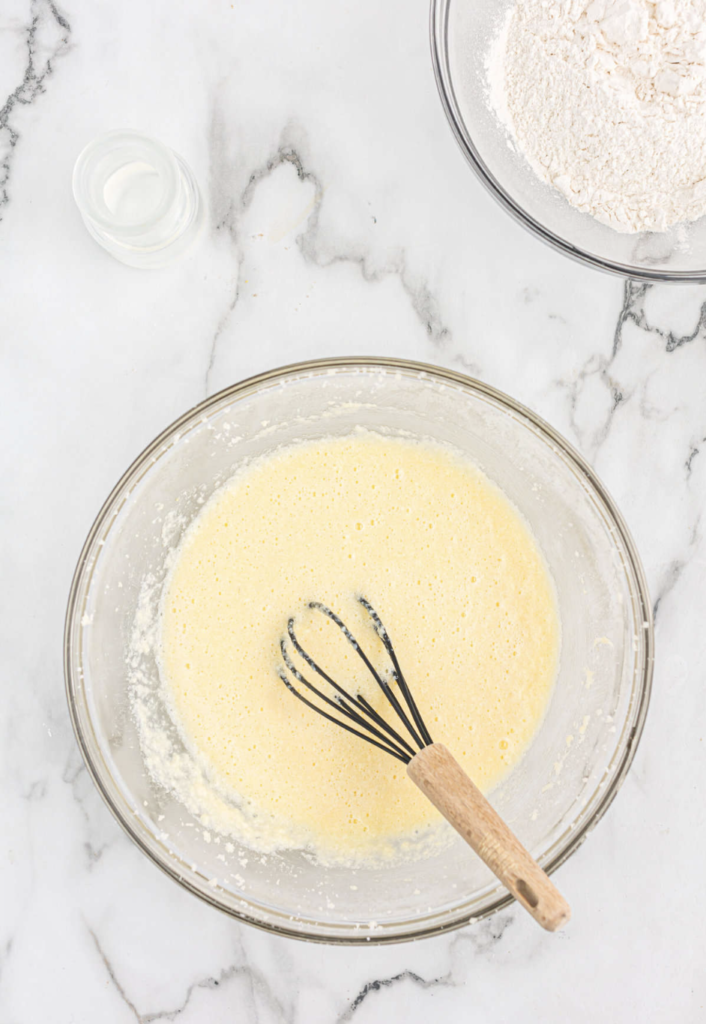
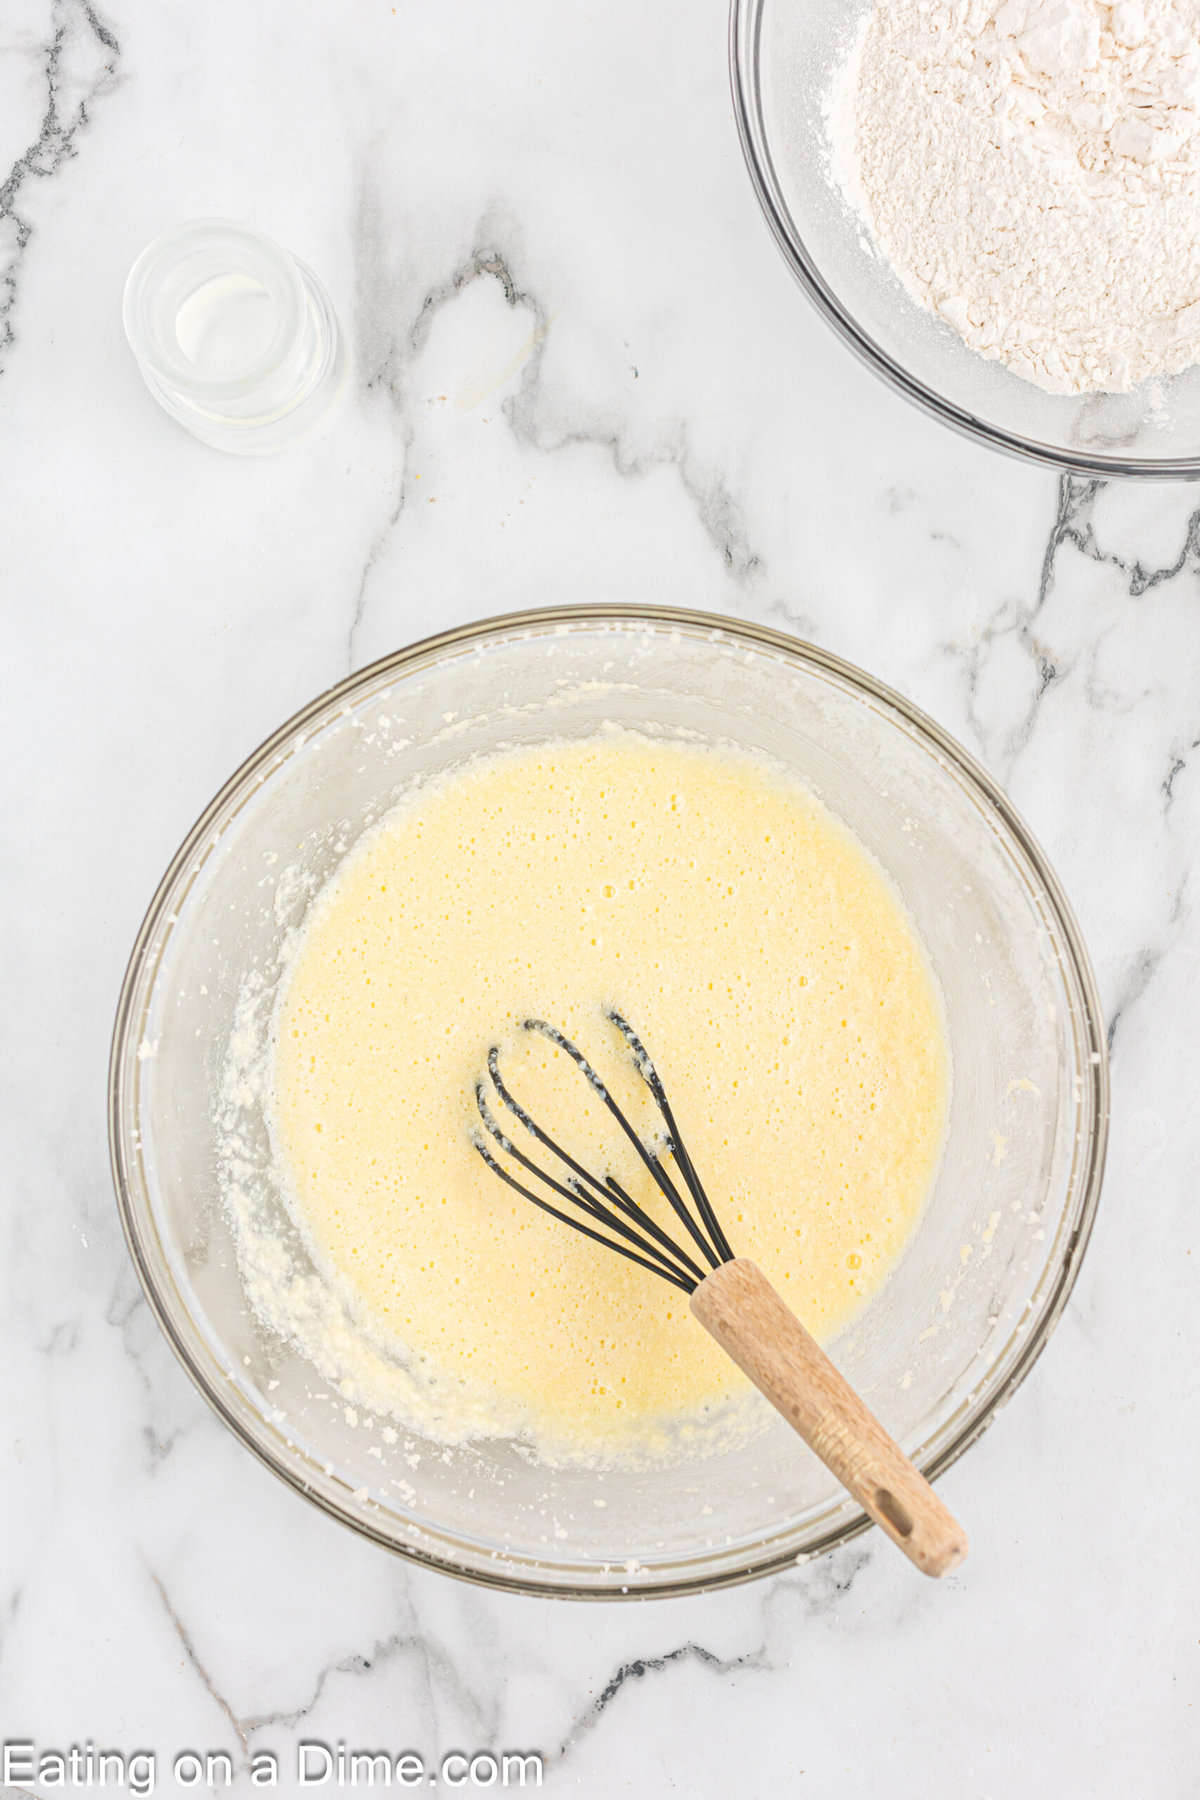
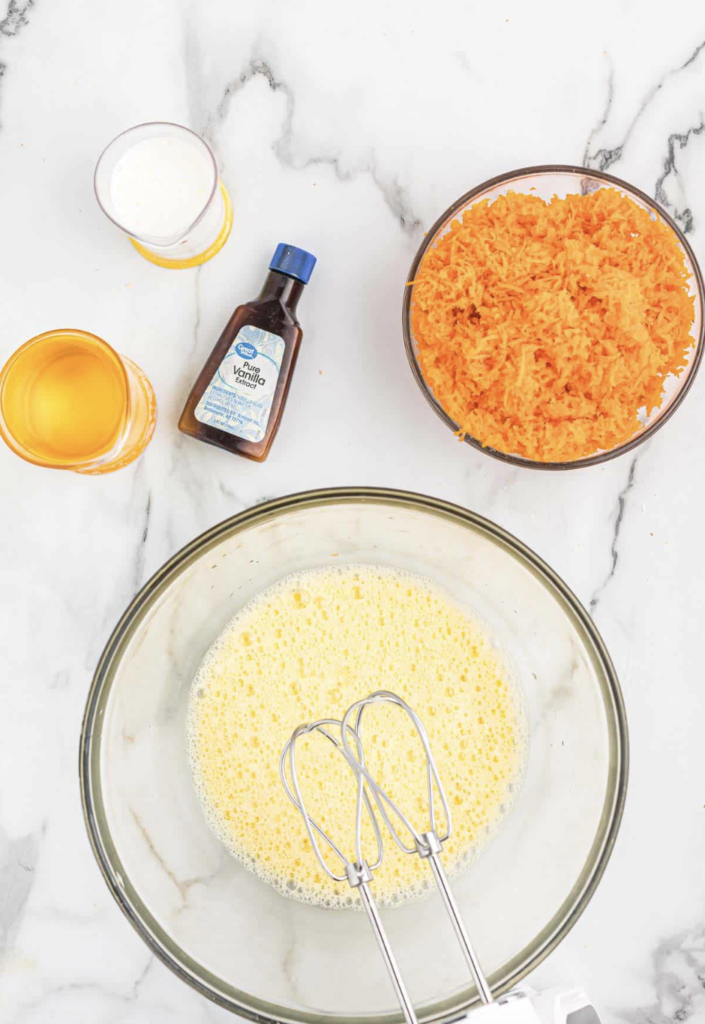
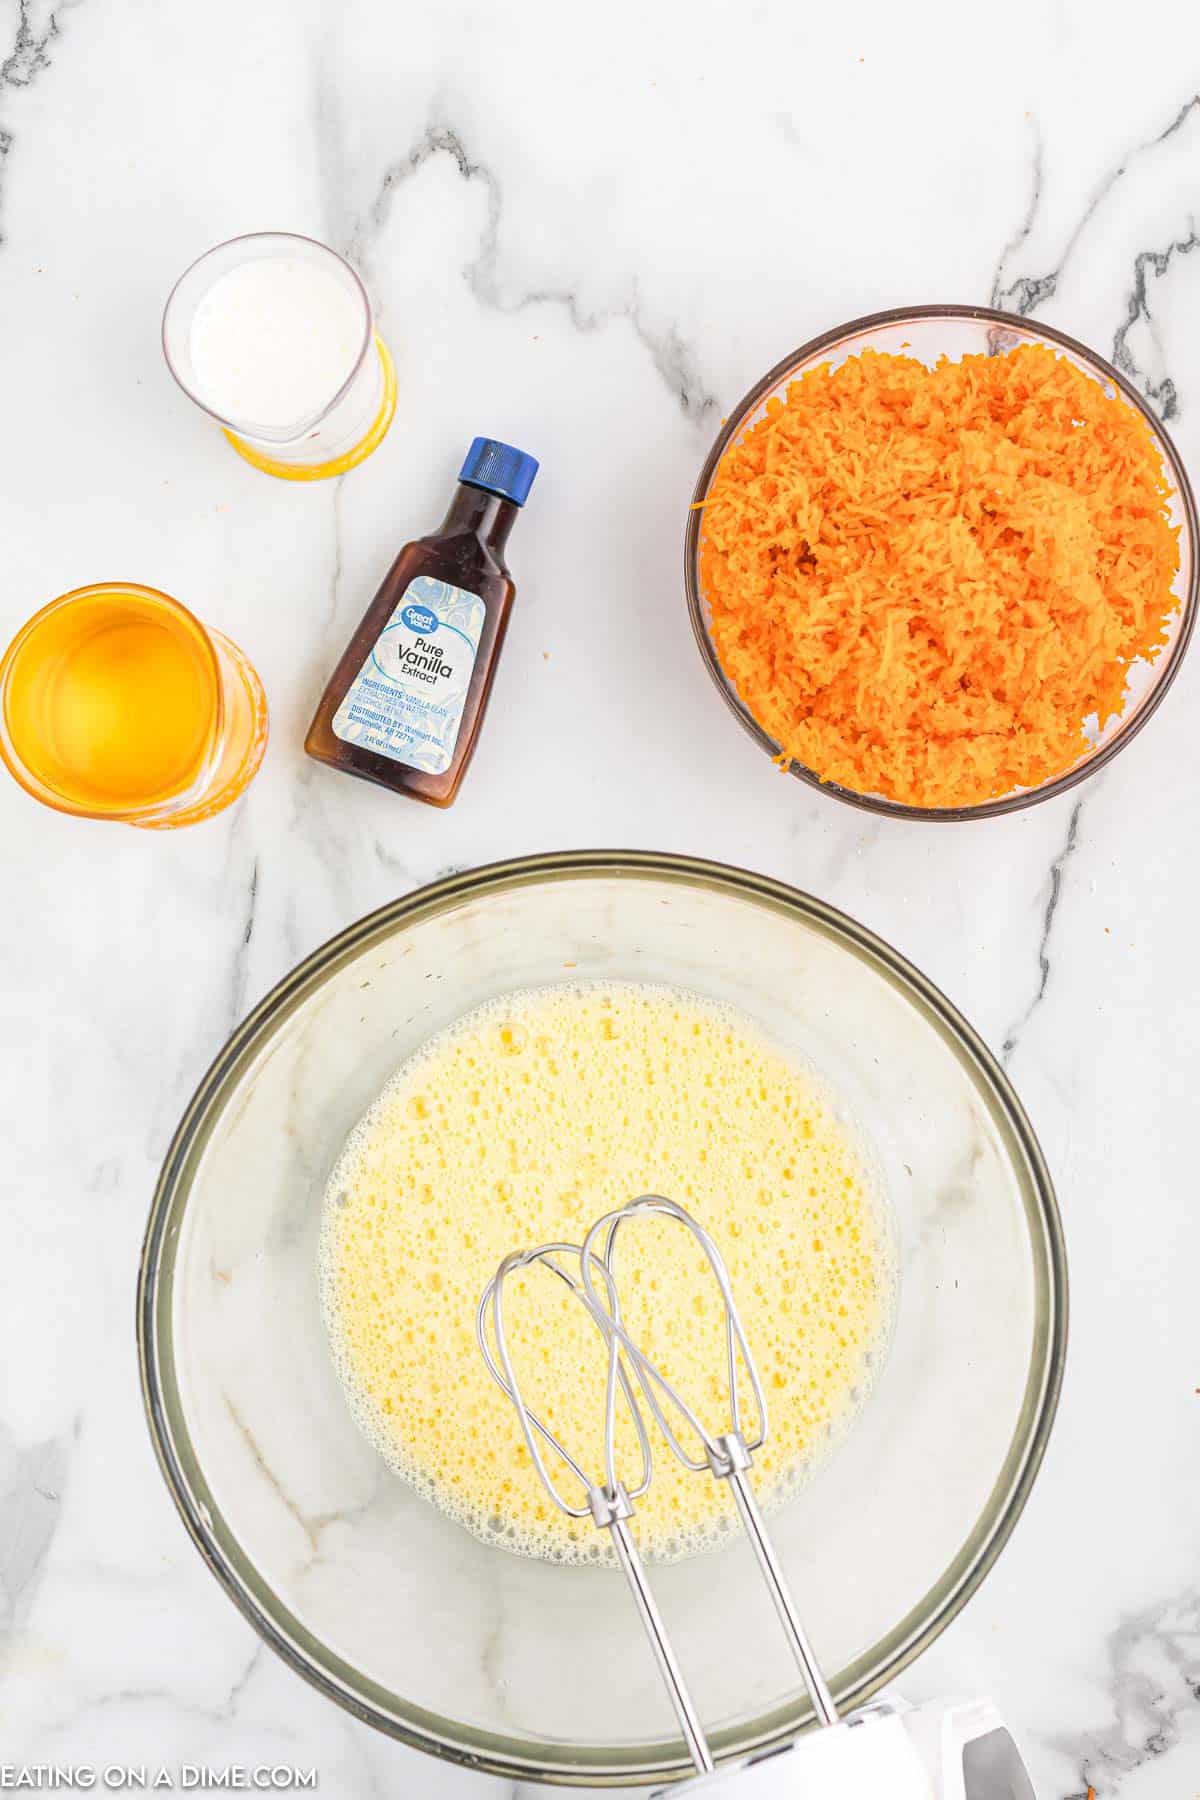
    Step 2 – Puree the strawberries with a food processor and it only takes a few seconds. Add the strawberry puree to the cake mix along with eggs and oil . Mix everything together.


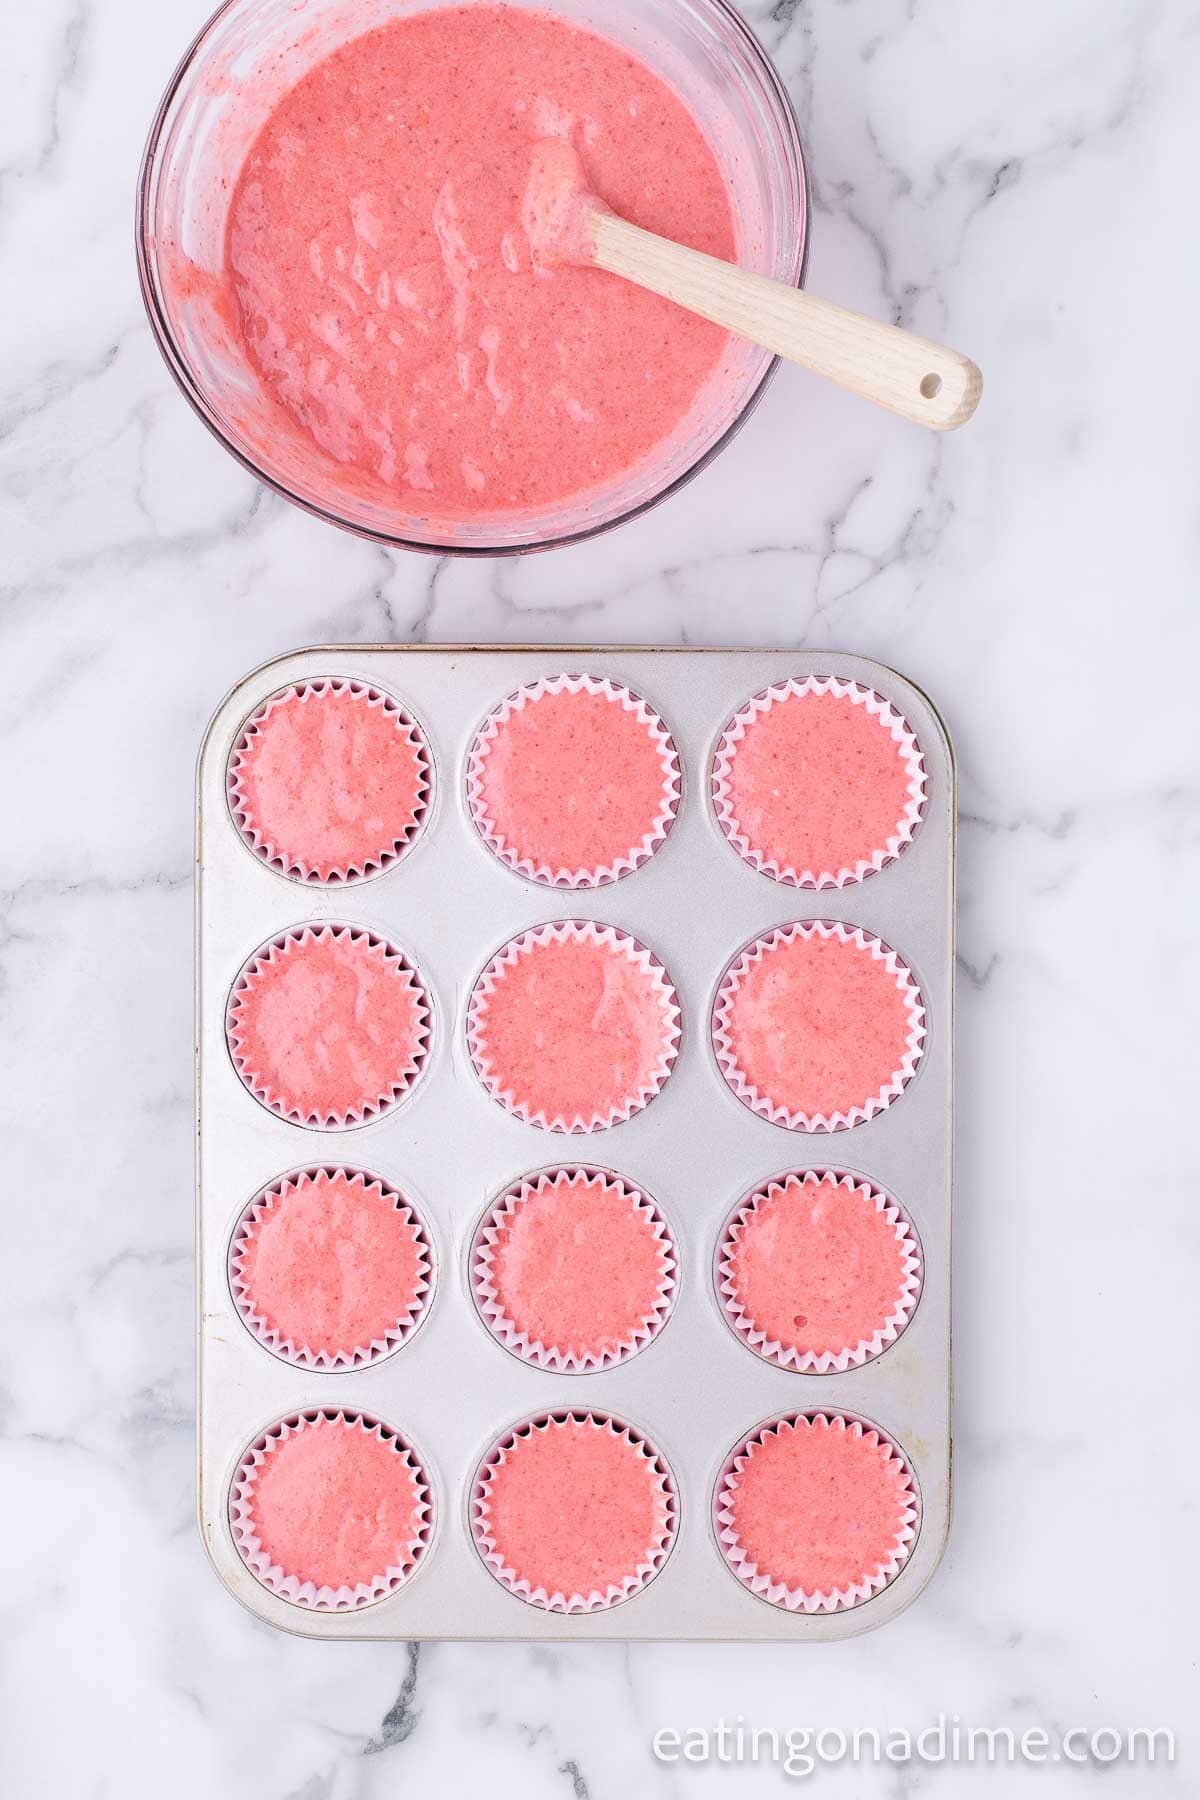
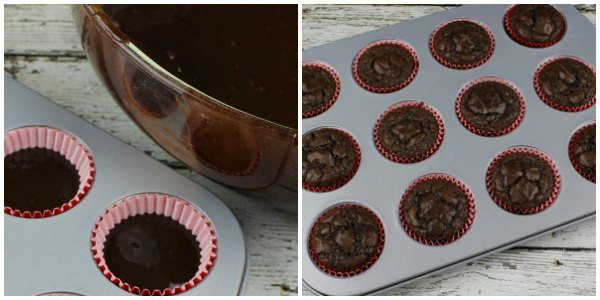
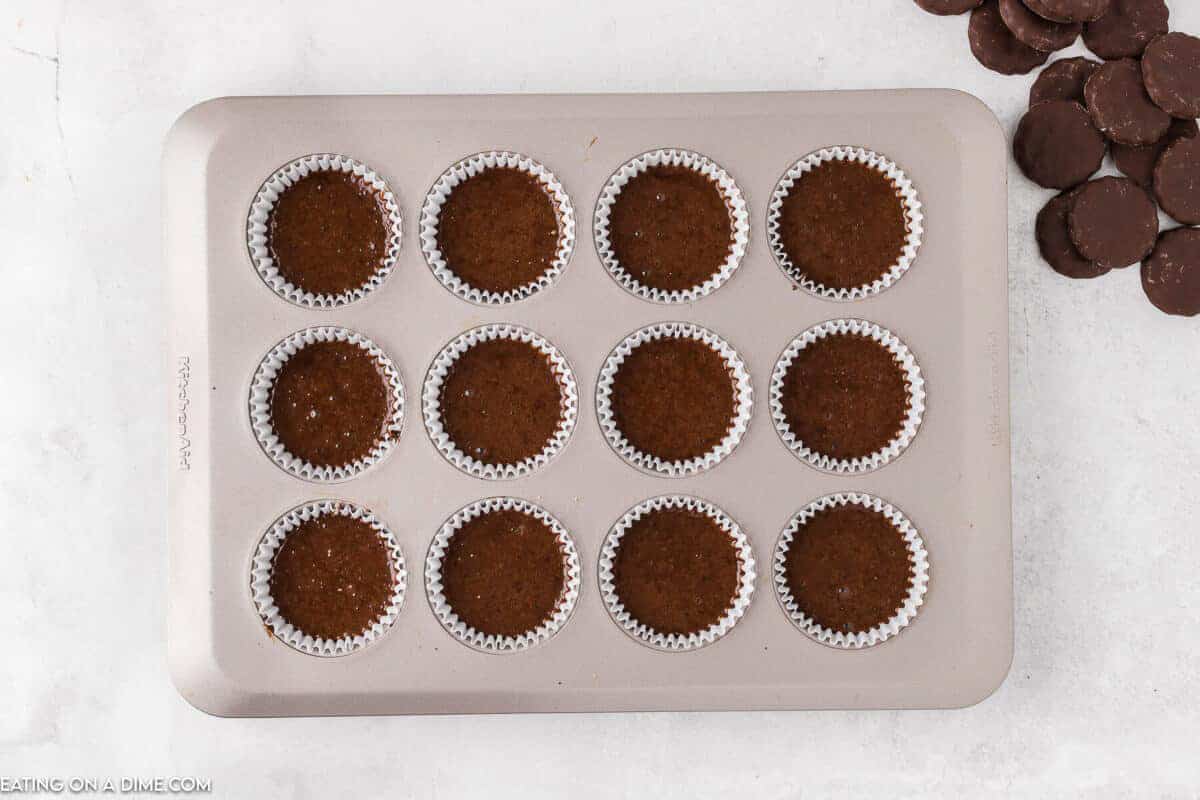
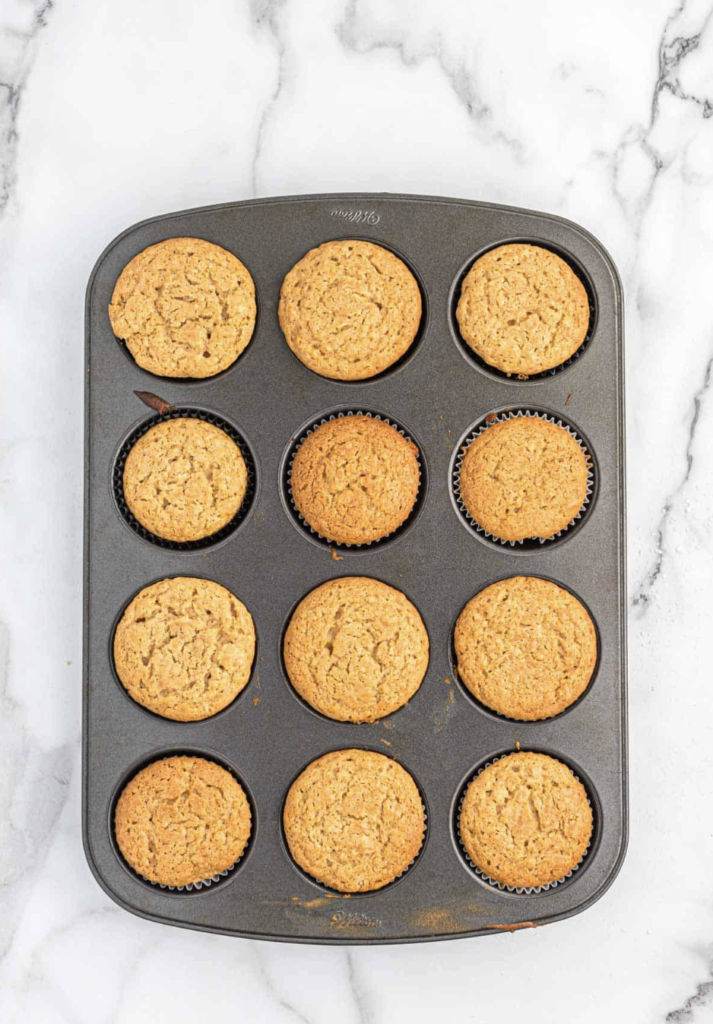
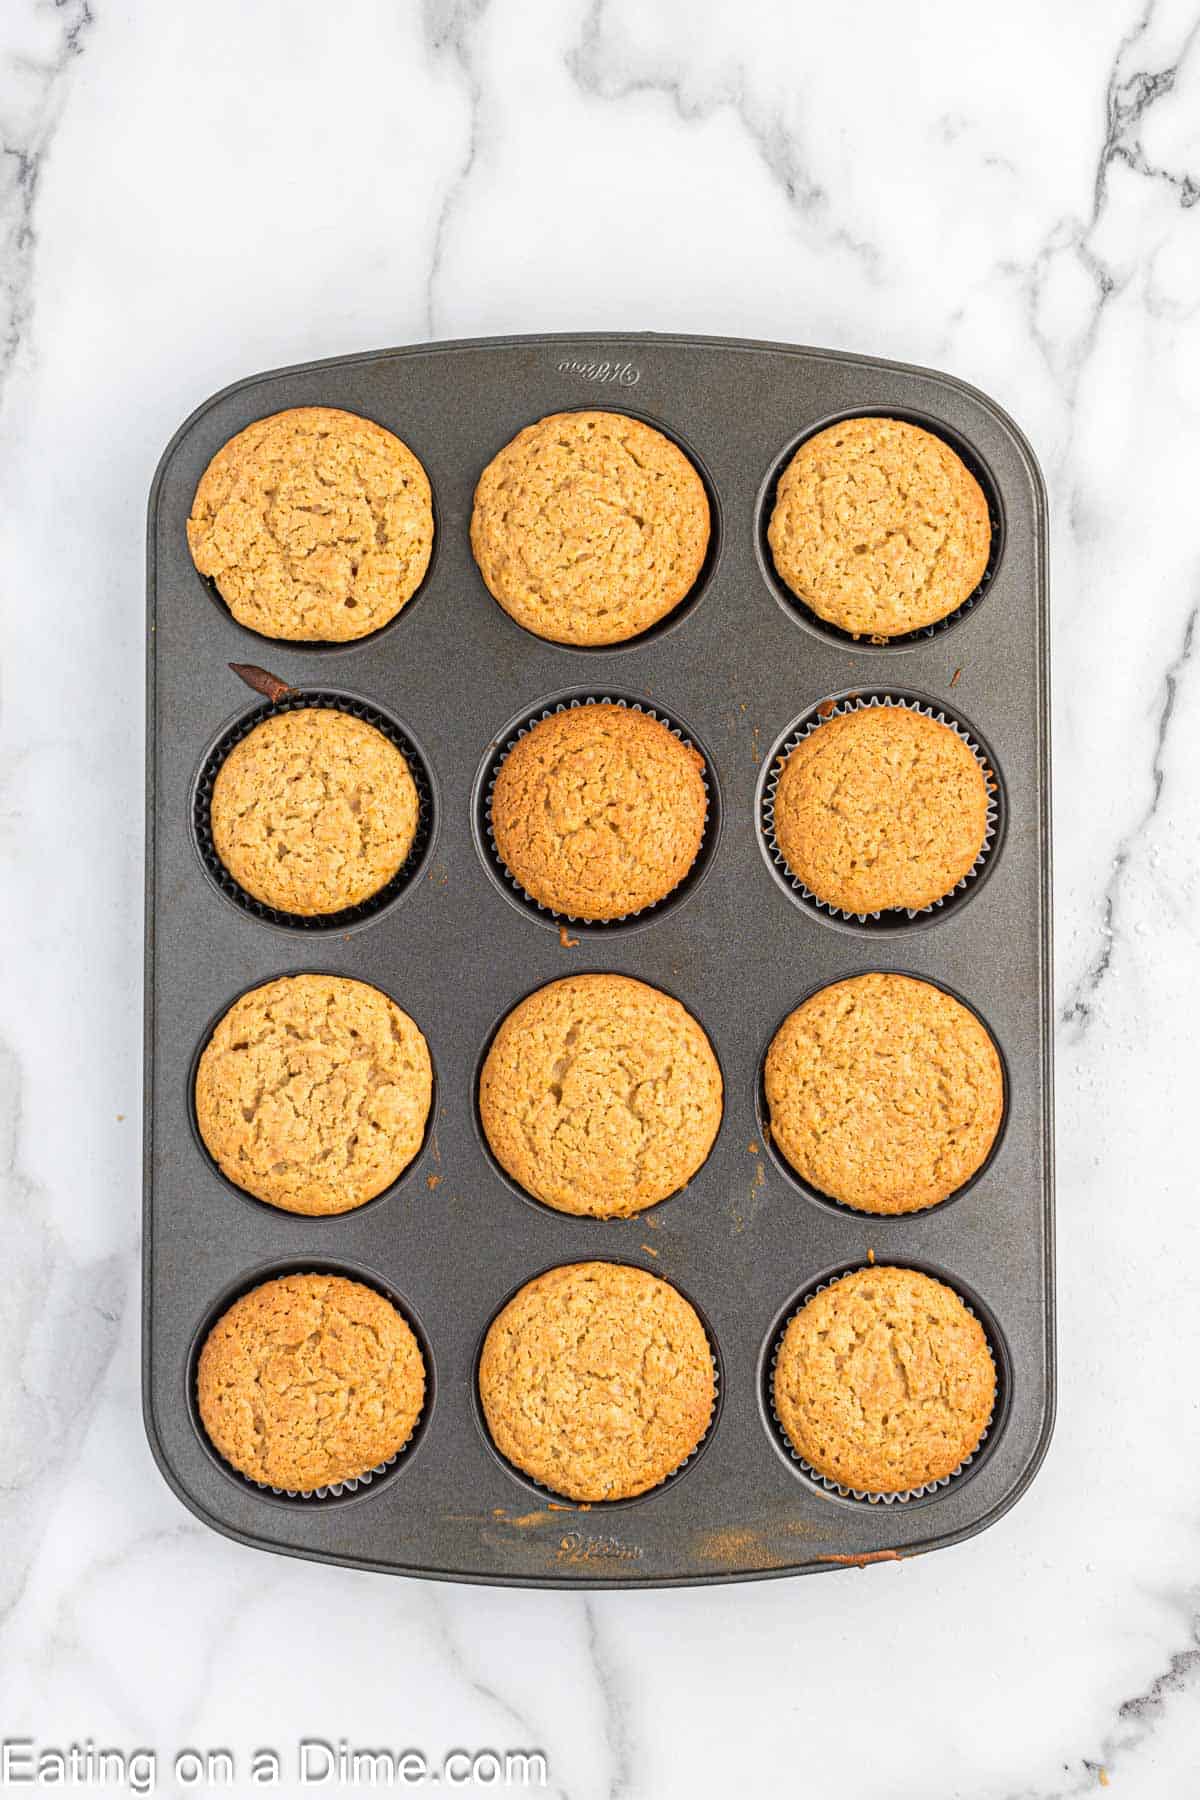
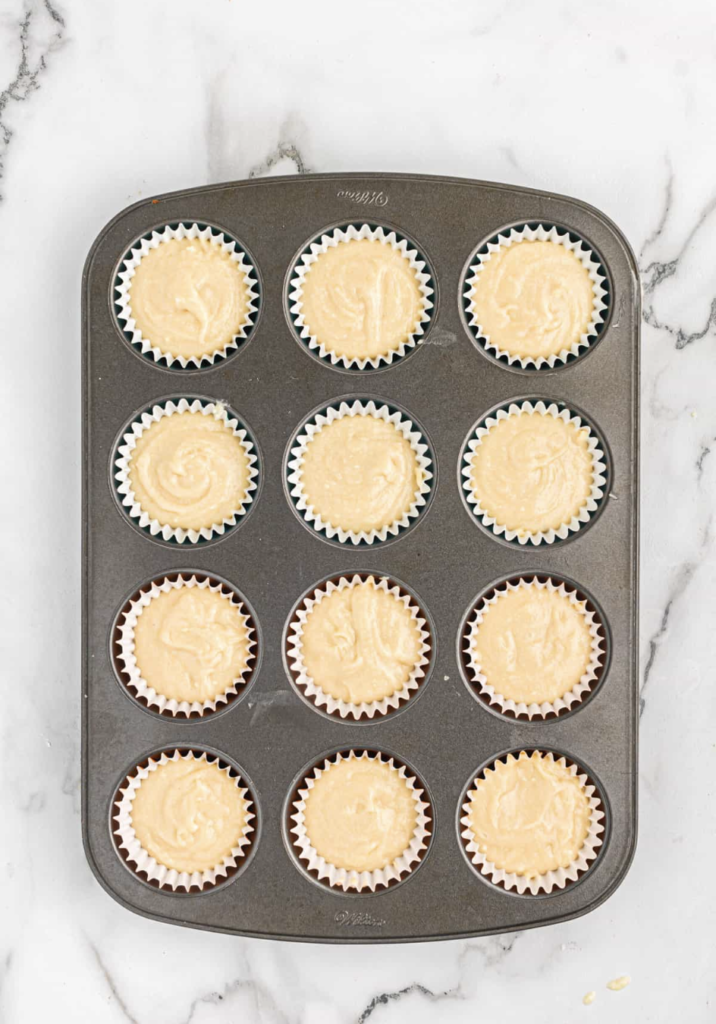
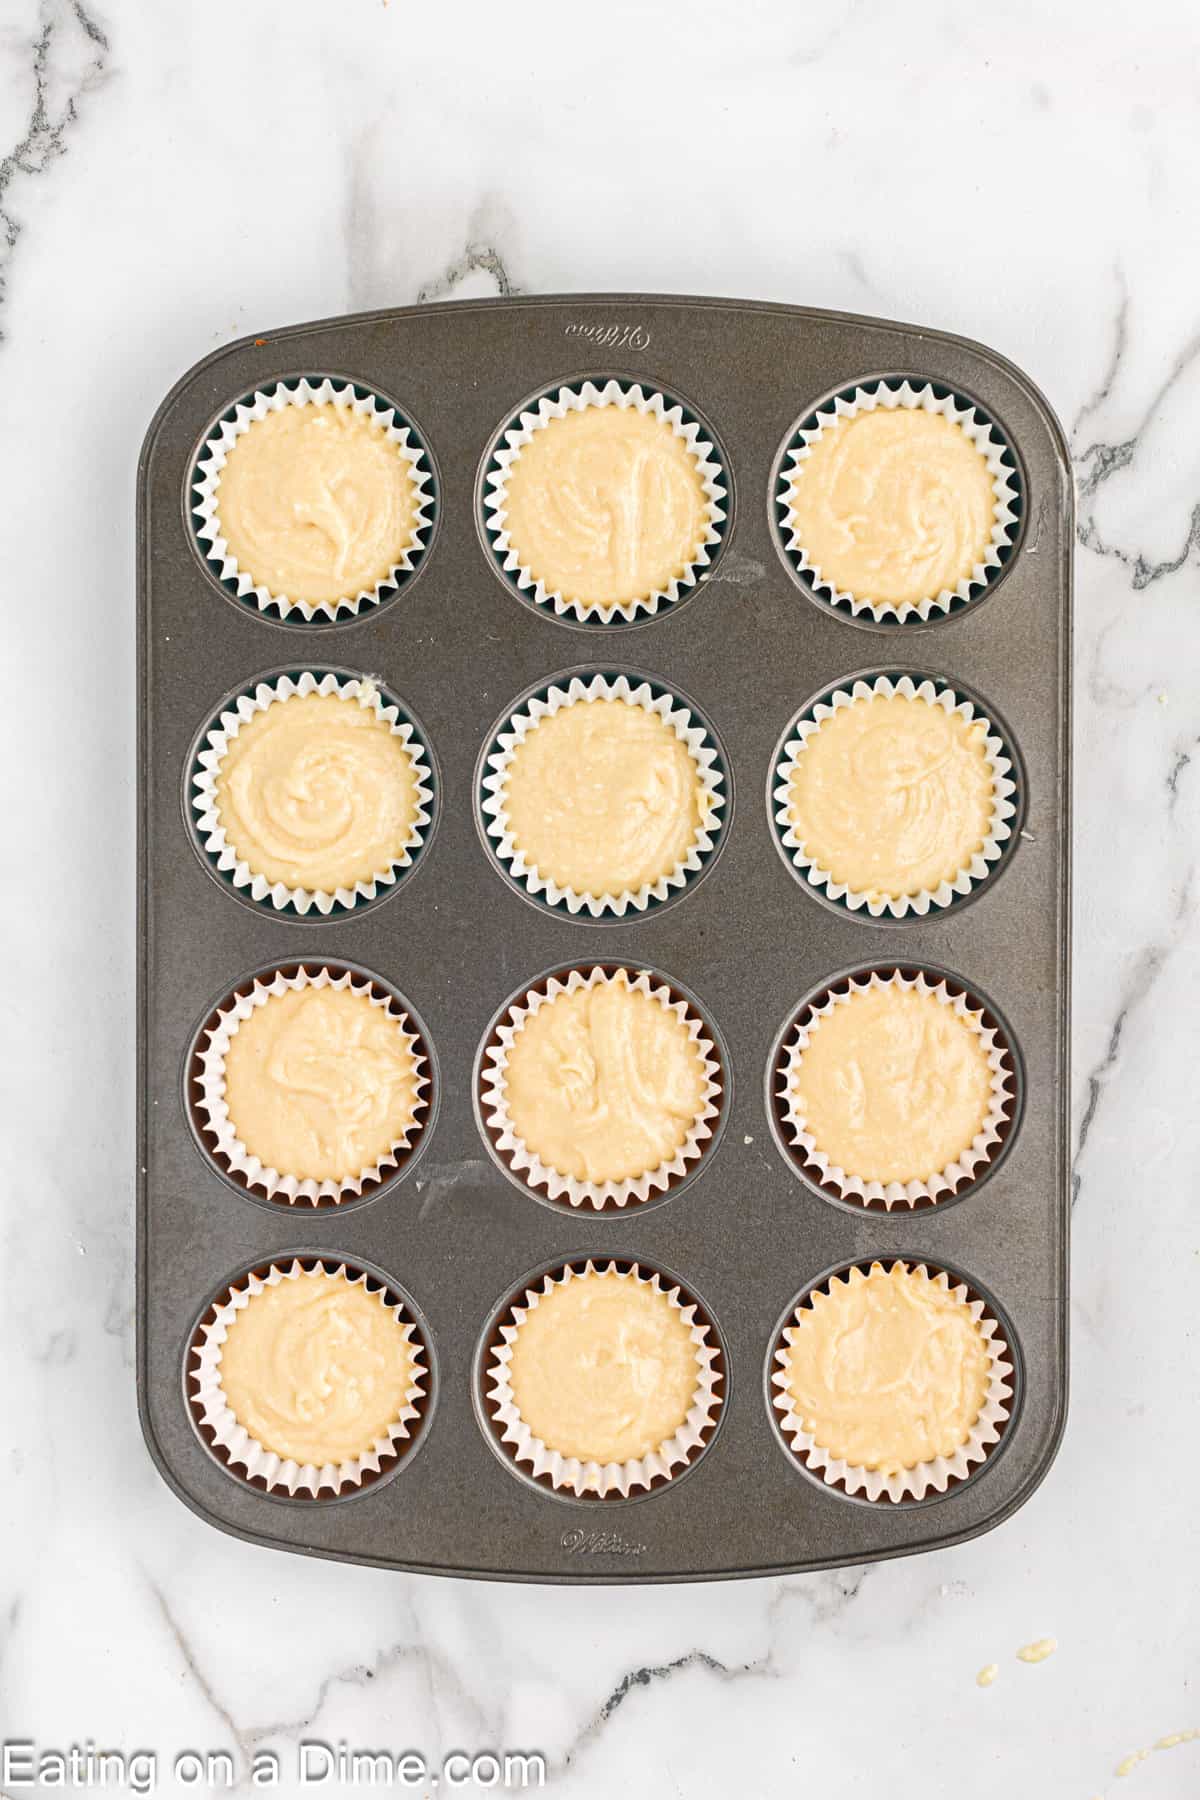
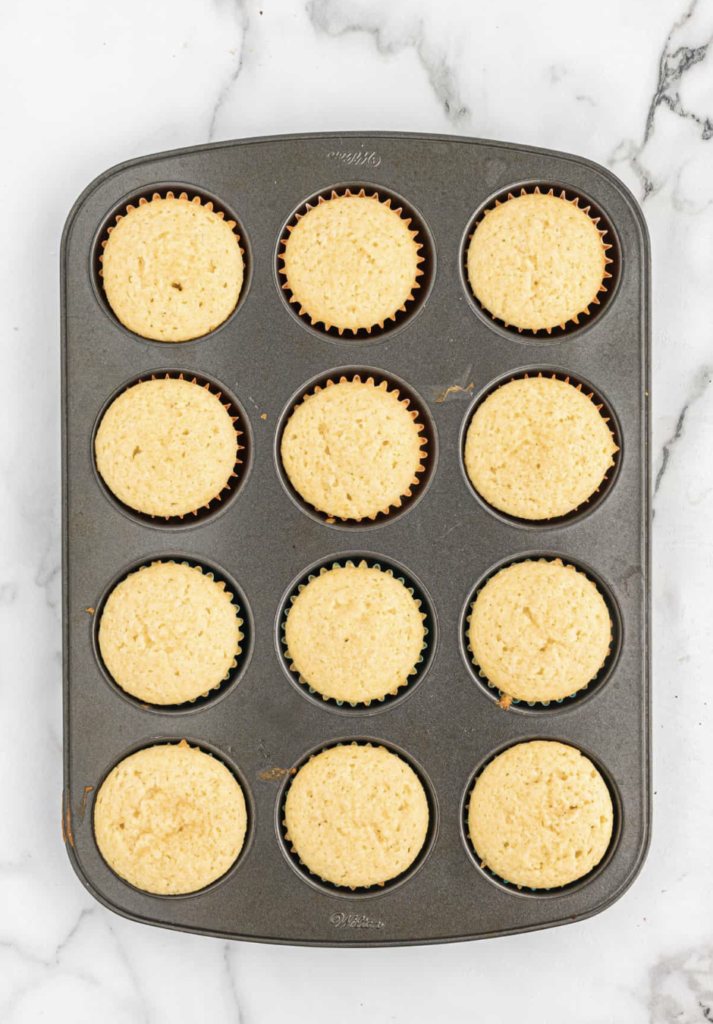
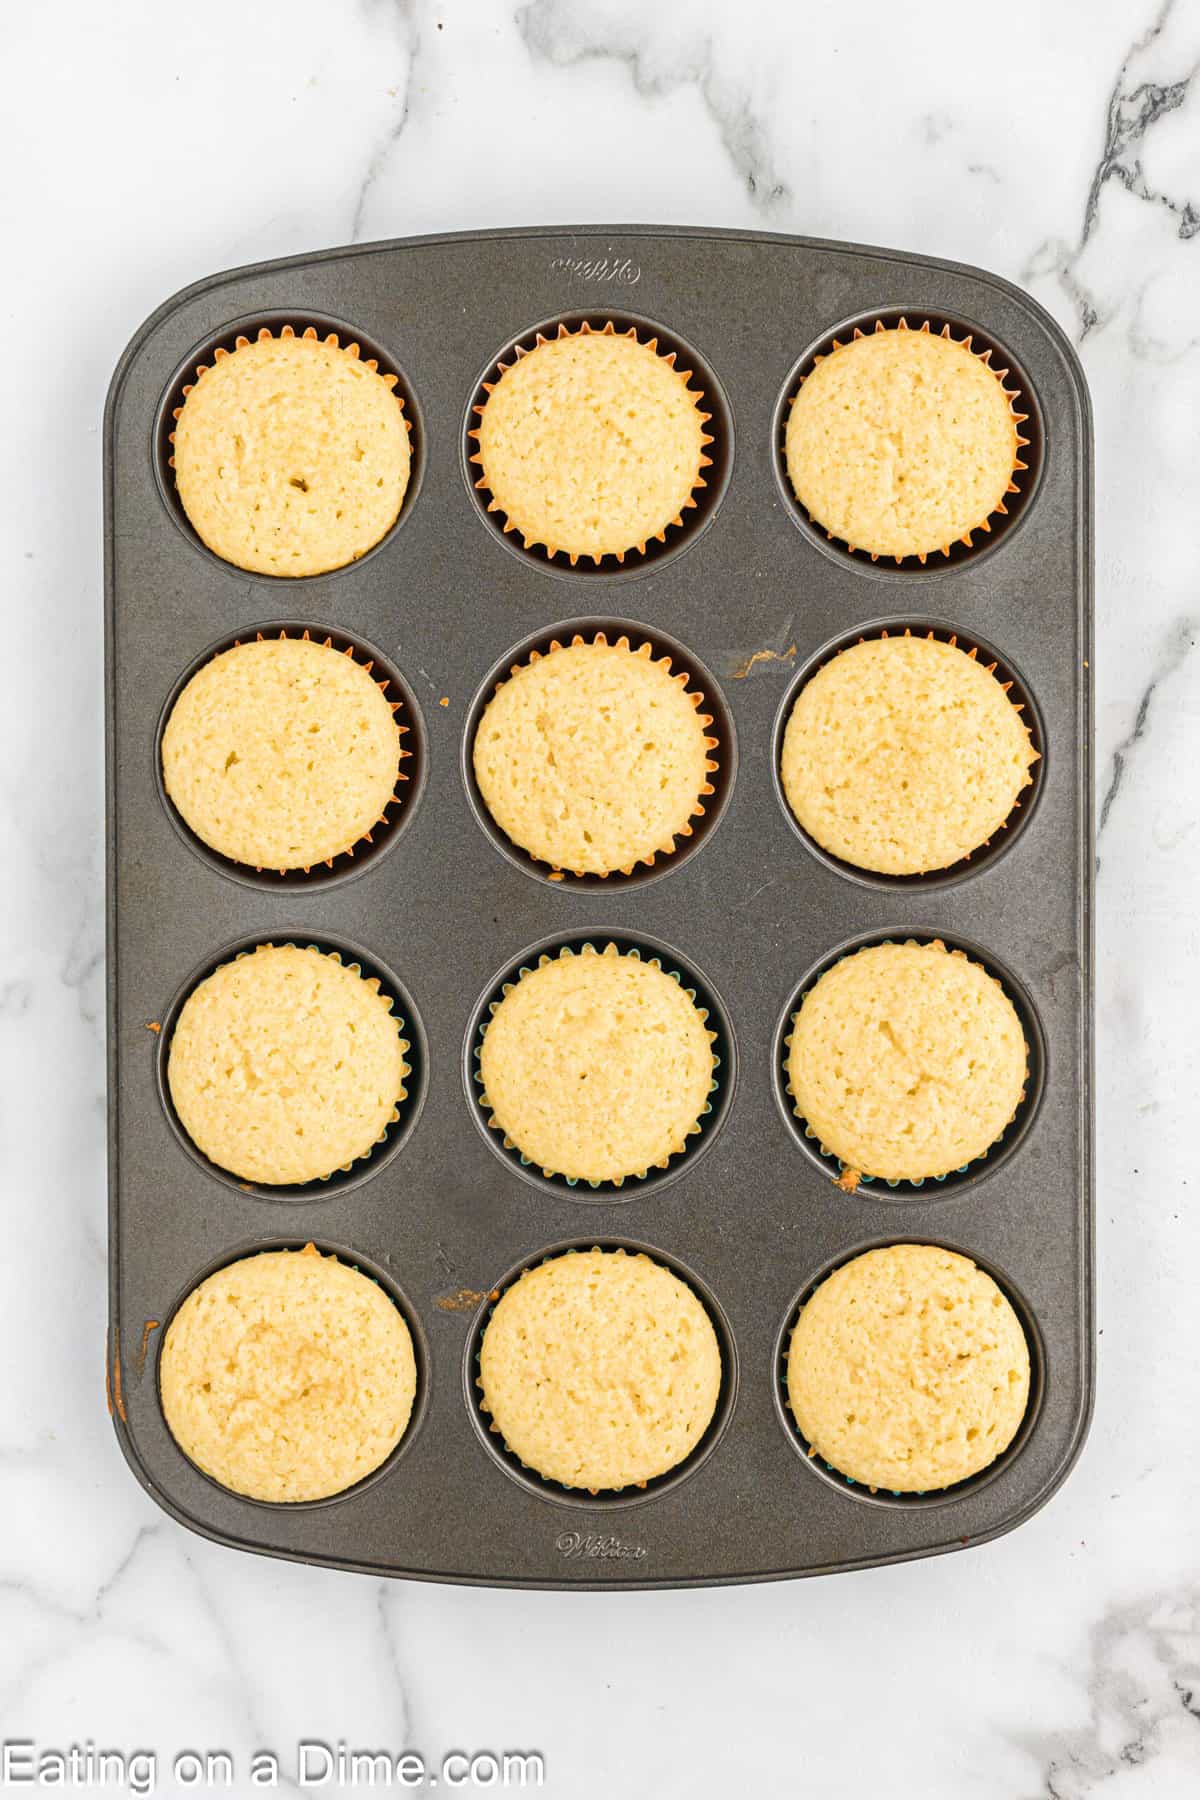
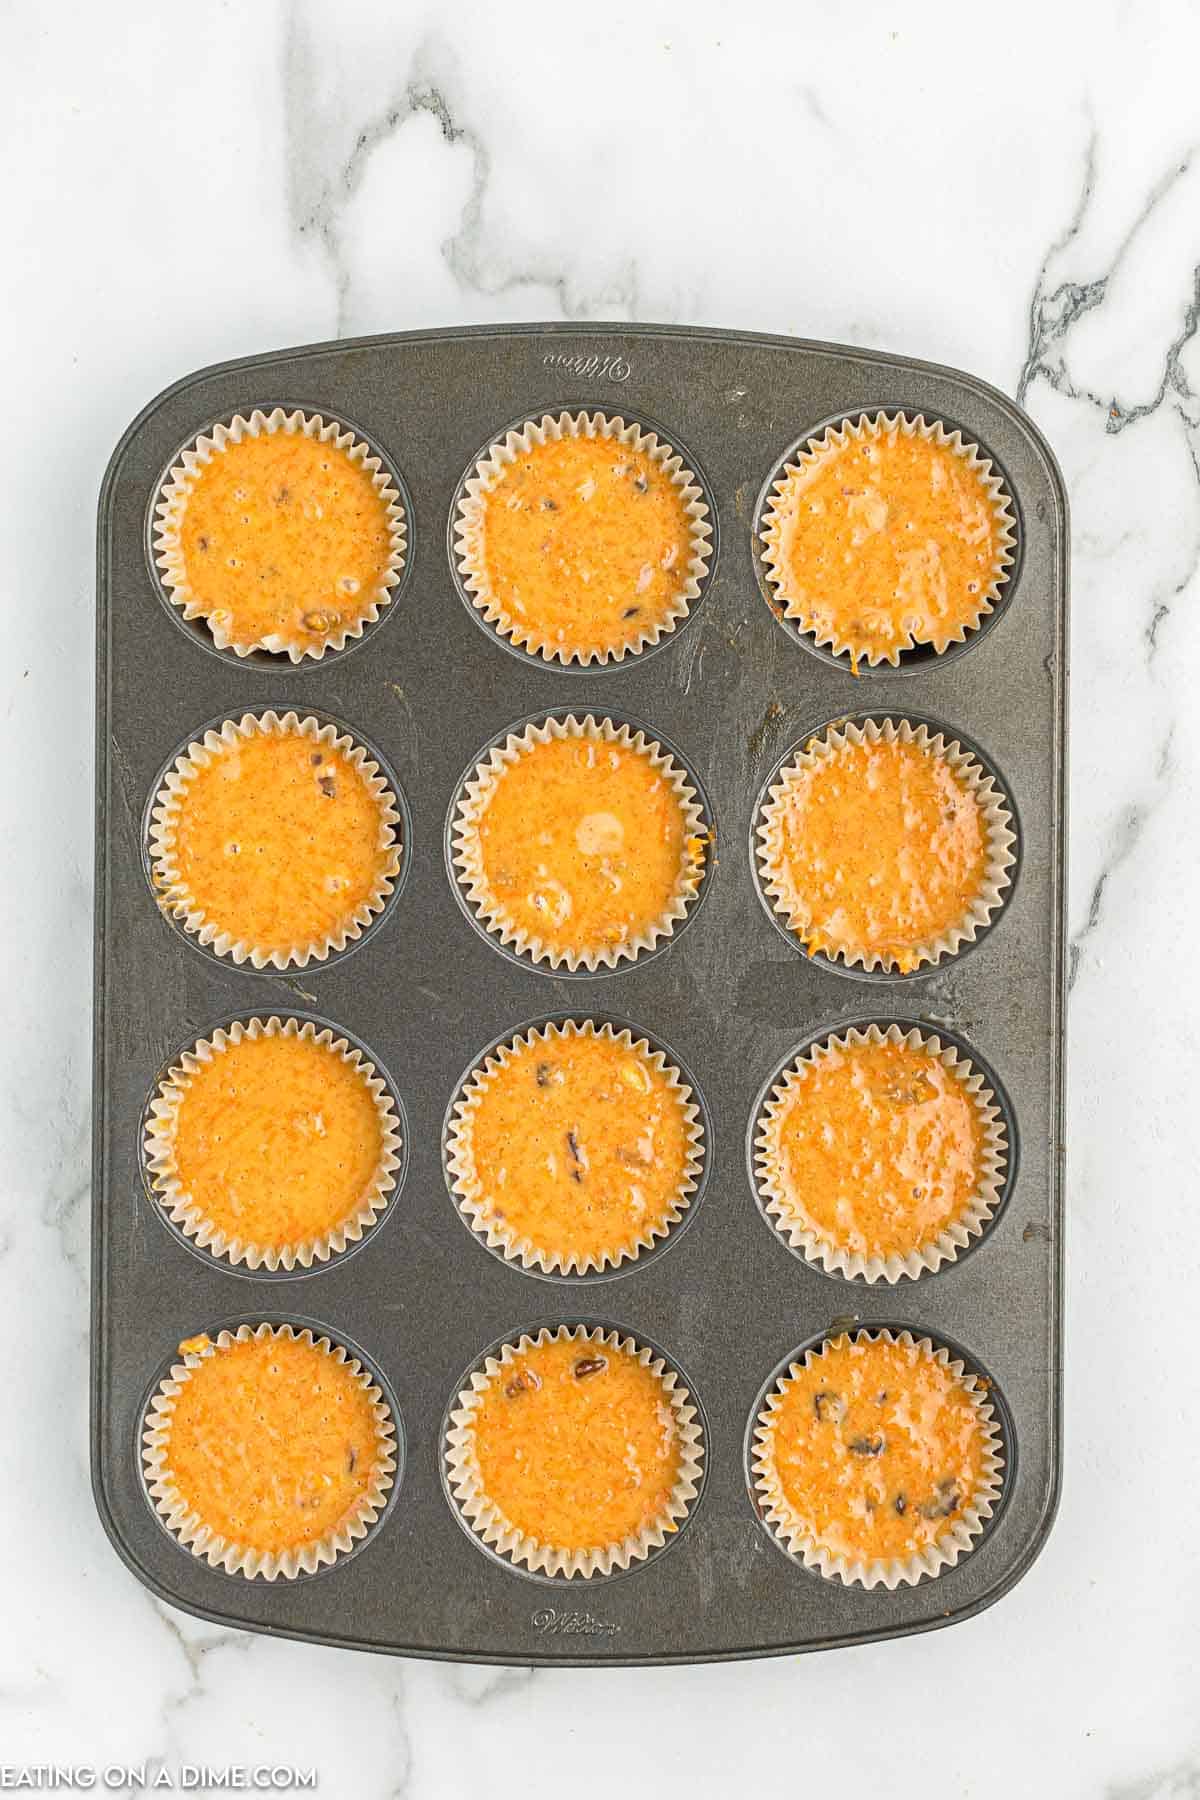
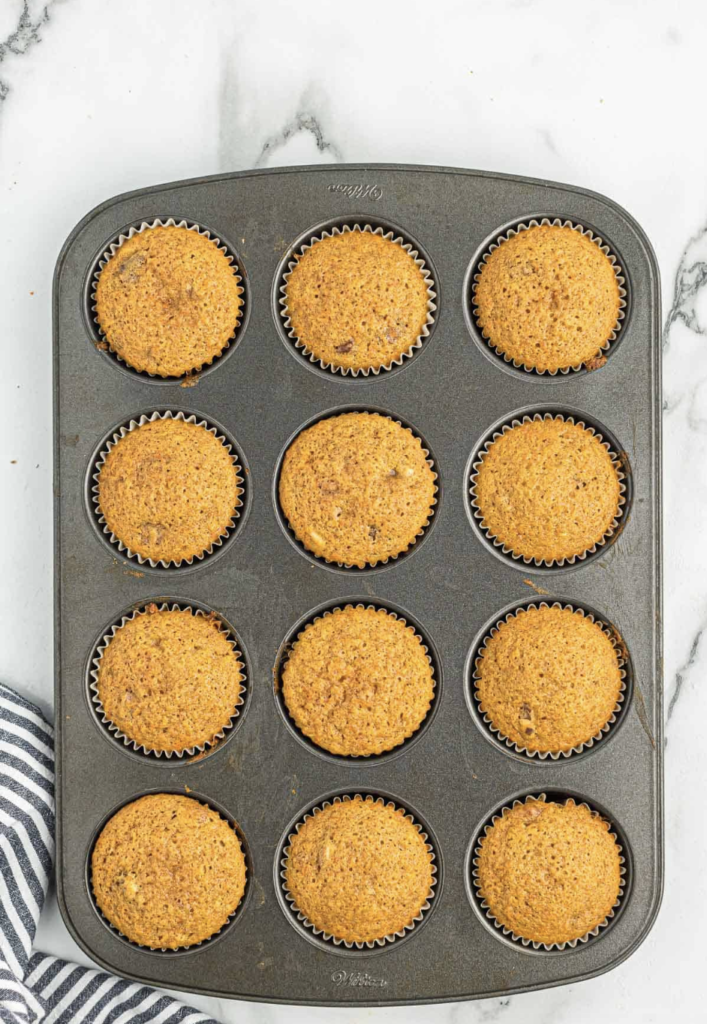
    Step 3 – Put cupcake liners in the pan and fill with the batter. I like to use a cookie scoop to do this but it’s totally optional.  It definitely helps to make it go faster and to ensure each one is the same size. Then bake and cool completely.


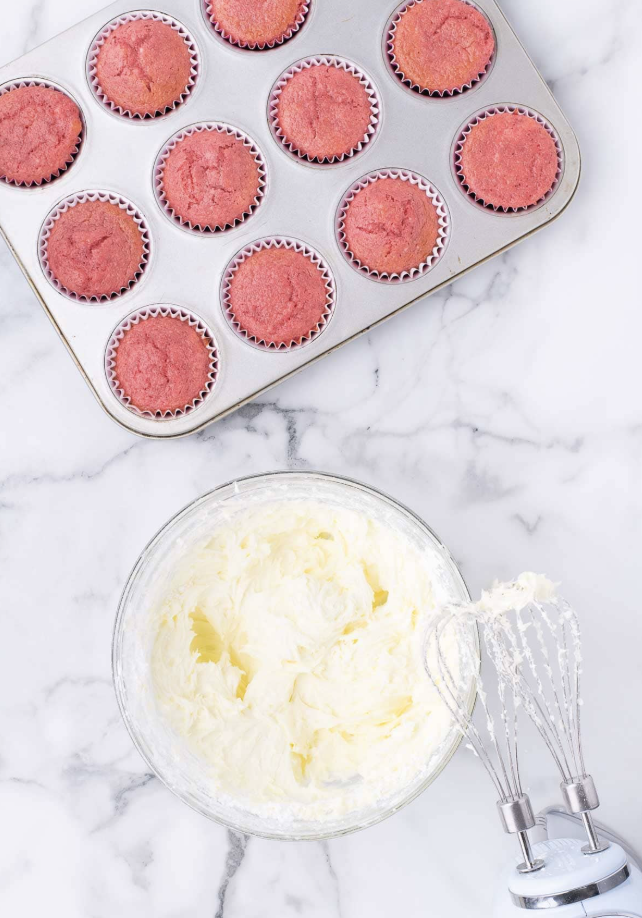
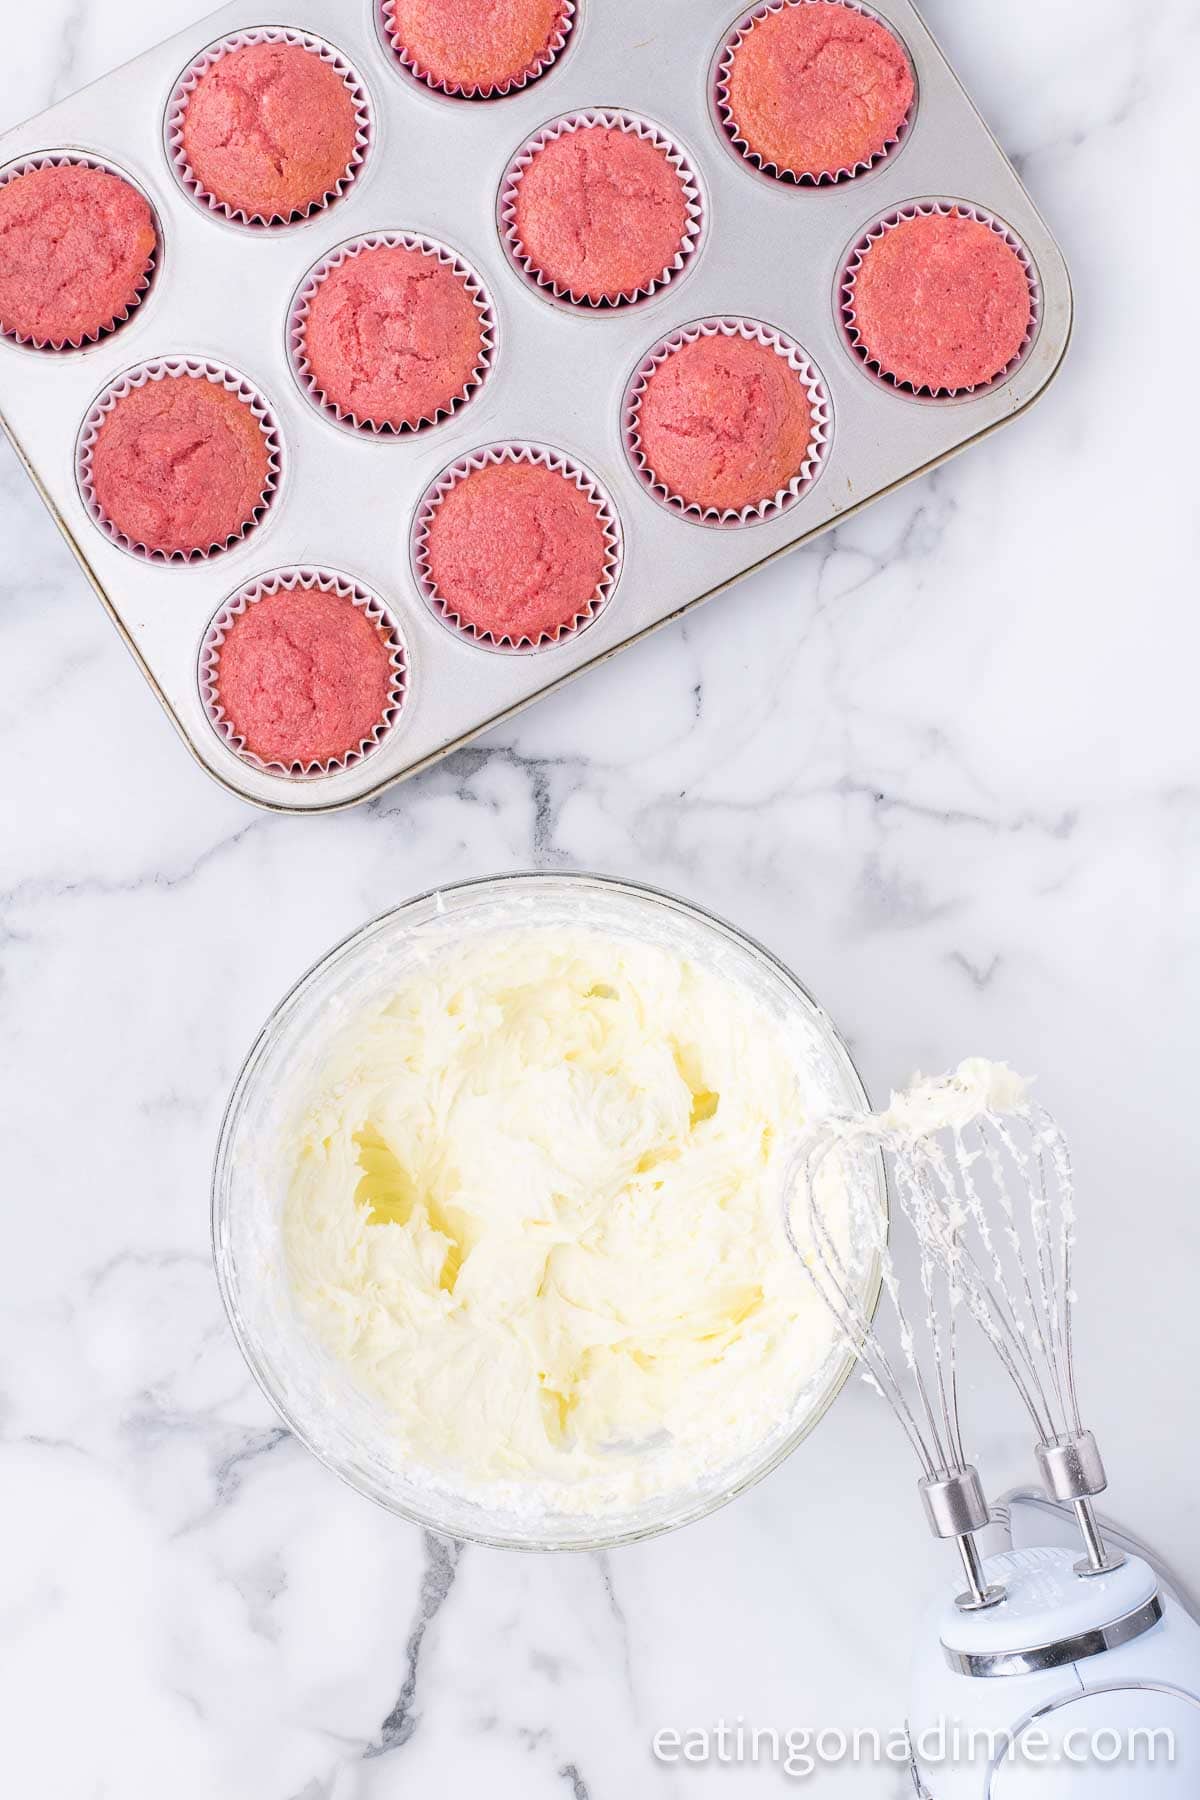
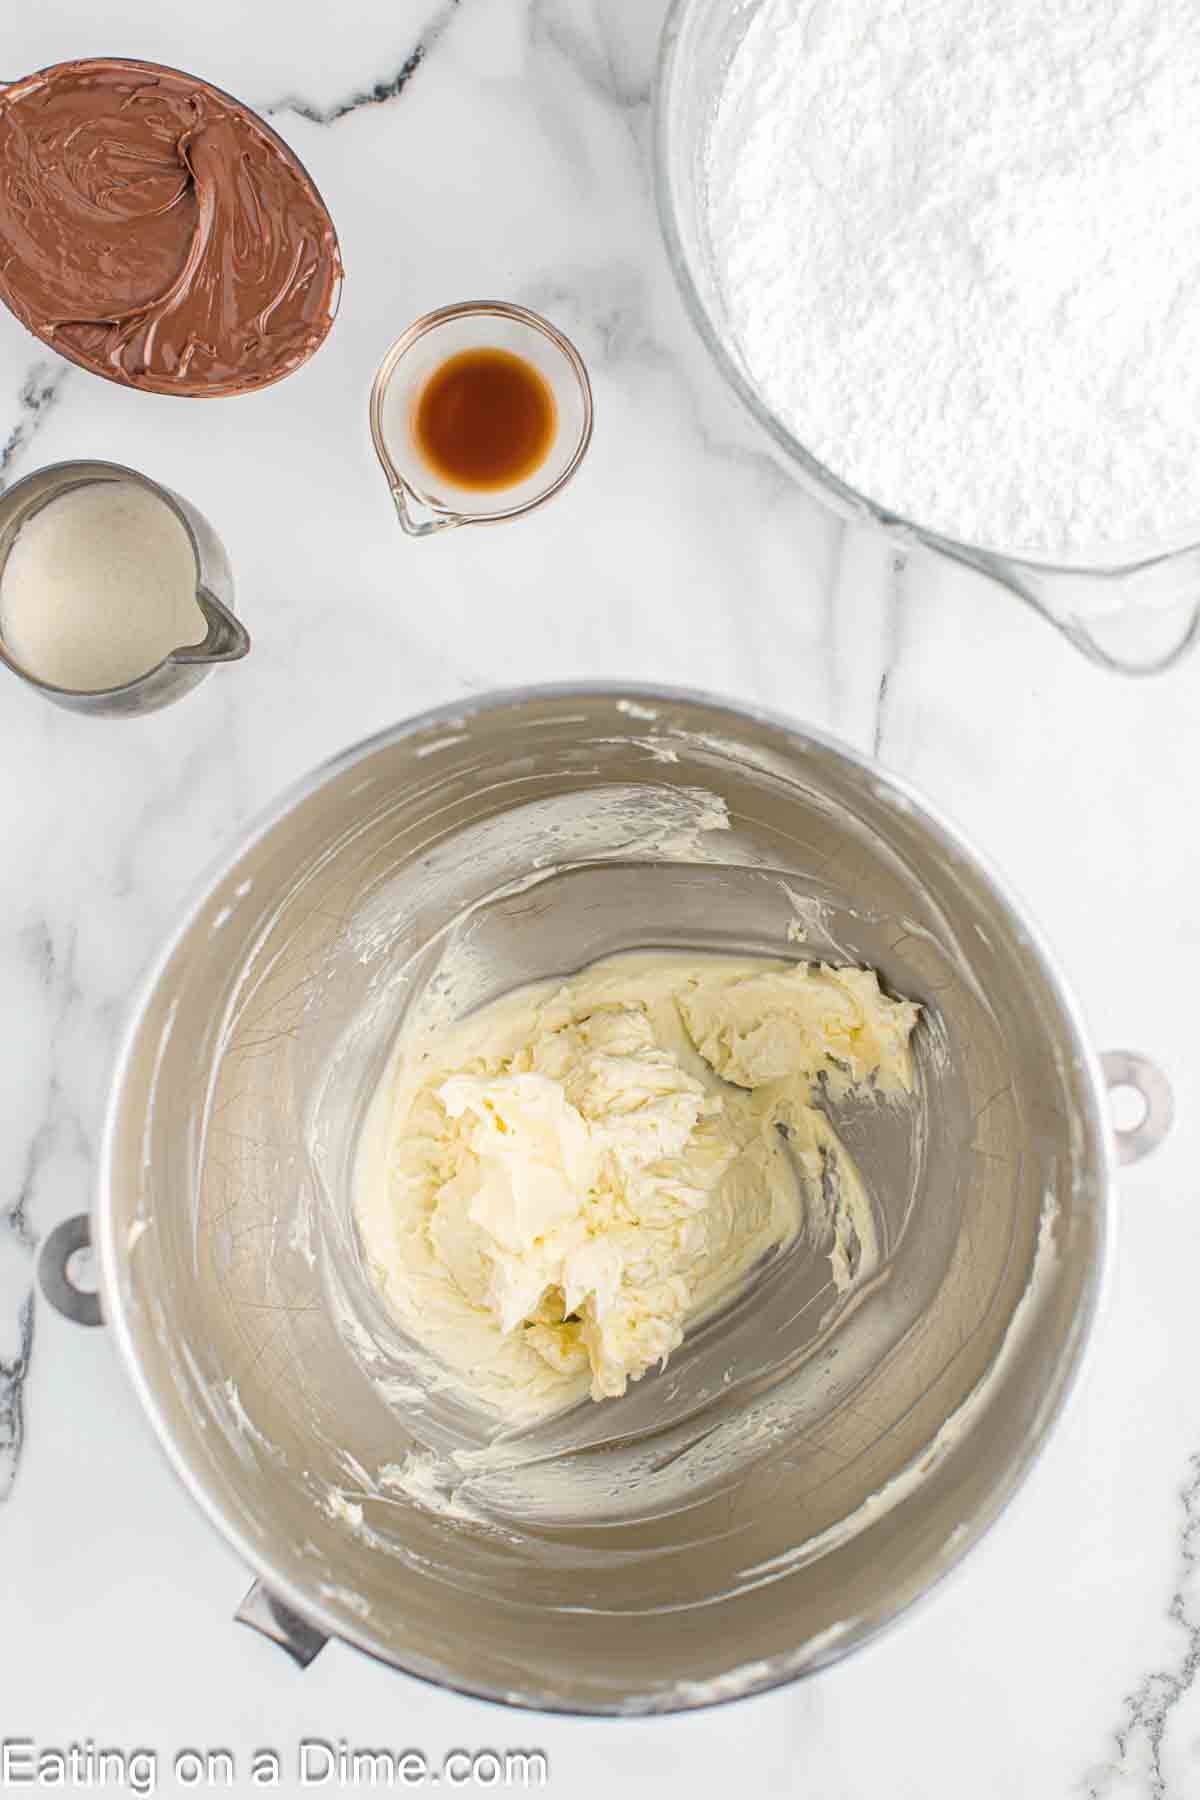
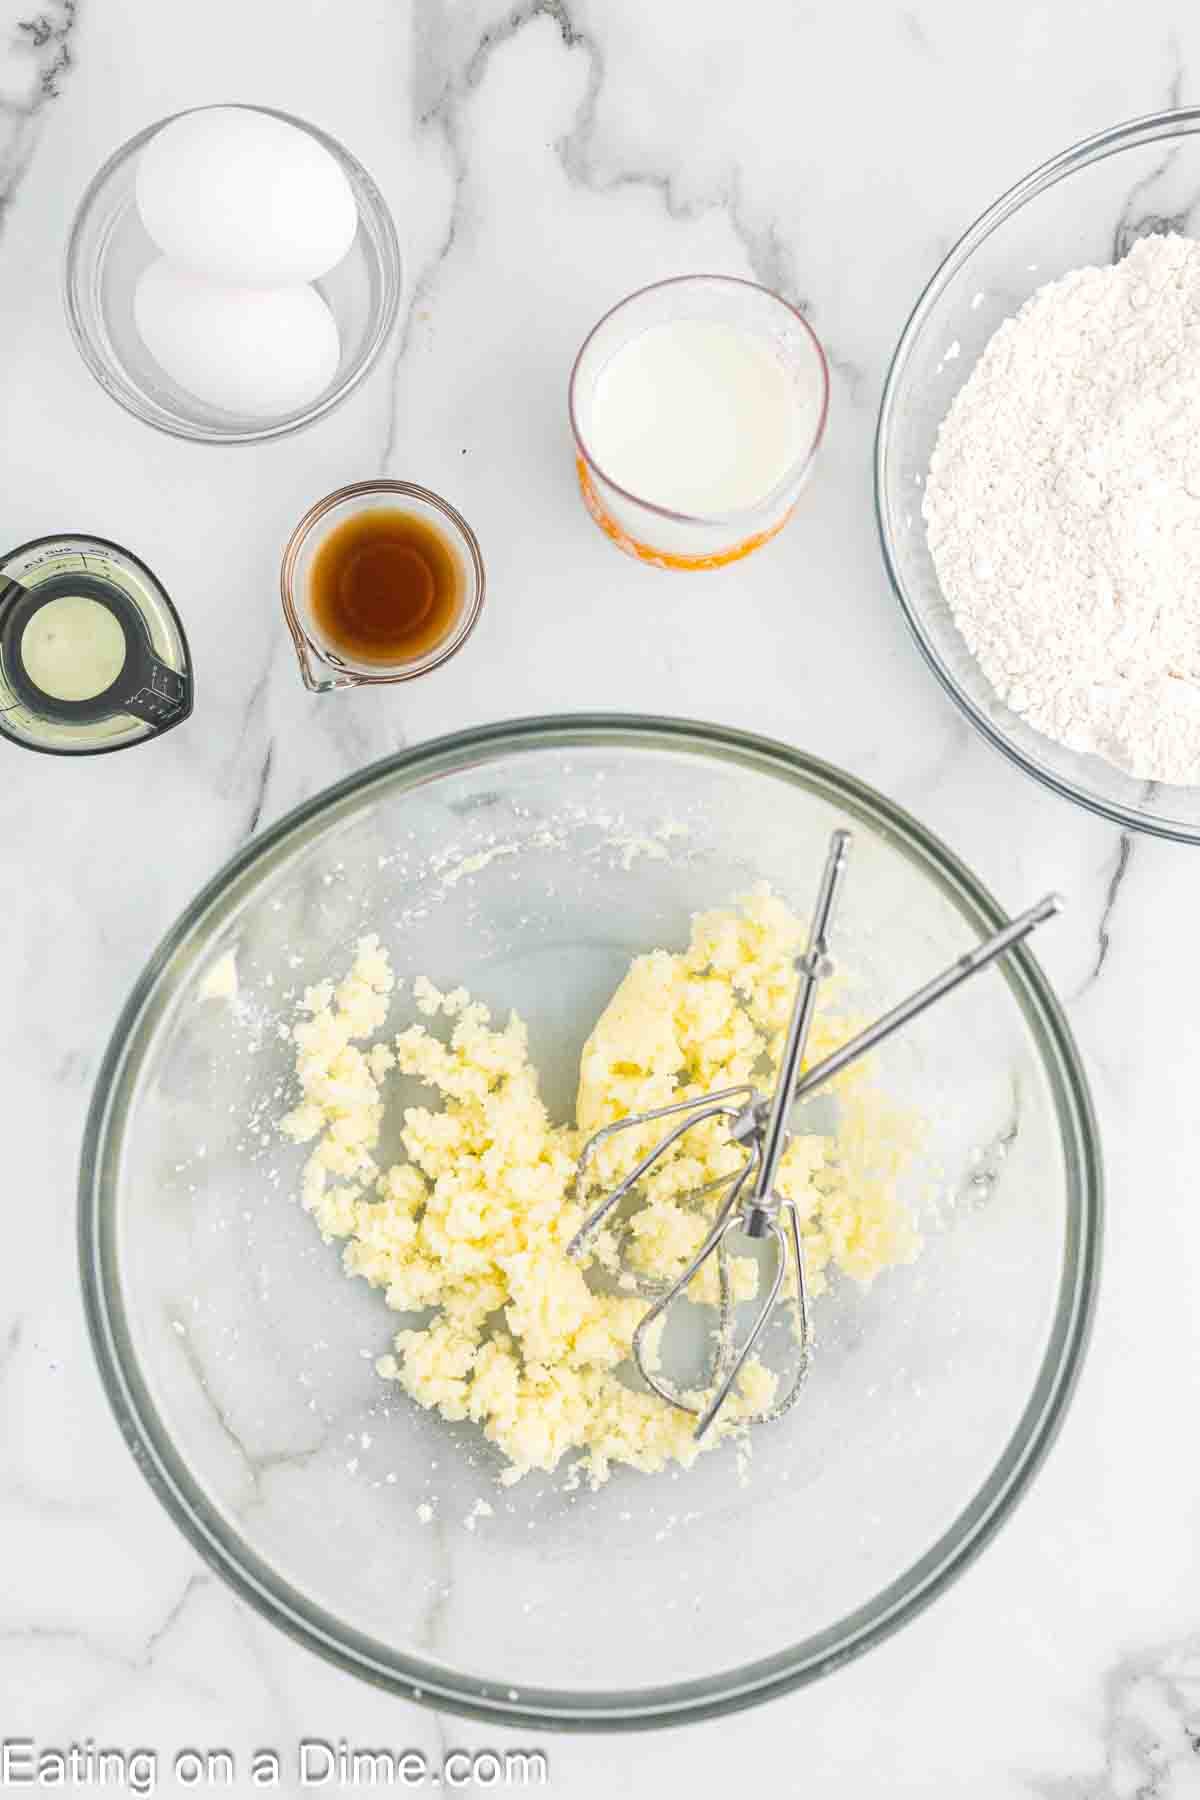
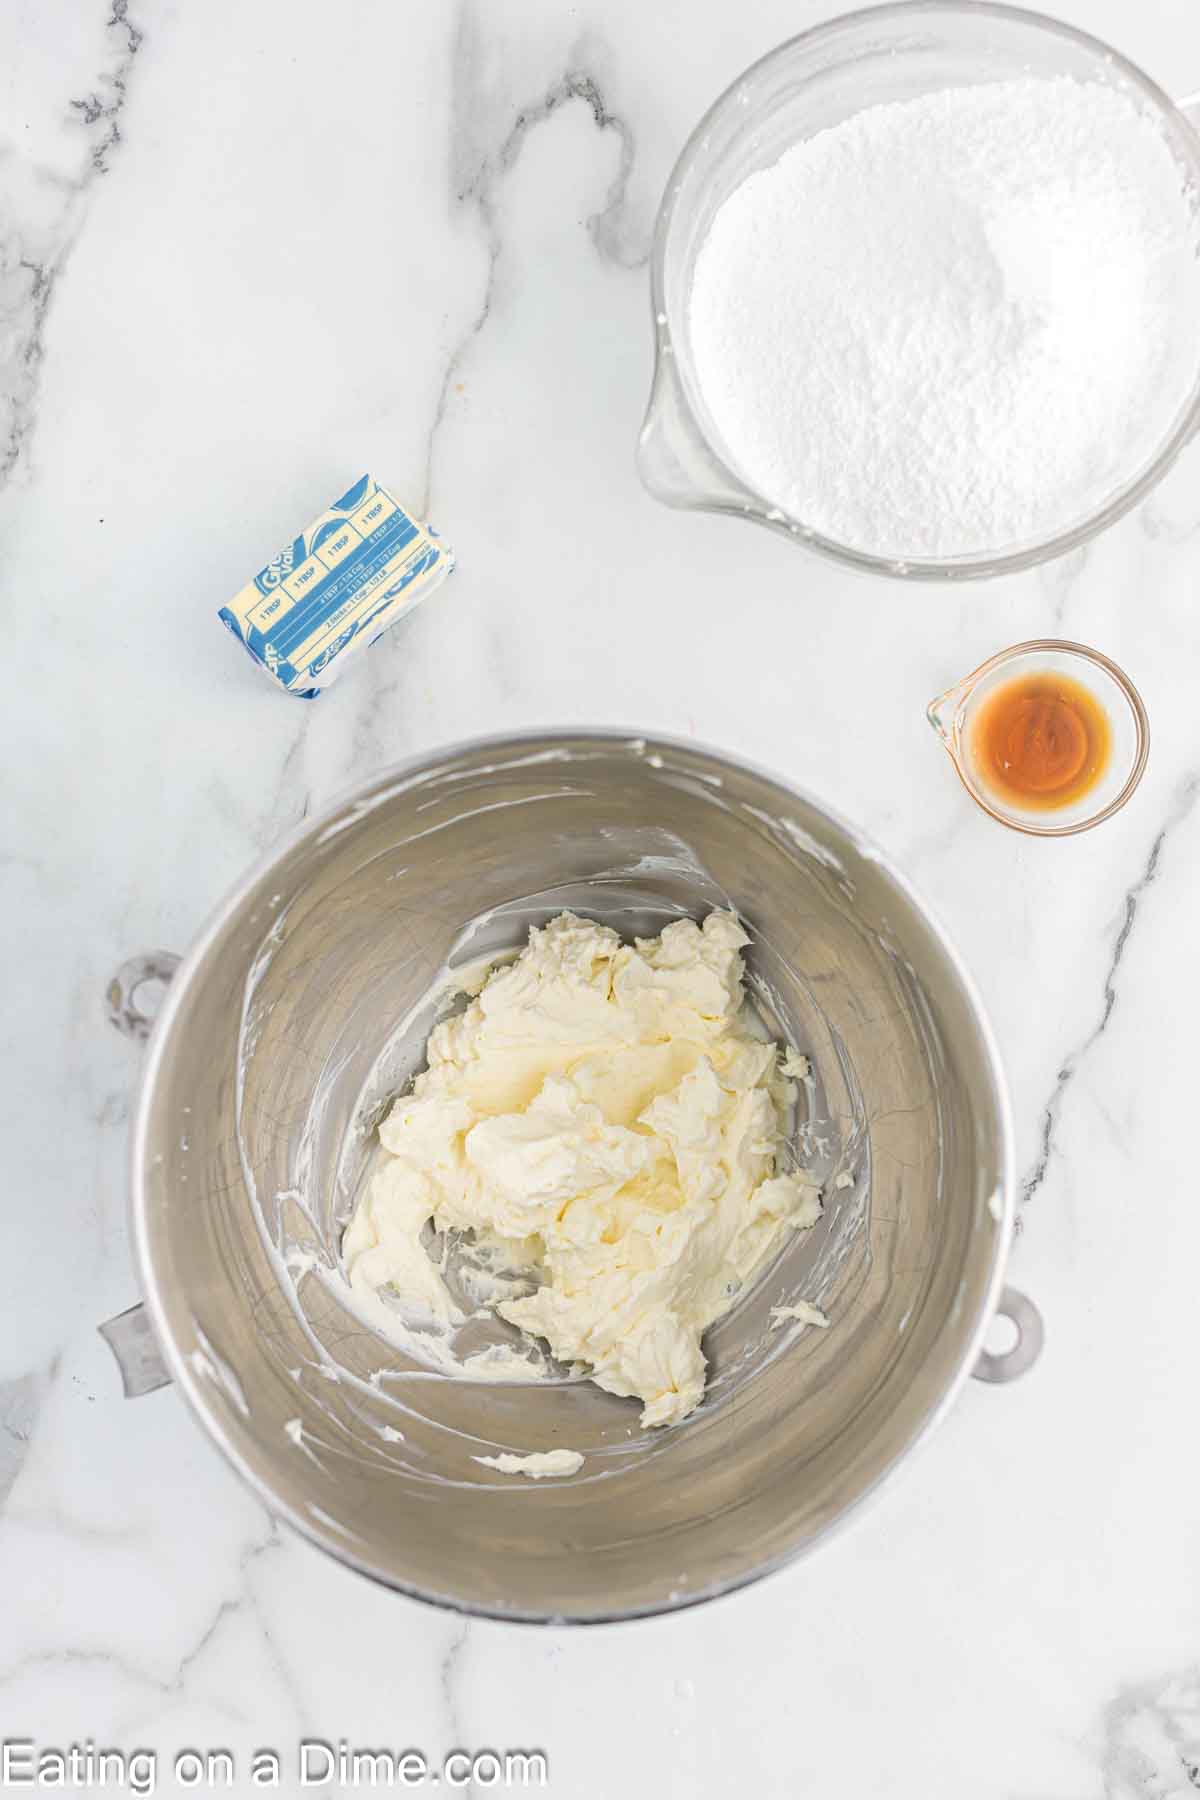
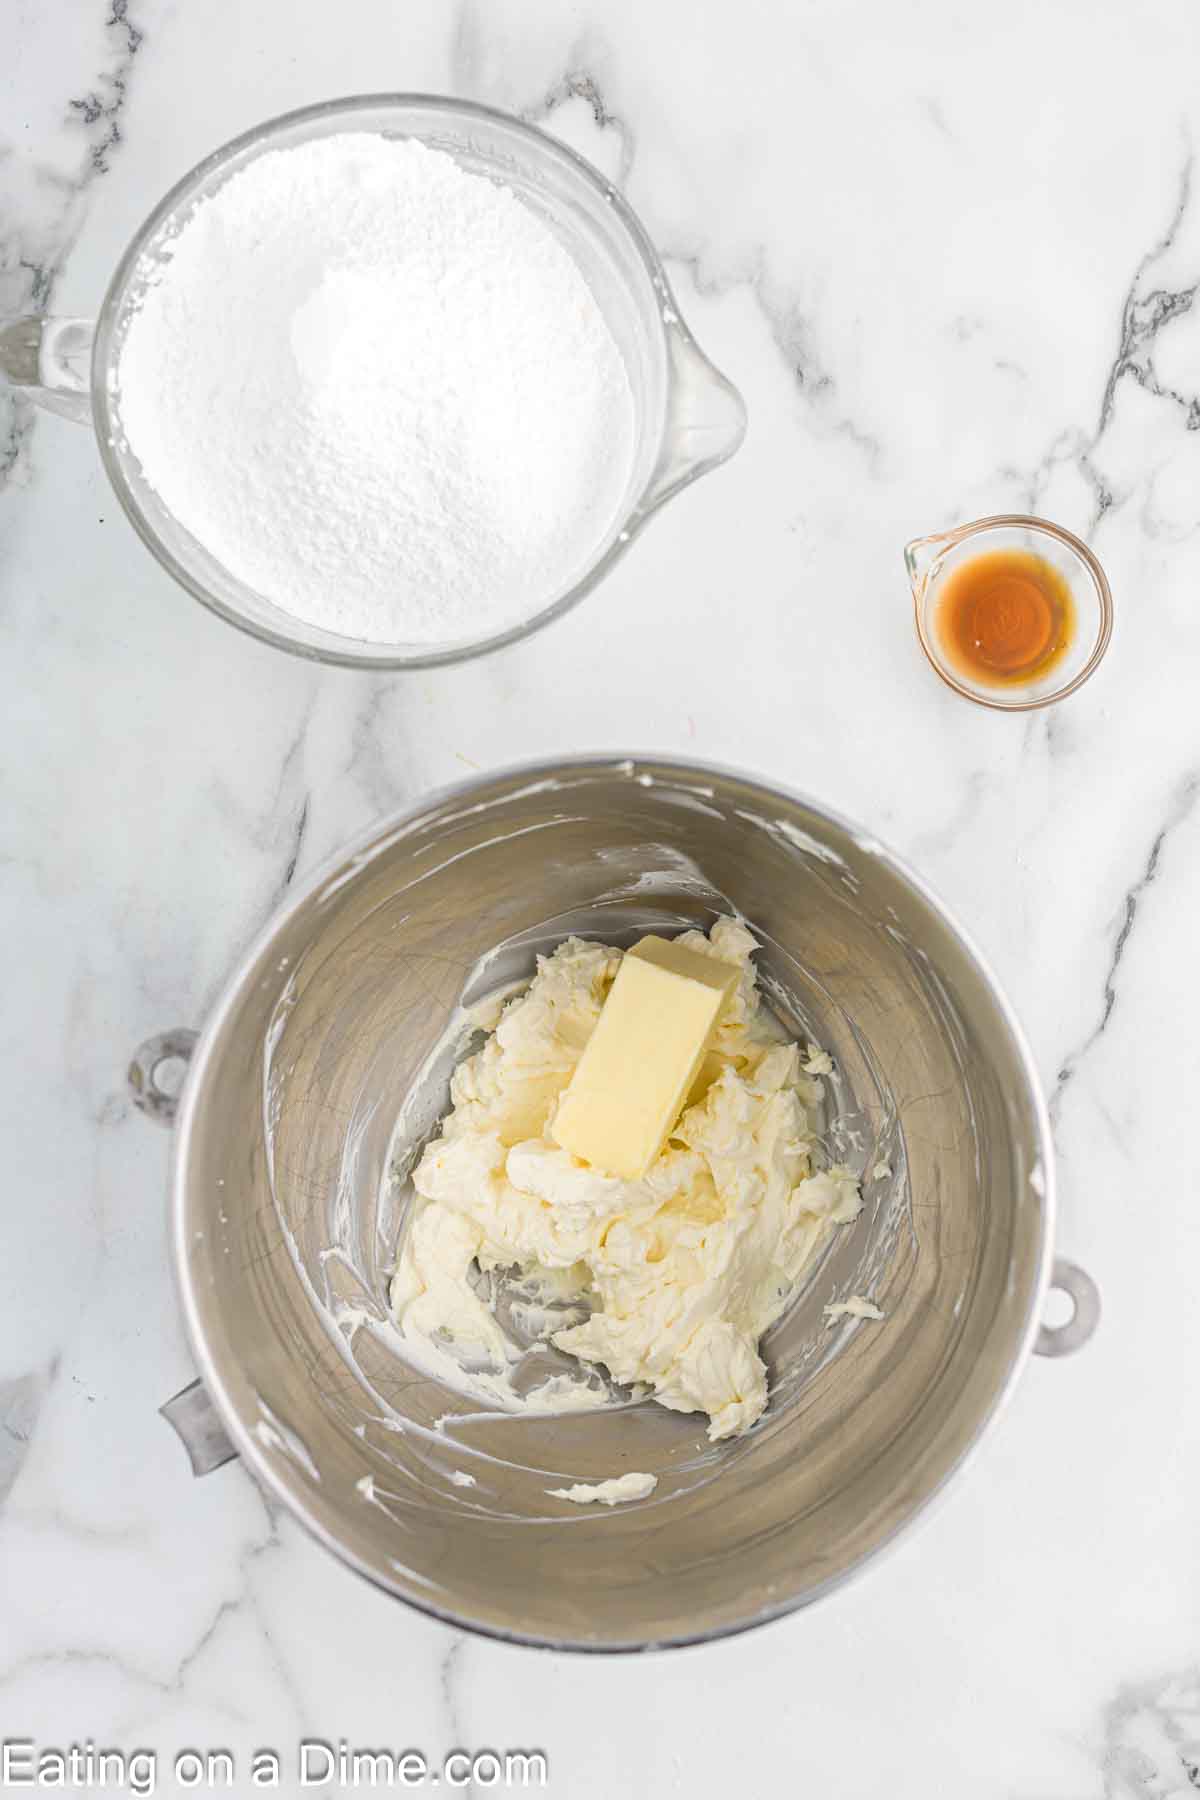
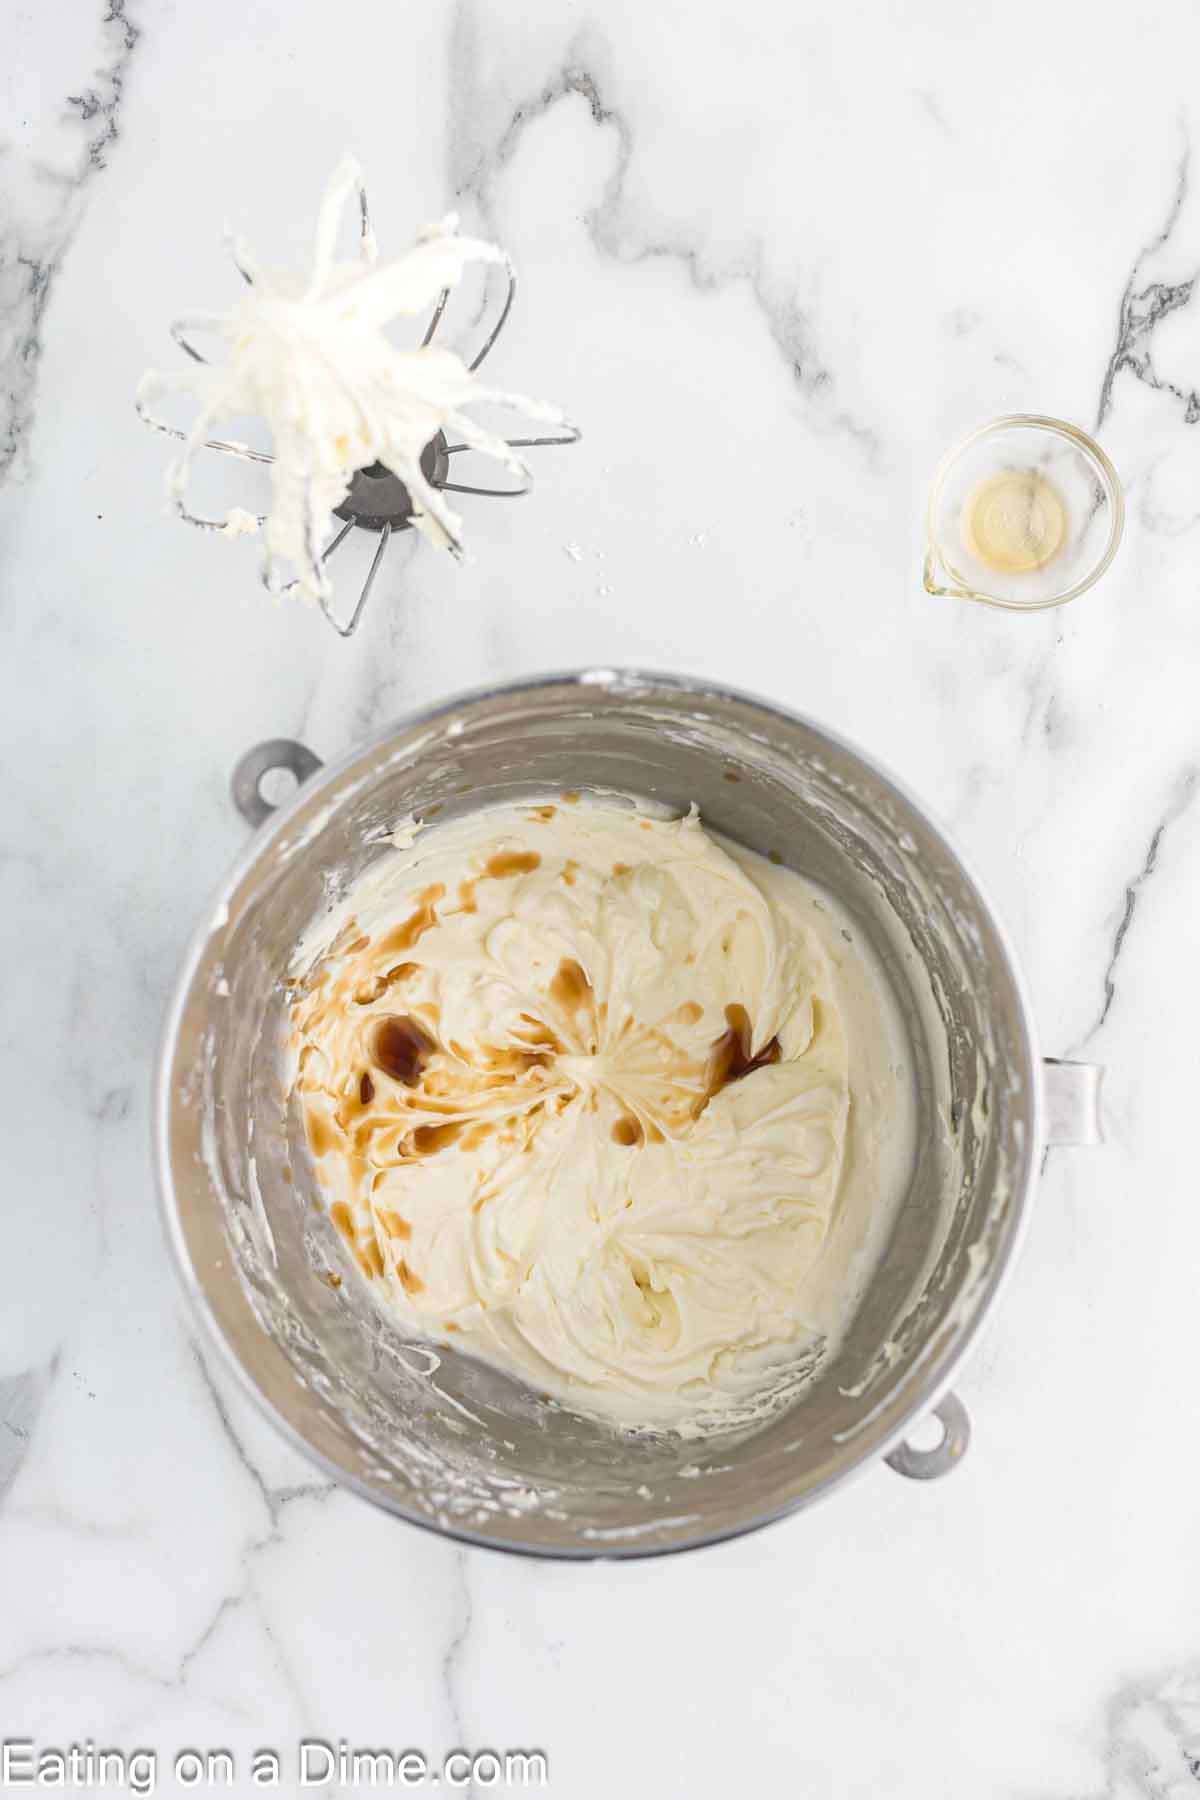
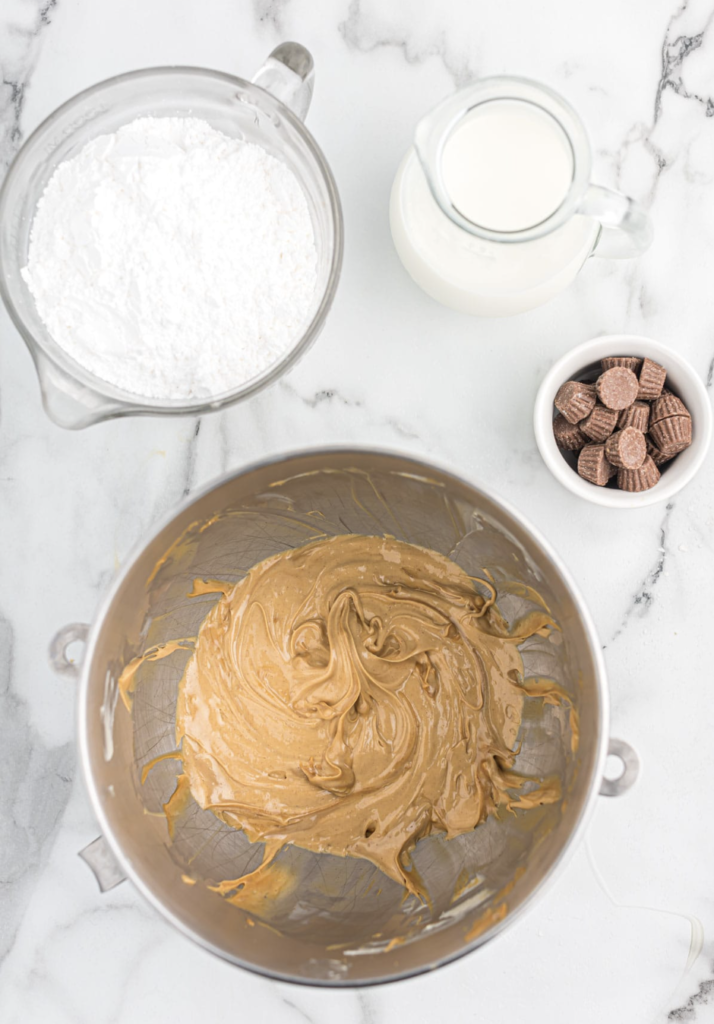
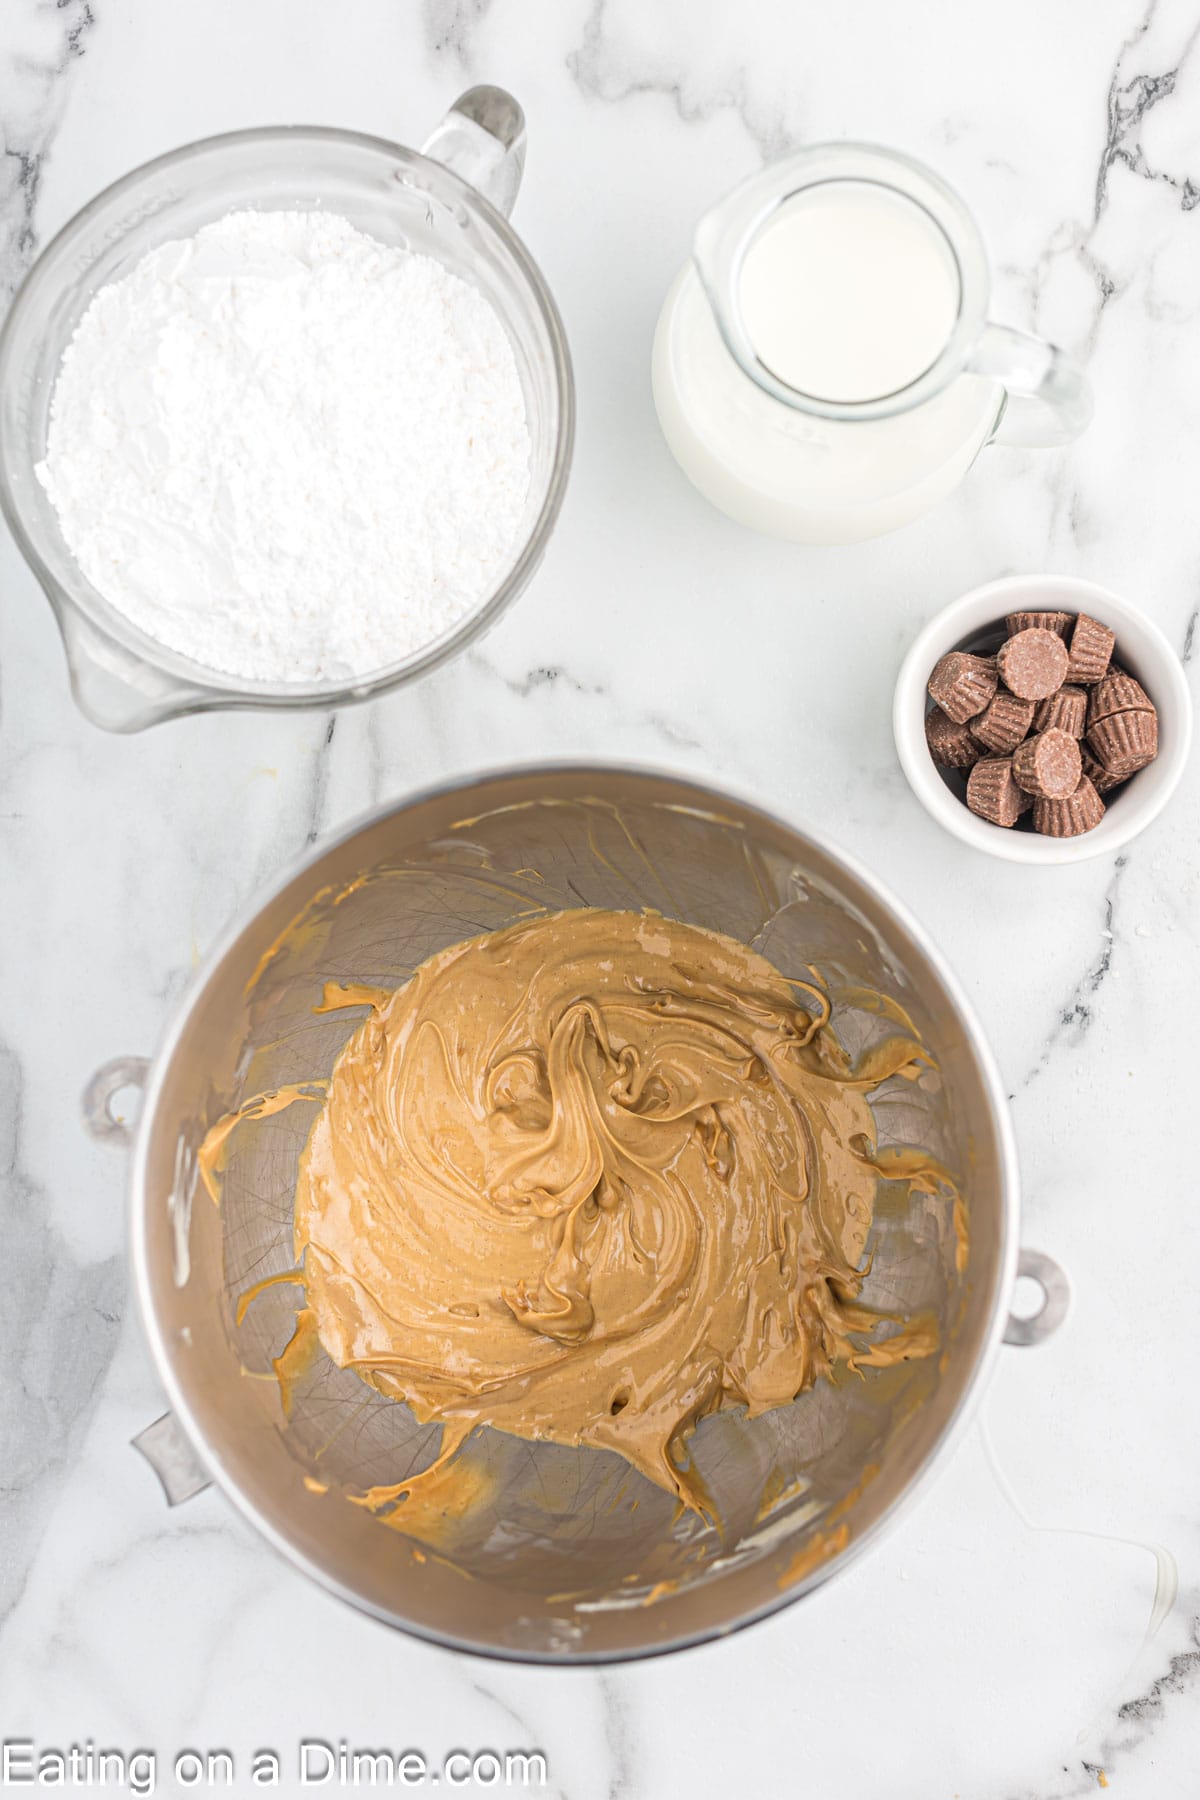
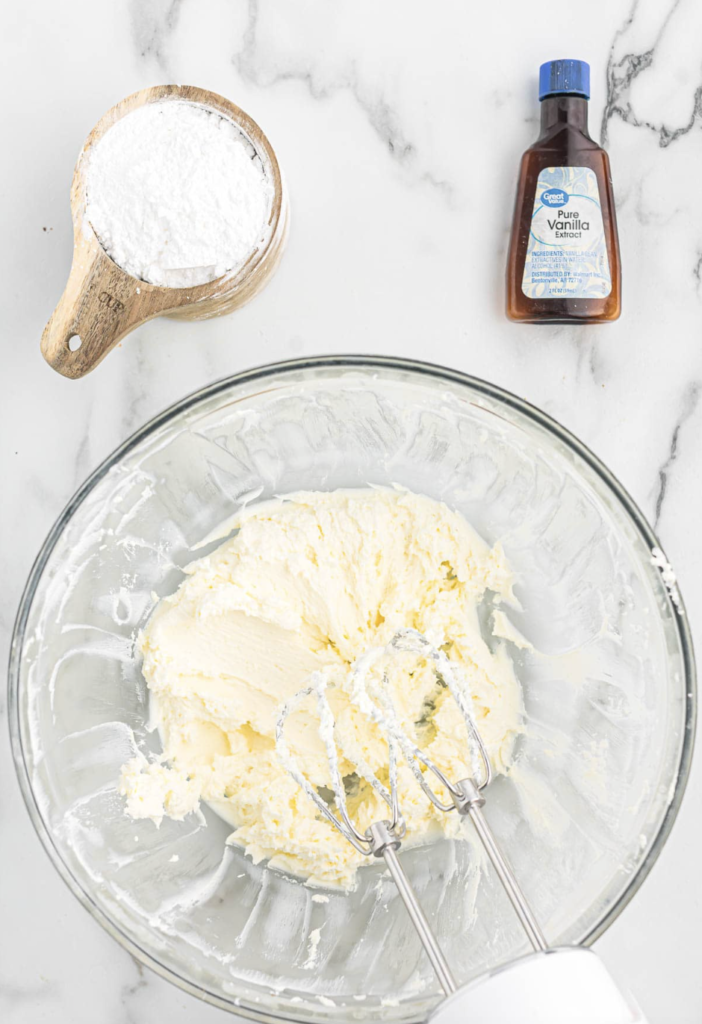
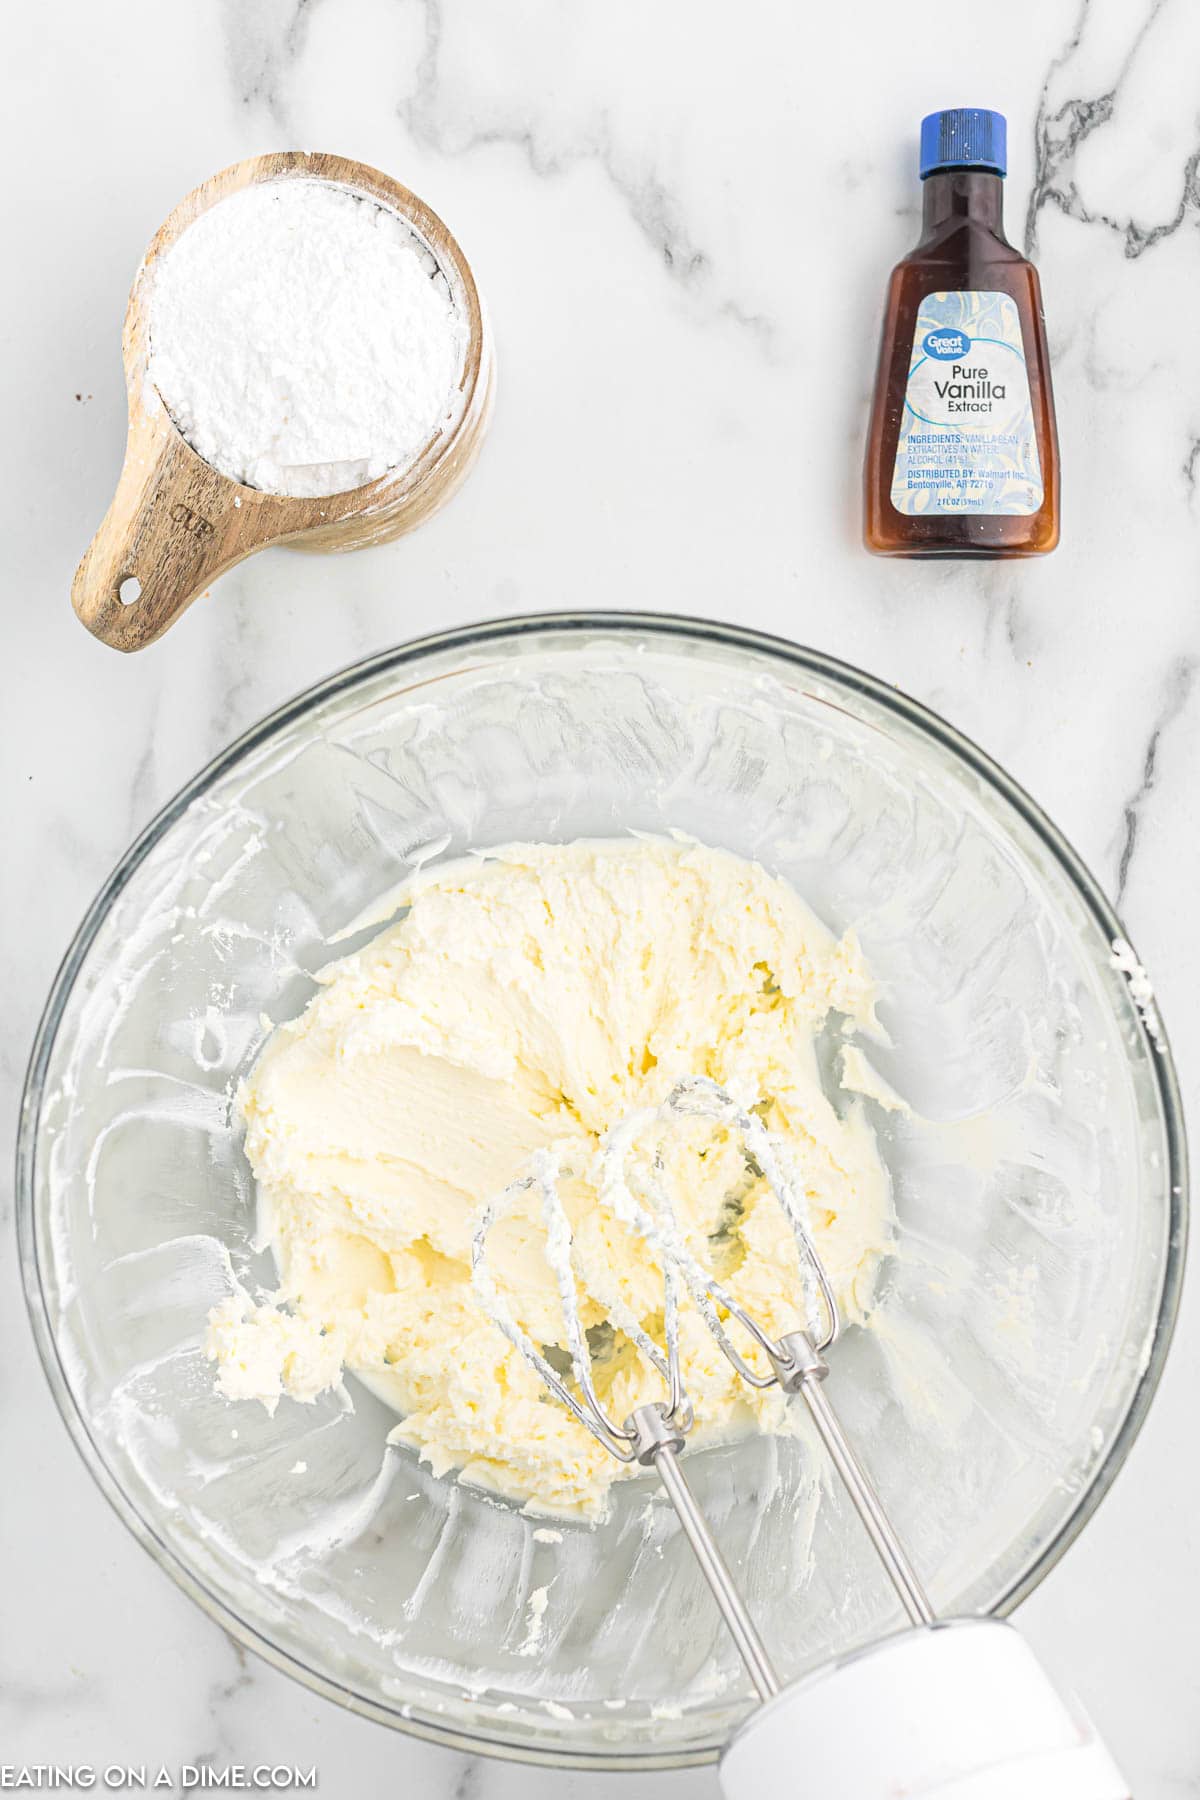
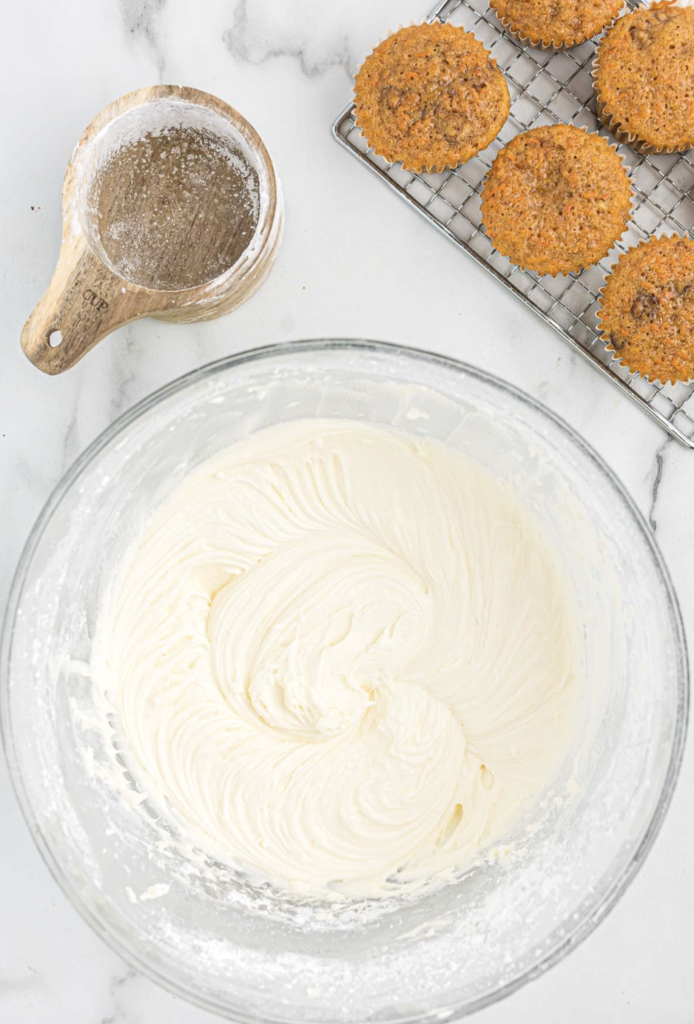
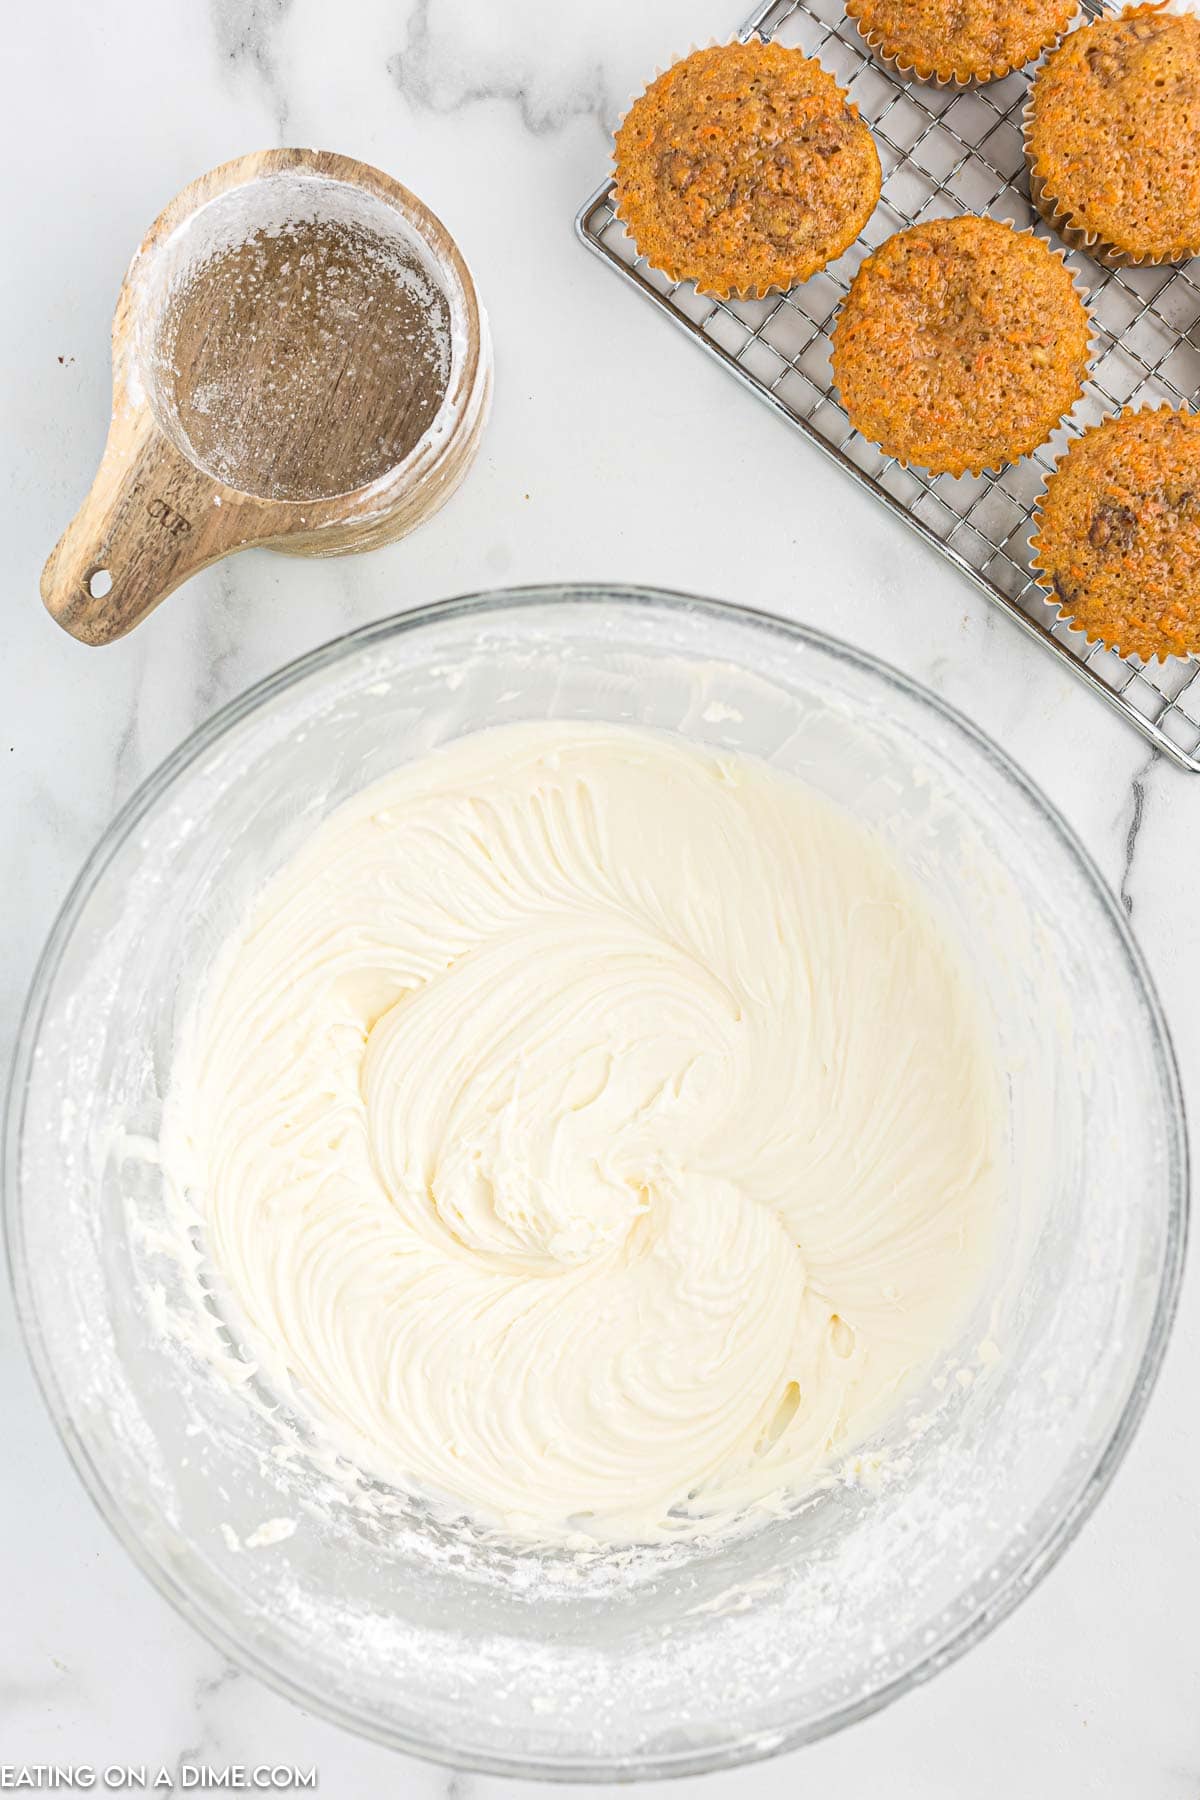
    Step 4 – Cream the butter then slowly add the powdered sugar and lemonade mix.  You can use a stand mixer if you have one. Next, add water as needed but just a little at a time until the frosting is the preferred consistency.


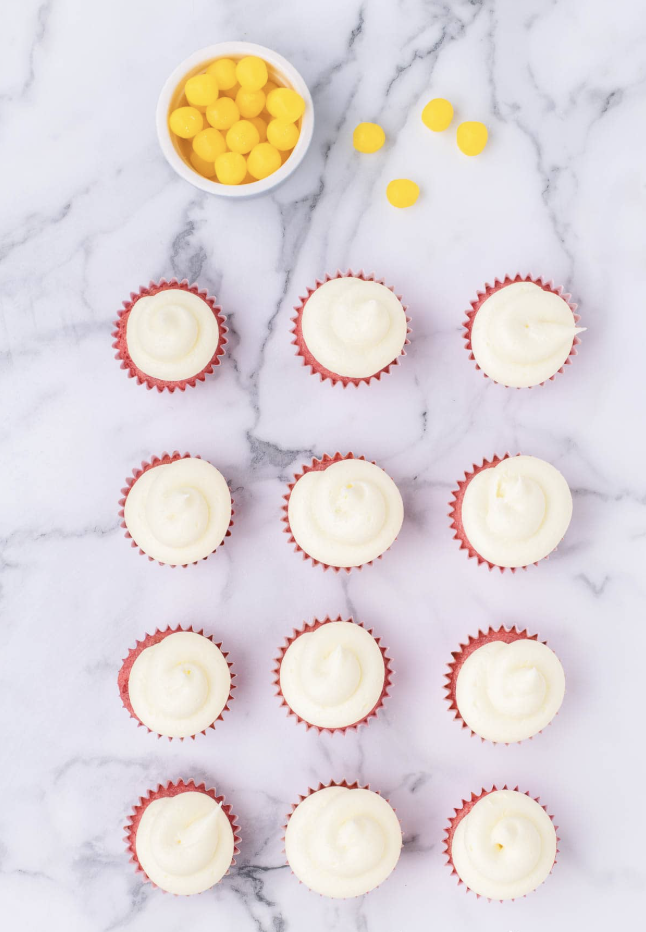
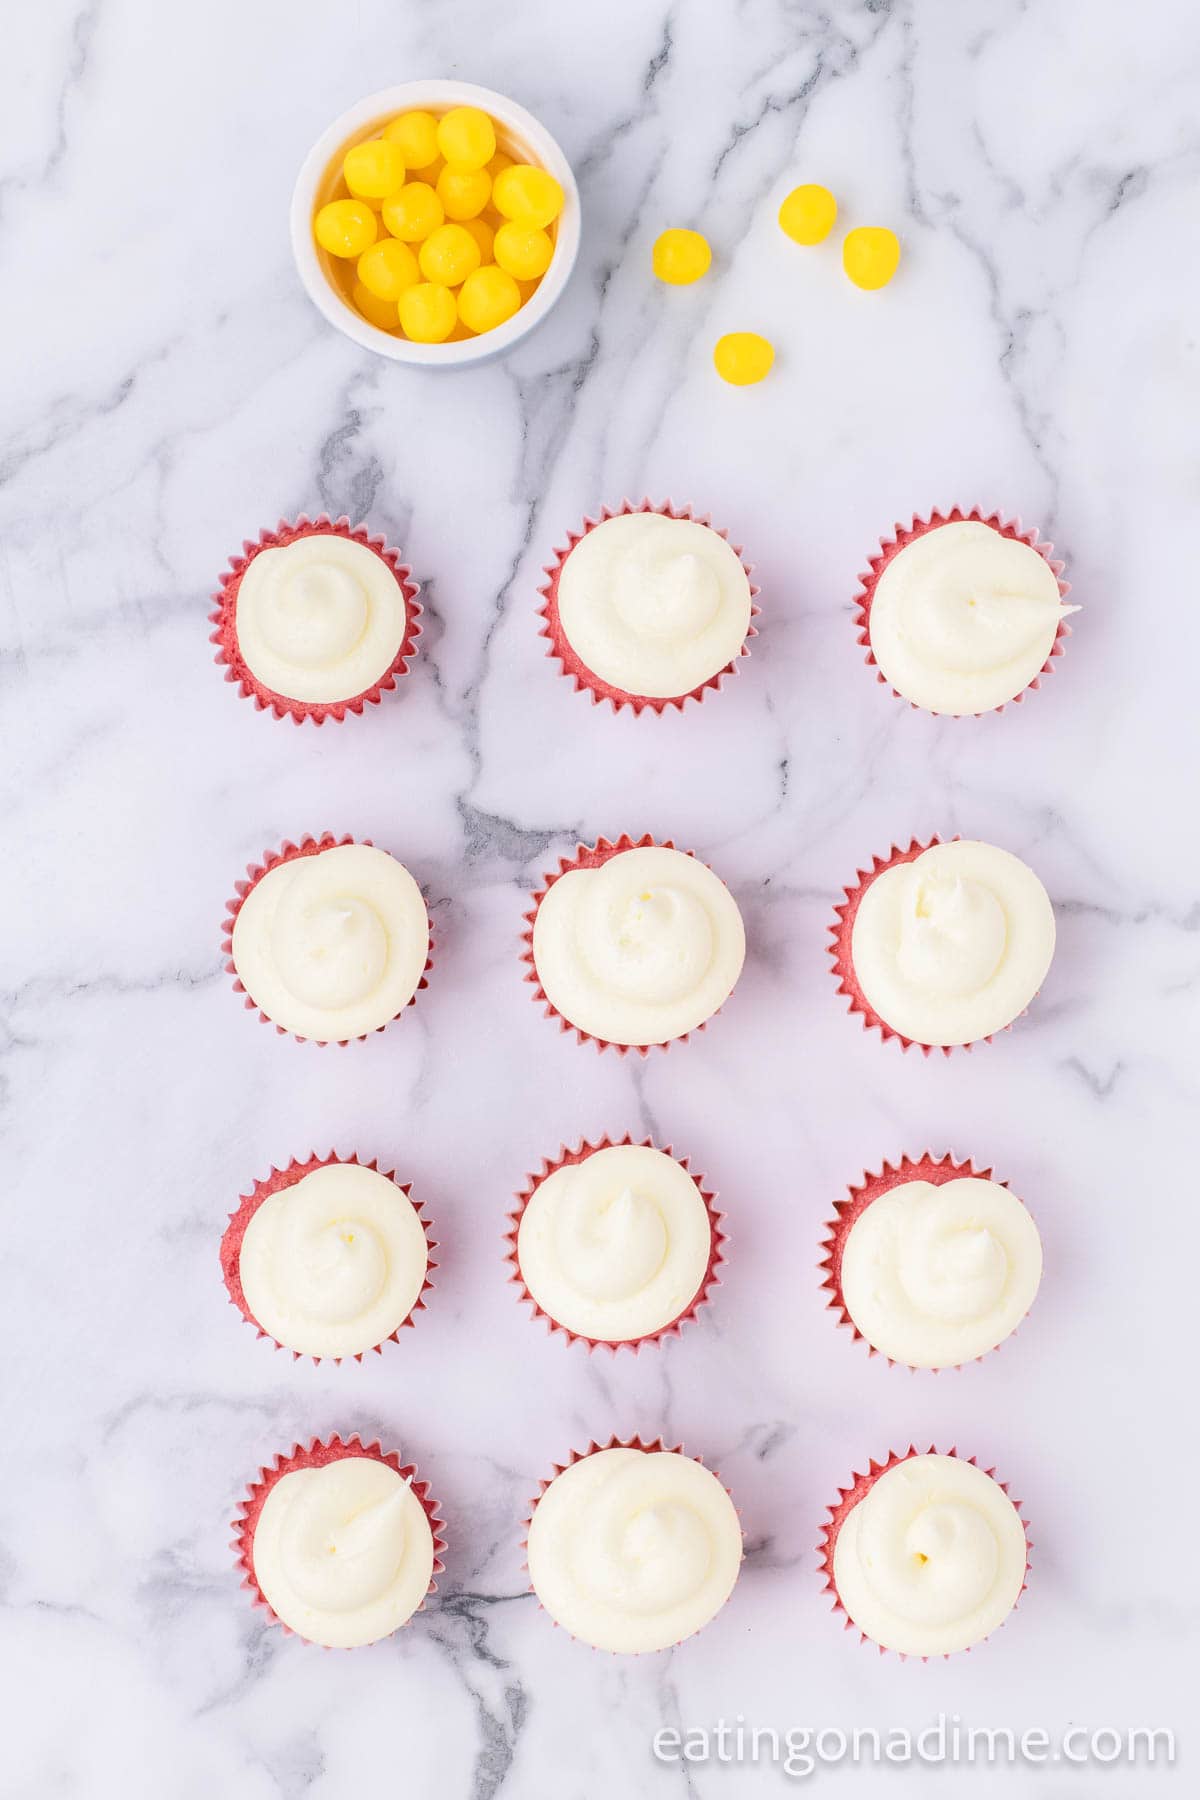
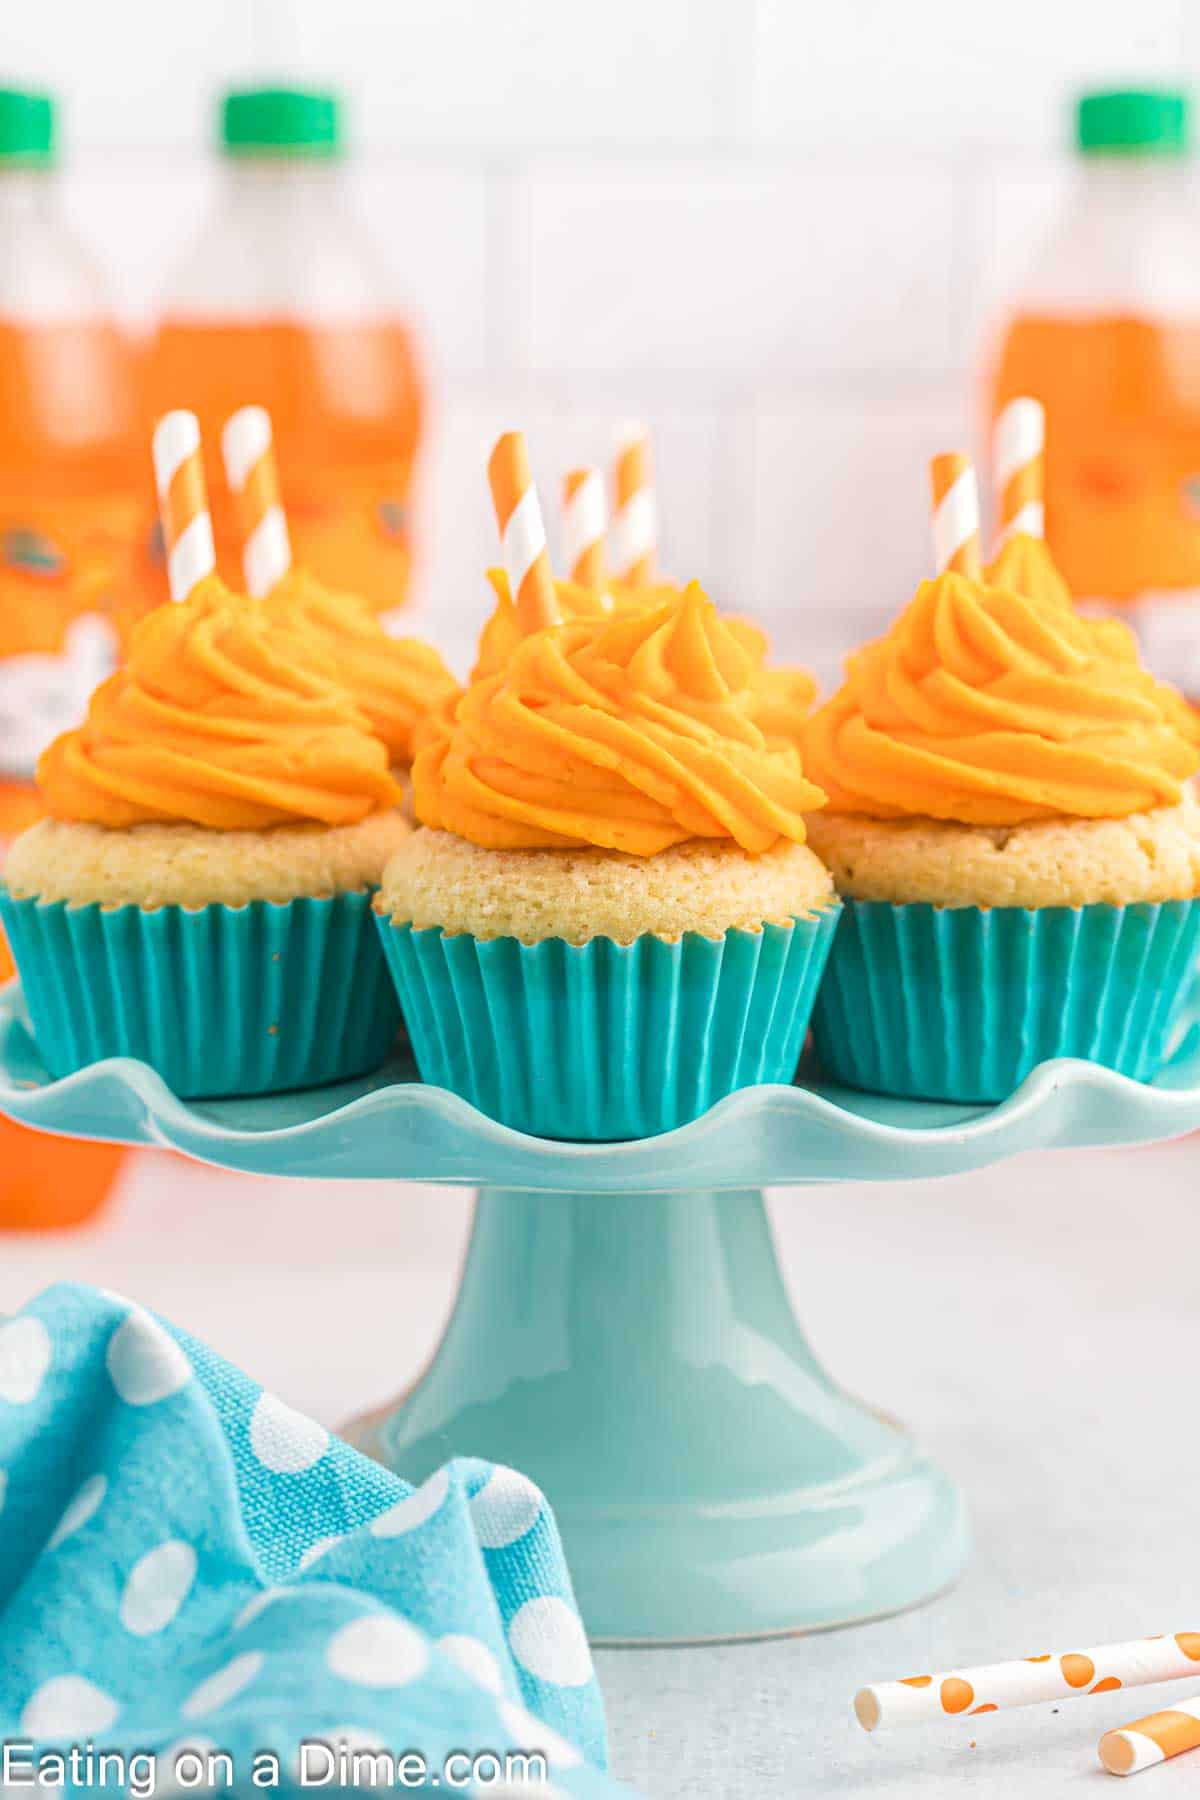
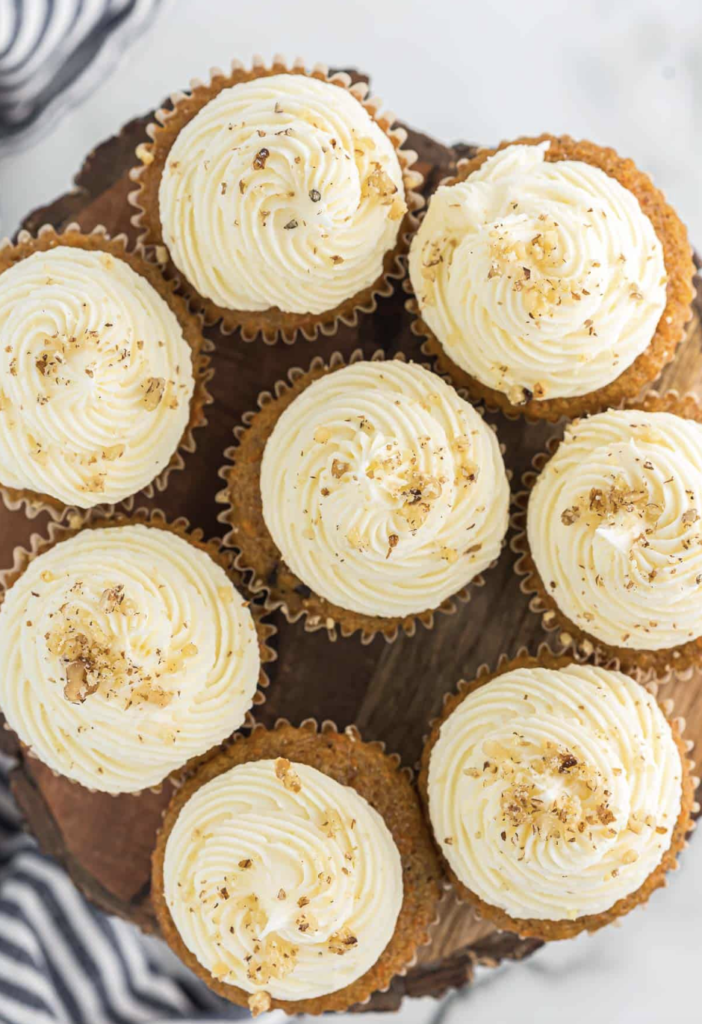
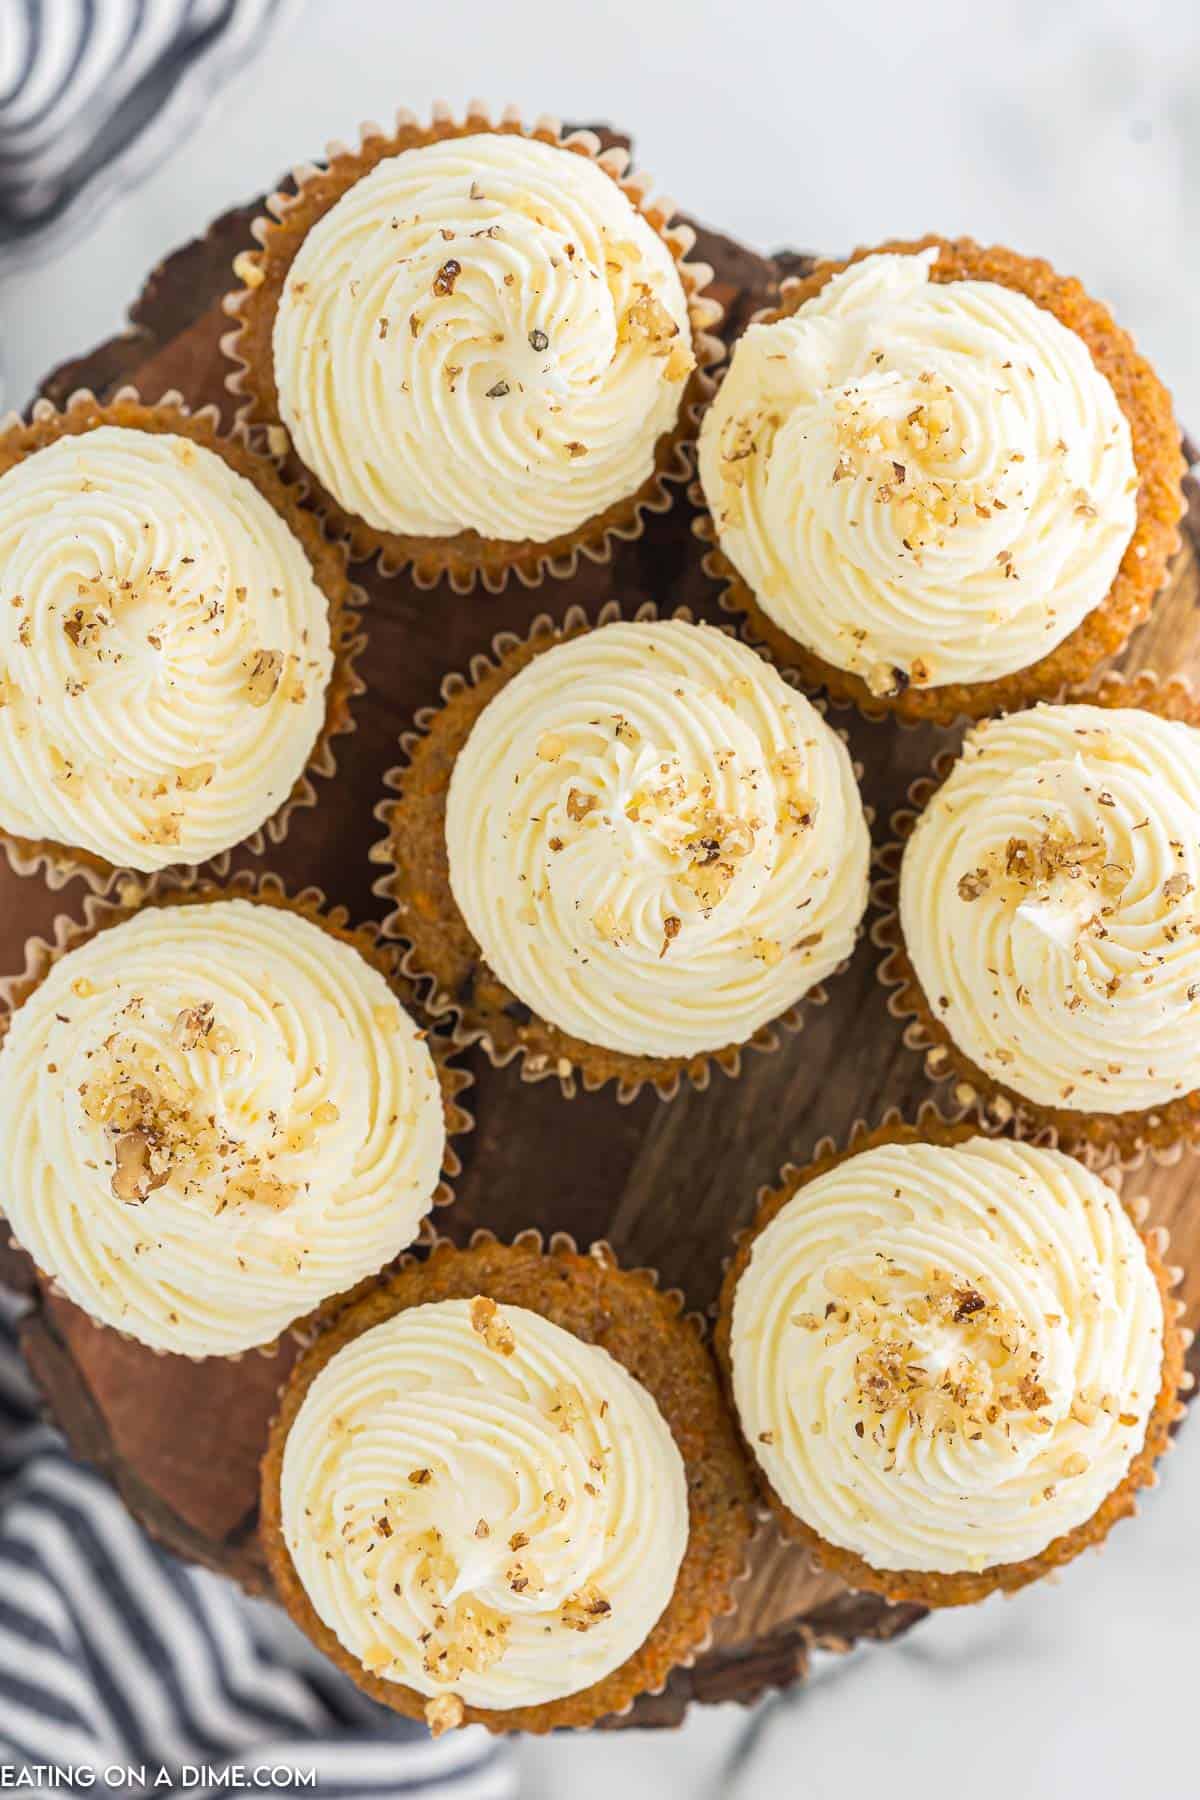
    Step 5 – Put the icing into a piping bag and decorate the cupcakes. I love these Wilton throw away bags because you can just toss them once you are finished.


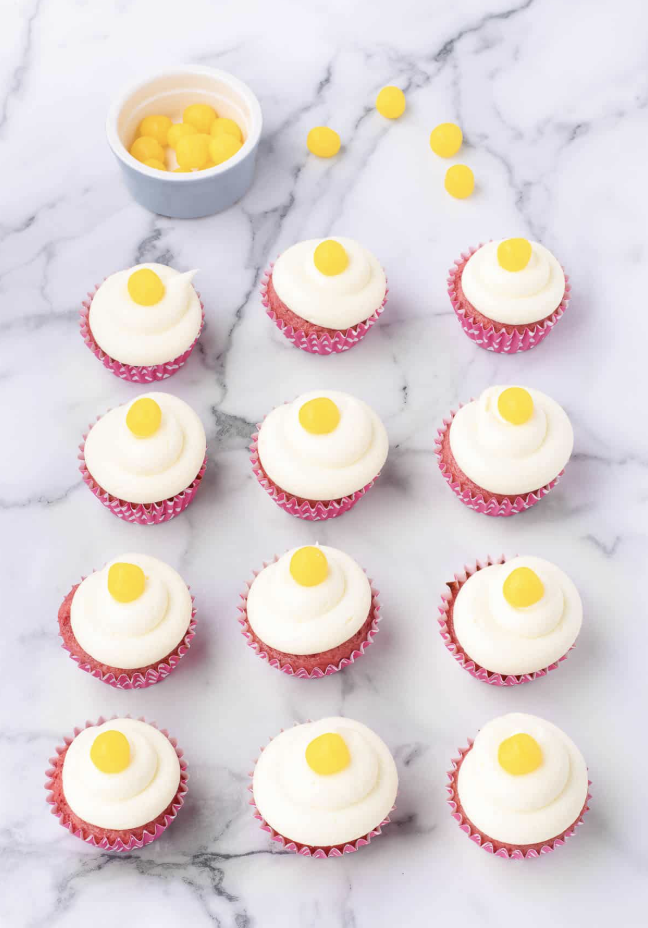
    Step 6 – This last step is optional but you can dust with sparkling sugar, top with lemon candy and a fun straw if you prefer. So fun!

    Recipe Tips

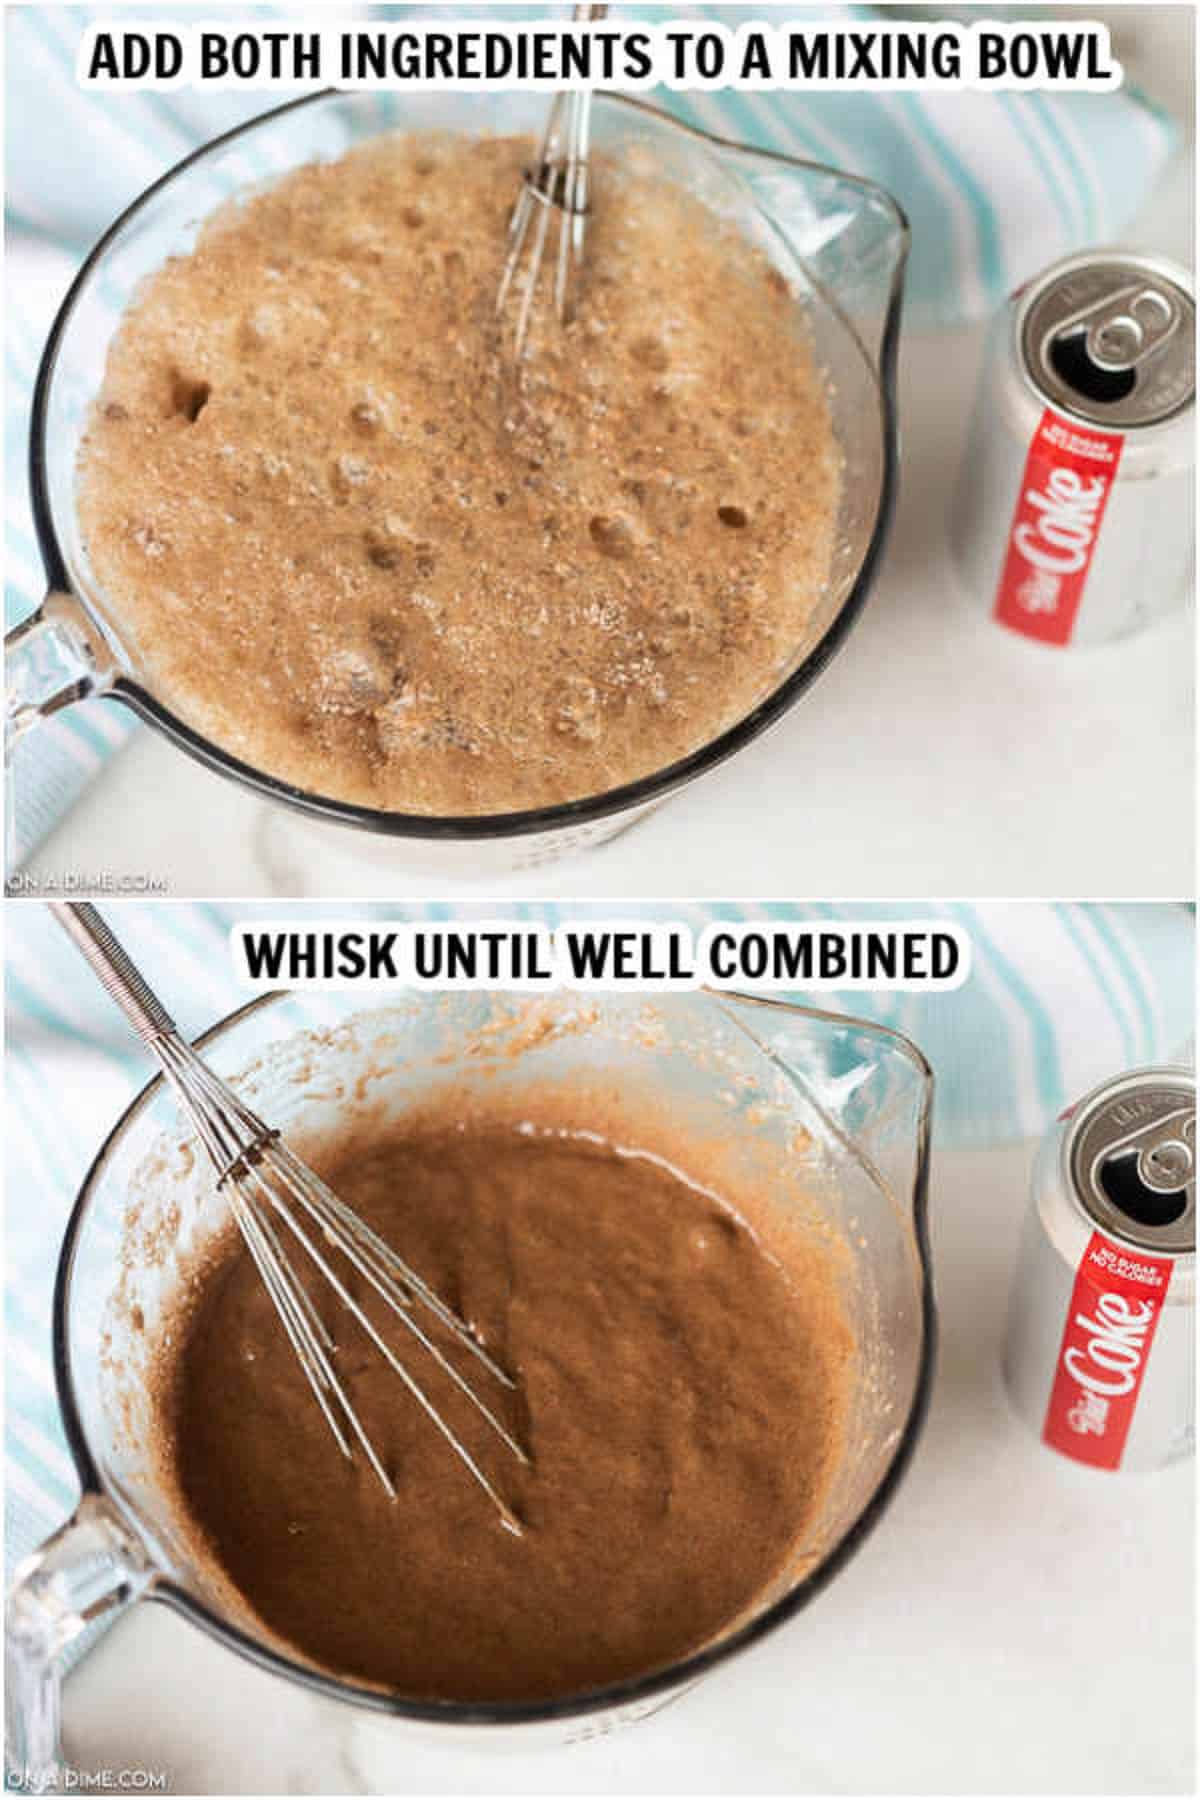
    • Combine Ingredients – We combined the ingredients by hand, but you can also use a stand mixer or a hand mixer.
    • Puree Fruit – For best results, we recommend using a food processor to puree the strawberries. This gives the strawberries the best consistency before pouring into the dry ingredients.
    • Divide Cupcake Batter – Evenly divide the cupcake batter into the paper liners. We like to use a cooking scoop as it seems to be easier and less messy.
    • Cool Cupcakes – Before frosting cupcakes, allow them to cool to room temperature on a wire rack. This will help to distribute the frosting evenly without the cupcakes getting messed up.
    • Frosting the Cupcakes – Use a piping bag to frost the cupcakes. If you do not have a piping bag, another option is to use a ziplock bag. Just cut the corner of the bag and then you can easily frost the cupcakes.

    Frequently Asked Questions

    Can I Make Ahead?

    Yes, this is the perfect recipe to make ahead of time. We recommend preparing the cupcakes and then storing them in an airtight container. Then when ready to serve add your frosting and toppings.

    How to Store Leftovers

    Store your leftovers in the fridge in an airtight container for up to 5 days.

    Can I Freeze Cupcakes?

    Yes, you can freeze these cupcakes. Once the cupcakes have cooled to room temperature, store in a freezer safe container or zip lock bag. We recommend frosting after thawing to create a beautiful pink cupcake.


    •  


    Print
    clock clock iconcutlery cutlery iconflag flag iconfolder folder iconinstagram instagram iconpinterest pinterest iconfacebook facebook iconprint print iconsquares squares iconheart heart iconheart solid heart solid icon

    Strawberry Lemonade Cupcakes

    5 Stars 4 Stars 3 Stars 2 Stars 1 Star No reviews
    • Author: Hannah

    Description

    This delicious Strawberrry Lemonade Cupcakes recipe is make with real strawberries and actually lemonade! They are delicious!

    Ingredients

    Scale

    For the Cupcakes:

      • 1 box White Cake Mix
      • 1 box Strawberry Jell-O
      • 2 tbsp Sweetened Lemonade mix
    • 16 oz thawed package Frozen Strawberries in Sugar or your could use FRESH strawberries when they are in season
    • 3 Eggs
    • 1/3 cup Vegetable Oil

    For the Frosting and Serving:

    • 1/2 cup Butter
    • 6 cups Powdered Sugar
    • 1/4 cup Sweetened Lemonade mix
    • 2 tbsp Water
    • Chewy Lemonheads candy optional

    Instructions

    For the Cupcakes:

    • Preheat oven to 350 degrees Fahrenheit.
    • Stir together Cake mix, dry Jello and 2 tbsp lemonade mix.
    • Puree strawberries.
    • Add strawberries, eggs and vegetable oil to dry ingredients.
    • Mix until smooth and blended.
    • Place liners in cupcake pan and fill 2/3 to 3/4 full.
    • Bake about 20 minutes.
    • Allow to cook completely.

    For the Frosting and Serving:

      • Cream butter in a medium bowl
    • Slowly add in the powdered sugar and 1/4 cup lemonade mix. Add water as needed, until everything is incorporated and frosting is right consistency.
    • Transfer icing to piping bag or zippered bag and clip corner to pipe.
    • Ice tops of each cupcake and top each cupcake with a Lemonhead candy.

  • Skinny Chocolate Cupcakes – Diet Coke Cupcakes

    Skinny Chocolate Cupcakes – Diet Coke Cupcakes

    This skinny chocolate cupcakes recipe is delicious! Coming in at only 80 calories each, they’ll become your new favorite treat! They are so moist, you don’t even need icing which makes them that much easier to make!
    After I tried my first version of Skinny Cupcakes with Sprite Zero and Low Calorie Brownies, I just had to try a chocolate version. Let’s just be honest here, I am a woman, so I have to have chocolate, even if I am trying to drop a few pounds. Sprite Zero mixed in with chocolate seemed just plain weird to me, so for my skinny chocolate cupcake recipe I used a Diet Coke. The result was absolutely amazing!

    These Skinny Chocolate Cupcakes are a winner!

    Everyone, including the kids and the husband didn’t want to eat just one. Good thing 2 skinny chocolate cupcakes is still less calories than one regular cupcake! Instead of having over 200 calories like a normal cupcake, this baby only has 80 calories in it! Can you really go wrong? Not only do these diet coke cupcakes have less than 100 calories each — there’s only 2 ingredients!Guys, these are probably the easiest cupcakes ever which means no guilt all around!

    2 Ingredients:

    • Diet Coke
    • Chocolate Cake Mix
    I love using a cake mix to make these easy cupcake recipe.  You don’t have to worry about how much flour or baking soda to use, it’s already all included in the cake mix!

    How to make Skinny Chocolate Cupcakes:

    • First you need to preheat your oven to 350 degrees.
    • Next, in a medium bowl. Add the dry chocolate cake mix to the bowl and add in the diet coke. Really, just about any dark diet soda will work here if you don’t like Diet Coke.
    • Just like in my first version of the skinny cupcake, when you pour in the soda with the cake mix, it will fizz. Don’t let that freak you out, it will look like regular cupcake batter after you mix it.
    • Then whisk the ingredients together until combined.
    • After the cake is mixed together, place paper liners in a muffin pan. If you do not want to use liners, that is okay! Just make sure that you spray the muffin cups with cooking spray so that your skinny chocolate cupcakes do not stick!
    • Pour the cake batter into the liners, filling them up approximately ¾ of the way full. This is usually about ¼ cup of batter. You should get roughly 20-22 cupcakes.
    • Next, bake the cupcakes for 17-20 minutes or until a toothpick comes out clean.
    • After the cupcakes are finished baking, remove them from the oven and allow them to cool. Enjoy them as is or dust the tops with powdered sugar.
    After doing the math….. An entire batch of these cupcakes is 1600 calories. However, I made 20 cupcakes so they are only 80 calories each! Woohoo! Of course, if you made 24 cupcakes, they would only be 66 calories each. However, I’d rather tack on a few extra calories for a bigger cupcake.  Just sayin’! Make sure you try some of our delicious cupcakes. I know you will find more your family will love and are also easy to make in no time at all.

    Skinny Cupcake Variations:

    • Add dark chocolate chips to the cupcake batter before baking for a double chocolate skinny cupcake! To still keep them under 100 calories you might try a sugar free chocolate chip.
    • Love vanilla? Add 1 tsp vanilla extract. Take it up another notch by using Diet Cherry Coke for Skinny Cherry Vanilla Chocolate Cupcakes!
    • No diet coke? No problem! Instead of using diet soda, you can still create skinny cupcakes by using a 5.3oz of vanilla Greek yogurt and one cup of water. Simply combine the dry ingredients and wet ingredients in a large bowl and mix until blended together.
  • 4th of July Brownies – Easy Bomb Brownie Bites

    4th of July Brownies – Easy Bomb Brownie Bites

    Well I have the cutest recipe for you today. I think this might be one of my favorite patriotic desserts because these little 4th of July brownies look like little bombs… or fire crackers.

    Close-up of a Bomb Brownie Bite

    An easy patriotic dessert!

    The kids can make these this 4th of July brownies recipe and will have lots of fun getting involved. They will be so proud of showing off their adorable 4th of July dessert that look like the cutest little fire crackers!

    I think you will love them too! Anyone can make them and everyone will devour them. They are so easy to make it is almost impossible to call it a recipe.

    You’ll love serving these at your next 4th of July party with some of our other delicious 4th of July Recipes and these Firecracker Cupcakes.

    What do you need to make these fourth of July brownies:

    You will need a mini muffin pan to make this delicious and fun red white and blue brownies. I love having this pan to make no only mini brownies but mini muffins too!

    I also recommend using mini cupcake liners when you make this recipe as well. They have a lot of fun patriotic colors to choose from that will make these patriotic brownies even more festive for the 4th of July.

    You can spray the muffin pan with non-stick cooking spray instead of the liners but I love using the liners to make this brownie recipe.

    Brownie Bites Ingredients

    Ingredients for the Brownies:

    • All Purpose Flour
    • Hershey’s Dark Cocoa
    • Semi-Sweet Mini Chocolate Chips
    • Butter
    • Eggs
    • Sugar
    • Almond Extract
    • Salt
    • Red Mini Cupcake liners
    brownie bites decorating ingredients

    Ingredients for the Decorations:

    Six 4th of July Bomb Brownie Bites on a wooden board with a star in the back ground.

    How to make the brownies:

    First preheat oven to 350 degrees F. Then line mini muffin pan with paper liners and set aside.

    Next in a small mixing bowl, add the flour and cocoa powder. Whisk to blend well and set side.

    Then in a double boiler, melt the butter and mini chocolate chips until smooth and shiny. Remove from heat and set aside.

    Then in a large mixing bowl, add the eggs, sugar, extract and salt. Whisk together for 1 minute to incorporate. Add the melted chocolate mixture and stir well to combine.

    Mixing together the brownie batter mixture

    Then add the flour mixture and stir well until fully mixed.

    Spoon the brownie batter into the prepared pan until the tins are approximately 2/3 full. Do not fill up to the top since the batter expands when cooking.

    The brownie batter poured into a mini muffin pan and then a photo after the brownies have been baked.

    After the pan is filled bake for 8-10 minutes or until an inserted toothpick comes out clean.

    Then cool in the pan for 5 minutes before transferring to a wire rack to cool completely.

    How to Decorate the Brownies:

    First line a cookie sheet with wax paper and set aside. Pour the cherries into a strainer to remove excess juice.  Transfer to a bowl and chill for 5 minutes (this will help the chocolate to harden almost immediately).

    Then in a microwave-safe bowl, microwave the royal blue chocolate melts for 45 seconds. Stir until completely melted.

    Dip 12 of the chilled cherries into the melted chocolate and immediately sprinkle with the red, white and blue jimmies after each dip. Place each of the candy dipped cherries on the cookie sheet to harden.

    The light blue candy melts melted in a bowl and the cherry is being dipped in the candy.

    In a microwave safe bowl, microwave the light blue chocolate melts for 45 seconds. Stir until completely melted.

    Dip the remaining cherries into the melted light blue chocolate and immediately sprinkle with the red, white and blue nonpareil’s. Place on the cookie sheet to harden for 5 minutes. I line the cookie sheet with wax paper or line with foil extends over the edges of the pan.

    The candy coated cherries being covered with the sprinkles and placed on a baking sheet to cool.

    Once the chocolate on the cherries have hardened, pipe about ½ tablespoon of cookie icing on top of each brownie bite. Place the decorated cherries on top of the icing.

    The brownies being decorated.  The icing topped on the brownie and then topped with the cherry.

    Let the cookie icing harden for about 10 minutes.

    4th of July Brownie Tips:

    • Brownies – You can make regular brownies instead if you don’t have a mini muffin pan. Cut the brownies into small pieces after they are baked or you can make star shaped brownies with a star cookie cutter!
    • To save time, you can use a brownie mix to make the mini brownies needed for this recipe.
    • I usually use pre-made white frosting for this recipe to save time but you can use a homemade recipe as well. This homemade buttercream icing would work great for this recipe. After the icing is made, add it to a pastry bag to easily top each brownie bit with. Then you can save the remaining frosting for another dessert!
    Close up of the patriotic brownie bomb bites.

    Print the Recipe for these Patriotic Brownie Bites:

    4th of July Brownie Bites

    You have to make these 4th of July Brownies. These look like little firecracker bombs and they are one of my favorite patriotic desserts.

    Prep Time 15 minutes

    Cook Time 10 minutes

    Cool 5 minutes

    Total Time 30 minutes

    Servings 24

    Cuisine American

    Course Dessert

    Calories 157

    • Preheat oven to 350°. Line mini muffin pan with paper liners and set aside.
    • In a small mixing bowl, add the flour and cocoa powder. Whisk to blend well and set side.
    • In a double boiler, melt the butter and mini chocolate chips until smooth and shiny. Remove from heat and set aside.
    • In a large mixing bowl, add the eggs, sugar, extract and salt. Whisk together for 1 minute to incorporate.
    • Add the melted chocolate mixture and stir well to combine.
    • Add the flour mixture and stir well until fully mixed.
    • Spoon the brownie batter into the muffin cups about 2/3 full. Do not fill up to the top since the batter expands when cooking.
    • Bake for 8-10 minutes or until an inserted toothpick comes out clean.
    • Cool in the pan for 5 minutes before transferring to a wire rack to complete the cooling process.
    • Directions for Decorating:
    • Line a cookie sheet with wax paper and set aside. Pour the cherries into a strainer to remove excess juice.  Transfer to a bowl and chill for 5 minutes (this will help the chocolate to harden almost immediately).
    • In a microwave-safe bowl, microwave the royal blue chocolate melts for 45 seconds. Stir until completely melted.
    • Dip 12 of the chilled cherries into the melted chocolate and immediately sprinkle with the red, white and blue jimmies after each dip. Place on the cookie sheet to harden.
    • In a microwave safe bowl, microwave the light blue chocolate melts for 45 seconds. Stir until completely melted.
    • Dip the remaining cherries into the melted light blue chocolate and immediately sprinkle with the red, white and blue nonpareil’s. Place on the cookie sheet to harden for 5 minutes.
    • Once the chocolate on the cherries have hardened, pipe about ½ tablespoon of cookie icing on top of each brownie bite. Place the decorated cherries on top of the icing.
    • Let the cookie icing harden for about 10 minutes.

    Calories 157kcal, Carbohydrates 20g, Protein 2g, Fat 8g, Saturated Fat 5g, Trans Fat 1g, Cholesterol 22mg, Sodium 65mg, Potassium 79mg, Fiber 1g, Sugar 16g, Vitamin A 113IU, Calcium 14mg, Iron 1mg

    Time to enjoy them!

    These 4th of July brownies are super easy to make and I know the kids would just love making them with you!  What are some of your favorite 4th of July dessert recipes? Will you be making these this year?

    More 4th of July dessert recipes:

  • Thin Mint Cupcakes

    Thin Mint Cupcakes

    Close up image of Thin Mint Cupcakes

    If you love Girl Scout Thin Mint Cookies, you have to make this delicious Thin mint cupcakes recipe. The mint plus the chocolate and the decadent icing combine for the best treat.

    I have a super delicious cupcake recipe for you today, Girl Scout cookie thin mint cupcakes. These Chocolate Mint Cupcakes is loaded with chocolate flavor. We love Girl Scout Cookie Season, but now I can make these for any occasion.

    If you like this recipe, you’ll want to try even more of my easy cupcakes recipes. These are equally delicious and an easy St Patrick’s Day Recipe.

    Why This Recipe Works

    These Girl Scout cookie thin mint cupcakes are not very difficult to make. The results are fantastic and the cupcakes look so fancy and are light and fluffy.

    However, they come together quickly and easily with very little effort. The taste amazing and even better topped with the mint buttercream frosting.

    Ingredients

    Tin Mint Cupcakes Ingredients - sugar, brown sugar, oil, vanilla extract, flour, cocoa powder, baking soda, baking powder, salt, milk, chocolate chips, heavy cream
    • Large Eggs
    • Granulated Sugar
    • Light Brown Sugar
    • Vegetable Oil
    • Vanilla Extract – You can also use Mint Extract
    • Flour
    • Unsweetened Cocoa Powder
    • Baking Soda
    • Baking Pwwder
    • Salt
    • Milk

    Chocolate Ganache Ingredients

    • Chocolate Chips
    • Heavy Whipping Cream

    Scroll to the bottom to see the full recipe and ingredients.

    Step by Step Instructions

    • Step 1 – Line your cupcake pan with liners and preheat your oven.
    Mix in sugar, eggs, brown sugar, vanilla and oil together in a bowl

    Step 2 – In a large mixing bowl to whisk sugar, eggs, brown sugar, vanilla and oil together.

    Combining dry ingredients in a bowl

    Step 3 – Mix together all of the dry ingredients.

    Adding the dry ingredients with the brown sugar mixture

    Step 4 – Add half of the flour mixture ingredients into the bowl with the liquid mixture and stir well.

    Combined cupcake batter in a bowl

    Step 5 – Add the milk and stir gently. Add the remaining dry ingredients and combine. Be careful not to over mix this.

    Pouring cupcake batter in the cupcake liner

    Step 6 – Fill each cupcake liner half way and bake in the muffin tins. These do not take long and about 15-20 minutes. I like to insert a toothpick in the middle to make sure it comes out clean. Let the cupcakes cool before icing.

    Placing heavy cream and chocolate chips in a bowl

    Step 7 – Add the chocolate chips and heavy cream together in a small bowl. Put this in the microwave for 40 seconds intervals. Stir and keep microwaving in short intervals until melted.

    Dipped cupcakes in the chocolate ganache in a bowl

    Step 8 – Take each cupcake and dip into the chocolate ganache. Quickly turn right side up so the ganache can set on top.

    Frosted cupcakes on a plate

    Step 9 – Second, use the vanilla frosting or your favorite homemade frosting recipe. Cream cheese icing is yummy too. Add  small amounts of the green food coloring until you reach your desired color for the mint frosting. You can even add mint or peppermint extract.

    • Step 10 – Use the piping bag to add frosting on top of the cupcakes. Top each one with a thin mints cookie. You can even crush up a few extra cookies and sprinkle them over the top for more yummy deliciousness!

    Recipe Tips

    • Frosting Cupcakes – Make sure cupcakes have cool completely before frosting the cupcakes.
    Close up image of Thin Mint Cupcakes

    How to Store Leftovers

    Store Mint Chocolate Cupcakes in an airtight container in the fridge for up to 5 days. If you prefer you can leave at room temperature for up to 2 days.

    Close up image of Thin Mint Cupcakes

    We love to hear from you. If you make these Girl Scout Cupcakes Recipe, please leave us a star review.

    If you love Girl Scout thin mint cookies, try this Thin mint cupcakes recipe. The mint combined with the chocolate, make the best treat. 

    Do you love Girl Scout Cookies thin mints? Make these girl scout cookie thin mint cupcakes at home. This delicious cupcakes recipe will impress your family.

    Prep Time 10 minutes

    Cook Time 20 minutes

    Total Time 30 minutes

    Servings 12 -14

    Cuisine American

    Course Dessert

    Calories 223

    • Cupcakes:
    • Preheat oven to 350°F and line pan with silicone or paper cupcake liners.
    • In a large bowl, whisk sugar, eggs, brown sugar, vanilla extract and oil together.
    • In a different bowl combine all of the dry ingredients – flour, cocoa powder, baking soda, baking powder and salt.
    • Pour half of these dry ingredients into the liquid mixture. Stir well.
    • Add in the milk and gently stir again. Add in the rest of the dry ingredients, being careful not to over mix.
    • Fill the cupcake liners half full and bake for 15-20 minutes or until toothpick inserted in the center comes out clean. Allow to cool completely.
    • Chocolate Gonache:
    • To make the gonache, add the chocolate chips and whipping cream together in a small bowl and microwave for 40 seconds. Remove from the microwave and stir. Continue to microwave until smooth.
    • Frost Cupcakes:
    • Dip the cooled cupcakes into the gonache and turn right side up to allow gonache to set on top.
    • Use the vanilla frosting or your favorite homemade frosting recipe, adding small amounts of green food coloring until you have reached your desired colored.
    • Pipe frosting onto the cupcakes and top with a Thin Mints cookie! You can even crush up a few extra cookies and sprinkle them over the top for more yummy deliciousness!

    You will love this recipe that turns my personal favorite Girl Scout cookie into a cupcake!

    Calories 223kcal, Carbohydrates 32g, Protein 2g, Fat 10g, Saturated Fat 7g, Cholesterol 5mg, Sodium 110mg, Potassium 113mg, Fiber 1g, Sugar 24g, Vitamin A 75IU, Calcium 49mg, Iron 1.1mg

  • Chocolate Peanut Butter Cupcakes – Eating on a Dime

    Chocolate Peanut Butter Cupcakes – Eating on a Dime

    Close up image of chocolate peanut butter cupcake.

    I have a delicious recipe for Chocolate Peanut Butter Cupcakes that I think you are going to love. The homemade chocolate cupcake is moist and sweet and the peanut butter frosting adds the perfect touch.

    If you are a fan of chocolate and peanut butter as much as I am, you have to give these Chocolate Peanut Butter Cupcakes a try today. Being a mom of 8 kids, we make a lot of easy cupcake recipes. The combination of chocolate and peanut butter is my favorite.

    You may like a lighter cupcake option with this Skinny Chocolate Cupcake. Or for another chocolate and peanut butter option try these Reese’s Cupcake Recipe. You may even want to try these Peanut Butter Pretzel Bites for another delicious chocolate and peanut butter combination.

    Why You Will Love This Recipe

    I love making cupcakes from scratch. They taste so much better than the box cake mix and adding the homemade frosting makes it even better. The rich chocolate flavor with the added peanut butter makes this recipe a family favorite.

    These cupcakes are perfect to serve for the holidays, birthday or for any occasion. If you are a baker, you probably already have the majority of the ingredients.

    Make these Homemade Chocolate and Peanut Cupcakes today for a delicious treat everyone will love.

    Ingredients

    Image of the ingredients to make the chocolate peanut butter cupcakes - flour, sugar, cocoa powder, baking soda, baking powder, salt, eggs, milk, oil, vanilla extract, boiling water, butter, peanut butter, heavy whipped cream, powdered sugar

    Cupcake Ingredients

    • All Purpose Flour
    • Granulated Sugar
    • Dutch-Process Cocoa Powder
    • Baking Soda
    • Baking Powder
    • Salt
    • Large Eggs
    • Whole Milk
    • Oil
    • Vanilla Extract
    • Boiling Water

    Peanut Butter Frosting Ingredients

    Scroll to the bottom for the full recipe and ingredients in the recipe card.

    Variations Ideas

    • Reese’s Peanut Butter Cup – A delicious addition to this cupcake recipe is add in a peanut butter cup to the cupcake batter before baking. This adds so much more peanut butter and chocolate flavor to this recipe.
    • Chocolate Chips – Add chocolate chips to this cupcake recipe. You can add mini and regular chocolate chips. Dark Chocolate or White Chocolate Chips can also be added.
    • Cake Mix – Feel free to make this recipe with a cake mix if you prefer.
    • Frosting – We love making homemade frosting but feel free to change it to what you prefer. You can top it with chocolate ganache or peanut butter buttercream frosting. Feel free to also use store bought frosting. You may even like this Nutella Frosting.

    Step by Step Instructions

    • Step 1 – Line the cupcake pan with paper liners. Preheat oven to 350 degrees.
    Combining the dry ingredients in a bowl

    Step 2 – Mix the dry ingredients, including the flour, cocoa, baking soda and salt, in a large bowl.

    Combining the eggs, milk, oil, and vanilla

    Step 3 – In a separate medium bowl whisk together eggs, milk, oil and vanilla.

    Combining dry ingredients with the egg mixture

    Step 4 – Add the liquid mixture to the dry ingredients. Beat for 3 minutes with an electric mixer on medium speed.

    Pouring boiling water into the cupcake mixture

    Step 5 – Slowly add the boiling water to the batter. The batter may appear a bit on the runny side.

    Dividing cupcake batter into the muffin tin

    Step 6 – Fill the cupcake liners ¾ full with cupcake batter.

    Dividing cupcake batter into the muffin tin

    Step 7 – Bake at 350 degrees for 20-25 minutes. Cupcake is done when toothpick inserted in center comes out clean. Cool in the pan for 10 minutes. Remove cupcakes to wire rack and cool completely before frosting.

    Combining the peanut butter frosting in a bowl

    Step 8 – Cream the butter, peanut butter and powder sugar until it becomes light and creamy. If it is too thick, add a few drops of the heavy whipping cream until it is the desired consistency. If the frosting is too thin, add more powdered sugar.

    Topping the chocolate cupcakes with the peanut butter frosting

    Step 9 – Use a pastry bag with a large tip to pipe the frosting on the cupcake. You can make this as simple or fancy as you like. Enjoy!

    Recipe Tips

    • Combine Ingredients – For best results, combine the ingredients with electric mixer or a stand mixer with the paddle attachment or whisk attachment.
    • Frosting Cupcakes – Frost the cupcakes after they have come to room temperature. This makes it easier to frost.
    • Dividing Chocolate Cupcake Batter –Fill the muffin pan evenly with the brownie batter. This helps to bake the cupcakes evenly.
    Close up image of several chocolate peanut butter cupcakes on a cake stand.

    Frequently Asked Questions

    How to Store Leftovers

    Store the leftovers in an airtight container at room temperature. These cupcakes will stay fresh for up to 5 days.

    Can I Freeze Cupcakes?

    Yes, you can freeze cupcakes. We do recommend freezing the cupcakes unfrosted for best results. Then when ready to serve, thaw the cupcakes and then frost.

    What is the best Peanut Butter to Use?

    We recommend using regular peanut butter such as Peter Pan, Jif and Skippy in this creamy peanut butter frosting. We think using regular peanut butter holds up better than using natural peanut butter.

    Close up image chocolate peanut butter with a bite out of it.

    More Easy Cupcake Recipes

    More Chocolate Peanut Butter Desserts

    We love hearing from you. If you make this Chocolate Peanut Butter Cupcakes Recipe, please leave us a comment or a star review.

    Chocolate peanut butter cupcake with a swirl of creamy, light brown frosting on top, set in a black cupcake liner. The background is blurred, with another similar cupcake partially visible.

    Chocolate Peanut Butter Cupcakes

    You have to try these easy chocolate peanut butter cupcakes. They are homemade and they taste amazing! Make these chocolate peanut butter cupcakes now. 

    Prep Time 20 minutes

    Cook Time 25 minutes

    Total Time 45 minutes

    Servings 24

    Cuisine American

    Course Dessert

    Calories 341

    • Chocolate Cupcake:
    • Line the cupcake pan with paper liners. Preheat oven to 350 degrees.
    • Mix the dry ingredients, flour through salt, in a bowl.
    • In a separate bowl whisk together eggs, milk, oil and vanilla.
    • Add the liquid mixture to the dry ingredients. Beat for 3 minutes with an electric mixer on medium speed.
    • Slowly add the boiling water to the batter. The batter may appear a bit on the runny side.
    • Fill the cupcake liners ¾ full.
    • Bake at 350 degrees for 20-25 minutes.
    • Remove from oven and cool in the pan for 10 minutes. Remove cupcakes to wire rack and cool completely before frosting.
    • Peanut Butter Frosting:
    • Cream the butter, peanut butter and powder sugar until it becomes light and creamy. If it is too thick, add a few drops of the heavy whipping cream until it is the desired consistency. If the frosting is too thin, add more powdered sugar.
    • Use a pastry bag with a large tip to pipe the frosting on the cupcake. You can make this as simple or fancy as you like. Enjoy!

    There is enough frosting to frost 24 cupcakes. However, if you want to pipe them like we did in the pictures, you will want to double the frosting amounts.

    Calories 341kcal, Carbohydrates 48g, Protein 5g, Fat 15g, Saturated Fat 8g, Cholesterol 28mg, Sodium 237mg, Potassium 186mg, Fiber 2g, Sugar 37g, Vitamin A 190IU, Calcium 40mg, Iron 1.2mg

  • Nutella Frosting – Eating on a Dime

    Nutella Frosting – Eating on a Dime

    Cupcake on a plate topped with Nutella Frosting

    If you love Nutella, then you need to try this Nutella Frosting Recipe. You only need a few ingredients to make this creamy frosting for all your baked goods.

    My kids love Nutella and can eat it by the spoonful. They love it when I make Nutella Dip, Nutella French Toast Recipe, Nutella Brownies and Nutella Mug Cake Recipe.

    They now love when I make this chocolate hazelnut spread to topped on our easy dessert recipes. This frosting has the best creamy texture and full of hazelnuts flavor.

    Why Make This Recipe

    Nutella buttercream frosting is made with 5 simple ingredients. It tastes amazing and is easy to make. The creamy, thick texture easily pipes on cupcakes, cookies, and even chocolate cake.

    Ingredients

    Nutella Frosting Ingredients - butter, powdered sugar, nutella, heavy cream, vanilla extract
    • Unsalted Butter softened
    • Powdered Sugar
    • Nutella
    • Heavy Cream
    • Pure Vanilla Extract

    Scroll to the bottom for the full recipe and ingredients in the recipe card.

    Variations Ideas

    • Unsweetened Cocoa Powder – To enhance the chocolate hazelnut flavor, you can add in tablespoon of cocoa powder.
    • Salt – Add in a teaspoon salt to off-set the sweetness if you prefer.

    Step by Step Instructions

    Beating butter in a stand mixer bowl

    Step 1 – In a large mixing bowl, cream the butter on medium speed for 2 minutes until light and fluffy with a stand up mixer or a hand held mixer.

    Adding in the heavy cream, vanilla extract, and nutella into the butter

    Step 2 – Then add in the Nutella, heavy whipping cream and vanilla extract.  Mix until smooth.

    • Step 3 – Slowly add in the confectioners’ sugar, ½ cup at a time, until the frosting is the consistency that you prefer.
    • Step 4 – Chill until ready to use and then the frosting is ready to enjoy!

    Recipe Tips

    • Frosting Consistency – If the frosting is too thin, add more confectioners’ sugar and if the frosting is too thick, add more cream until the frosting is the consistency that you prefer.
    • Combining Ingredients – Combine the ingredients with a hand mixer or a stand mixer with a paddle attachment on low speed.
    • Scrape the Sides – Make sure to scrape the sides with a spatula to combine all the ingredients.
    Bowl of nutella frosting

    Serving Suggestions

    Nutella frosting is great on chocolate cupcakes, on a layer cake, or make a cookie sandwich. The frosting is easy to pipe on any bake goods by using a piping bag.

    Frequently Asked Questions

    How to Store Leftovers

    Refrigerate in an airtight container for up to 5 days.

    Can I Freeze?

    This Nutella Frosting freezes great. Place the frosting in freezer safe container and freeze for up to 3 months. When you are ready to use, allow the frosting to thaw at room temperature. Then beat the frosting with an electric mix to fluff it again, then it is ready to use.

    Cupcakes frosted with nutella frosting

    More Easy Frosting Recipes

    If you make this Nutella Frosting Recipe, please leave us a comment or a star review. We love hearing from you.

    Nutella Frosting

    If you love Nutella, then you need to try this Nutella Frosting Recipe. You only need a few ingredients to make this creamy frosting for all your baked goods.

    Prep Time 10 minutes

    Total Time 10 minutes

    Servings 12

    Cuisine American

    Course Dessert

    Calories 410

    • In a large mixing bowl, cream the butter on medium speed for 2 minutes until light and fluffy with a stand up mixer or a hand held mixer.
    • Then add in the Nutella, heavy cream and vanilla extract.  Mix until smooth.
    • Slowly add in the confectioners’ sugar, ½ cup at a time, until the frosting is the consistency that you prefer.
    • Chill until ready to use and then the frosting is ready to enjoy!
    If the frosting is too thin, add more confectioners’ sugar and if the frosting is too thick, add more cream until the frosting is the consistency that you prefer. 
    Refrigerate in an airtight container for up to 5 days.

    Calories 410kcal, Carbohydrates 52g, Protein 1g, Fat 23g, Saturated Fat 16g, Polyunsaturated Fat 1g, Monounsaturated Fat 4g, Trans Fat 1g, Cholesterol 46mg, Sodium 131mg, Potassium 87mg, Fiber 1g, Sugar 49g, Vitamin A 546IU, Vitamin C 0.03mg, Calcium 28mg, Iron 1mg

  • Pink Velvet Cupcakes Recipe

    Pink Velvet Cupcakes Recipe

    Pink Velvet Stacked on a cupcake stand

    Make these Pink Velvet Cupcakes for a fun treat this Valentine’s Day. The fun pink color and the cream cheese frosting make these cupcakes taste amazing.

    Being a busy mom of 8, my kids and love easy cupcake recipes. This Pink Cupcake Recipe is soft, velvety smooth and full of flavor. They are the perfect cupcake to make for someone special this Valentine’s Day or for any occasion.

    If you love this recipe, then try this Easy Red Velvet Cupcakes recipe or Red Velvet Cookies.

    Why We Love This Recipe

    Pink cupcakes will make anyone smile. These cupcakes are made from scratch with simple pantry ingredients. We usually make Red Velvet Cake for the holidays, but these Pink Cupcakes have become our favorite holiday treat.

    These cupcakes can be topped with your favorite pink and red sprinkles for a fun activity to do with the kids.

    Ingredients

    Pink Velvet Cupcake Ingredients - flour, baking powder, baking soda, salt, butter, sugar, oil, eggs, vanilla extract, buttermilk, pink food coloring, cream cheese, powdered sugar

    For the Cupcakes

    • All Purpose Flour
    • Baking Powder
    • Baking Soda
    • Salt
    • Butter, Softened
    • Granulated Sugar
    • Vegetable Oil
    • Large Eggs
    • Vanilla Extract
    • Buttermilk
    • Pink Gel Food Coloring

    For the Cream Cheese Frosting

    • Cream Cheese (softened)
    • Unsalted Butter softened
    • Powdered Sugar sifted
    • Vanilla Extract

    Scroll to the bottom of the post for the full recipe in the recipe card.

    Variations Ideas

    • Cake Mix – We love the flavor of a homemade cupcake from scratch. But we have made these with a cake mix and they turned out amazing.
    • Frosting – Feel free to use store bought frosting or make buttercream frosting or a chocolate frosting.

    Step by Step Instructions

    For the Cupcakes:

    • Step 1 – Preheat the oven to 350 degrees Fahrenheit.
    • Step 2 – Line a cupcake pan with cupcake liners.
    • Step 3 – In a bowl, whisk the flour, baking powder, baking soda and salt together in a medium bowl. Set aside.
    Beating the butter and sugar in a bowl

    Step 4 – Using either a stand up or hand held mixer, combine the butter and sugar until thoroughly mix together (approximately 1 minute).

    Mixing the eggs, oil, and vanilla extract in a bowl

    Step 5 – Add in the eggs, oil, and vanilla extract. Mix until these ingredients are combined and use a spatula to scrape the sides of the bowl as well.

    Combining the buttermilk with the flour mixture

    Step 6 – Slowly add in the dry ingredients and the buttermilk until both are thoroughly combined into the wet ingredients.

    Adding in the pink food coloring to the cupcake batter

    Step 7 – Add in pink food coloring until the batter is the color of pink that you prefer.

    • Step 8 – Pour the cupcake batter evenly into the cupcake liners in the muffin pan.
    • Step 9 – Bake for 15-18 minutes until a toothpick inserted into the center comes out clean.
    • Step 10 – Move the cupcakes to a wire rack to cool completely before topping with the frosting.

    How to Make Cream Cheese Frosting

    Beating the cream cheese in a bowl

    Step 1 – Beat the cream cheese in a large mixing bowl until smooth on medium speed.

    Adding in the butter to the cream cheese

    Step 2 – Add in the butter and beat until combined and smooth.

    Mixing in powdered sugar and vanilla in  the cream cheese mixture

    Step 3 – Then slowly add in the powdered sugar (1 cup at a time).  Mix after each cup is added. Continue to add until the frosting is thick and smooth. Then mix in the vanilla extract.

    Frosted pink cupcakes on a cupcake stand

    Step 4 – Top each cupcake with cream cheese frosting and enjoy.

    Recipe Tips

    • Combining Ingredients – Combine ingredients in a bowl and mix with a stand mixer or an electric mixer. Make sure to scrape down the sides to get all ingredients.
    • Cooled Cupcakes – Allow the cupcakes to cool before frosting.
    • Room Temperature Ingredients – Before combining the ingredients make sure the butter and cream cheese is softened. This creates a smooth and creamy texture.
    • Piping Bag – Make a beautiful topping on the cupcake by placing the frosting in a piping bag with a piping tip.
    Pink Cupcake on a cupcake stand

    Frequently Asked Questions

    How to Store Leftovers

    Refrigerate the leftovers, covered, for up to 5 days.

    Can I freeze Cupcakes?

    Yes, you can freeze cupcakes. We recommend freezing the cupcakes unfrosted and store in a freezer safe container for up to 3 months. Then when ready to serve, thaw the cupcakes at room temperature and then frost and decorate.

    How to Decorate

    There are many ways to decorate this sweet treats. Add your favorite sprinkles and frosting to share with everyone.

    Pink Cupcake stacked on a plate

    More Easy Cupcake Recipes

    If you make these Pink Velvet Cupcake Recipe, please leave us a comment. We love hearing from you.

    Pink Velvet Cupcakes

    Make these Pink Velvet Cupcakes for a fun treat this Valentine’s Day. The fun pink color and the cream cheese frosting make these cupcakes taste amazing.

    Prep Time 15 minutes

    Cook Time 15 minutes

    Total Time 30 minutes

    Servings 12

    Cuisine American

    Course Dessert

    Calories 389

    For the Cream Cheese Frosting:

    For the Cupcakes:

    • Preheat the oven to 350 degrees Fahrenheit.
    • Line a muffin tin with cupcake liners.
    • Combine the flour, baking powder, baking soda and salt together in a mixing bowl. Set aside.
    • Using either a stand up or hand held mixer, combine the butter and sugar until thoroughly mix together (approximately 1 minute).
    • Add in the oil, eggs and vanilla extract. Mix until these ingredients are combined and use a spatula to scrape the edge of the bowl as well.
    • Slowly add in the dry ingredients and the buttermilk until both are thoroughly combined into the wet ingredients.
    • Add in pink food coloring until the batter is the color of pink that you prefer.
    • Pour the batter evenly into the cupcake liners in the muffin pan.
    • Bake for 15-18 minutes until a toothpick inserted into the center comes out clean.
    • Move the cupcakes to a wire rack to cool completely before topping with the frosting.

    For the Cream Cheese Frosting:

    • Beat the cream cheese in a large mixing bowl until smooth.
    • Add in the butter and beat until combined and smooth.
    • Then slowly add in the powdered sugar (1 cup at a time).  Mix after each cup is added. Continue to add until the frosting is thick and smooth. Then mix in the vanilla extract.
    • Top each cupcake with cream cheese frosting and enjoy!

    Refrigerate the leftovers, covered, for up to 5 days.

    Calories 389kcal, Carbohydrates 50g, Protein 4g, Fat 20g, Saturated Fat 10g, Polyunsaturated Fat 3g, Monounsaturated Fat 5g, Trans Fat 0.3g, Cholesterol 68mg, Sodium 263mg, Potassium 67mg, Fiber 0.4g, Sugar 39g, Vitamin A 546IU, Calcium 53mg, Iron 1mg

  • Peanut Butter Cupcakes, Moist and Delicious

    Peanut Butter Cupcakes, Moist and Delicious

    Peanut Butter Cupcakes make the best dessert for any occasion. These cupcakes are made from scratch with simple ingredients. As a mom of 2, I make a lot of cupcakes for the kids birthdays, holidays and for their class parties. This easy cupcake recipe is one of our favorites because of the peanut butter flavor and the homemade peanut butter frosting. Make sure to check out this Chocolate Peanut Butter Cupcakes Recipe for the perfect combination of chocolate and peanut butter. If you love peanut butter desserts as much as I do, check out these Peanut Butter Pretzel Bites and Peanut Butter Icebox Cake.

    Why This Recipe Works

    If you love making homemade cakes and cupcakes as much as I do, then you probably already have the majority of these ingredients. The moist crumb, the amazing taste and soft texture makes these peanut butter cupcakes family favorite. If you love peanut butter, then you will want to make these cupcakes for your next gathering.

    Ingredients

    For the Cupcakes
    • All Purpose Flour
    • Baking Powder
    • Baking Soda
    • Salt
    • Vegetable Oil
    • Creamy Peanut Butter
    • Light Brown Sugar (packed)
    • Large Egg (room temperature)
    • Sour Cream
    • Whole Milk
    • Vanilla Extract
    For the Creamy Peanut Butter Frosting
    • Unsalted Butter, softened
    • Creamy Peanut Butter
    • Whole Milk
    • Powdered Sugar
    For Topping
    • Miniature Reese’s Peanut Butter Cups (cut in half)
    Scroll to the bottom of the post for the full recipe and ingredients in the recipe card.

    Variations Ideas

    • Cake Mix – We love the way these cupcakes taste made from scratch. But there is nothing wrong with using a cake mix.
    • Chocolate – Make this cupcake with chocolate cupcake batter and topped with peanut butter buttercream frosting. Chocolate and peanut butter is my favorite combination.

    Step by Step Instructions

    For the Cupcakes
    • Step 1 – Preheat the oven to 350 degrees Fahrenheit and line 2 muffin tins with cupcake liners.
    Step 2 – In a large mixing bowl, whisk together the flour, baking powder, baking soda and salt.  Set aside.
    Step 3 – In a separate mixing bowl, whisk together the creamy peanut butter, brown sugar, egg, sour cream, milk and vanilla extract.
    Step 4 – Create a well in the flour mixture and pour the wet ingredients into the dry ingredients.  Stir until combined.
    Step 5 – Pour the batter into the cupcake liners filling them up approximately 2/3 of the way full. Bake for 20-23 minutes until a toothpick inserted into the center of the cupcakes comes out clean.
    • Step 6 – Cool the cupcakes completely on a wire rack before topping with the frosting.
    For the Frosting
    Step 7 – In a medium bowl, cream together butter and peanut butter until smooth and fluffy with a hand held or stand up mixer.
    Step 8 – Gradually add powdered sugar, alternating with milk, beating after each additional until desired consistency.
    • Step 9 – Pipe the frosting on to the cooled cupcakes, top with a piece of the peanut butter cups and then they are ready to serve and enjoy.

    Recipe Tips

    • Room Temperature Ingredients – Before combining the ingredients we recommend egg and butter come to room temperature. This helps to create a smooth and creamy texture.
    • Filling Cupcake Liners – Fill the cupcake liners about 2/3 full to prevent the cupcake from spilling over the side. We recommend evenly distribute the batter so that the cupcakes are about the same size.
    • Cool Cupcakes – Before frosting the cupcakes make sure they have cooled to room temperature.
    • Piping Frosting – You can spread the frosting on with a knife or pipe it on with piping bags. We like to use a piping bag when we are taking them to a family gathering.

    Frequently Asked Questions

    How to Store Leftovers

    Refrigerate the leftovers in an airtight container, for up to 5 days.

    Can I Freeze Cupcakes?

    Yes, you can freeze cupcakes in a freezer safe container for up to 3 months. We do recommend placing in the freezer unfrosted. Then when ready to serve, thaw the cupcakes on the counter then frost.

  • Orange Soda Cupcakes – Easy to Make Orange Cupcakes

    Orange Soda Cupcakes – Easy to Make Orange Cupcakes


    If you love Orange Soda, you are going to love this delicious and easy Orange Soda Cupcakes. They combine homemade vanilla cupcakes with Orange Crush soda frosting to make delicious cupcakes that no one can resist.

    These orange soda cupcakes are perfect for any occasion. The orange flavor and fun color brings a smile to anyone. Make sure you try some of our delicious cupcakes. I know you will find more your family will love.

    Another fun cupcake recipe that we make all the time is Confetti Cupcakes or Lemon Blossoms.

    Why This Recipe Works

    We love this recipe because of the simple ingredients. If you are a baker, you probably already have all the supplies on hand. These orange crush cupcakes are always on the menu when we have a BBQ or a family gathering.

    Making cupcakes is something my kids and I enjoying doing together. You will love the flavor and how easy they are to make.

    Supplies for Orange Cupcake

    Ingredients


    Scroll to the bottom of the post for the full recipe in the recipe card.

    Variations Ideas

    • Cake Mix – These cupcakes are delicious made from scratch. But you can also use a vanilla cake mix with a cake orange crush soda for a simple cupcake recipe.
    • Frosting – Feel free to use store bought frosting to top these orange cupcakes.
    • Orange Zest – You can also add in orange zest to add even more orange flavor.

    Step by Step Instructions

    • Step 1 – Preheat oven to 350 degrees F and line a cupcake pan with your favorite paper liners.

    Step 2 – Then sift together the dry ingredients( flour, baking powder, baking soda and salt) in a medium bowl. Set aside.


    Step 3 – Next beat together the butter and sugar with a mixer (stand up or hand held mixer) on medium speed until pale and fluffy. Add in an egg and egg whites, one at a time beat after each addition and then add in vanilla to the wet ingredients.


    Step 4 – Whisk in the buttermilk by hand.


    Step 5 – Slowly mix together the dry ingredient and buttermilk mixture until well blended. Be careful to not over mix these ingredients.


    Step 6 – Fill your cupcake liners ¾ full in the muffin tin.


    Step 7 – Bake at 350 degrees F for 18 minutes-25 minutes or until a toothpick inserted in the center comes out clean. Allow the cupcakes to cool in the pan for about 10 minutes.

    • Step 8 – Remove cupcakes from pan and place each on a wire rack to cool completely. While your cupcakes are cooling, make your creamy orange buttercream frosting.
    • Step 9 – Cream all of your ingredients together in a medium size bowl until smooth. Slowly add drops of orange food color and mix between each one until the frosting is the orange color that you prefer.
    • Step 10 – You want your frosting to be thick enough to stand up. If it isn’t thick enough, add more powdered sugar. If it is too thick, add more soda. Be sure to mix well after each addition.
    • Step 11 – Once the frosting is ready, scoop it into a pastry bag with a large decorating tip.
    • Step 12 – Decorate to suit your taste. I topped mine with these adorable striped straws and everyone loved them.

    Recipe Tips

    • Combining Ingredients – Combine the ingredients in a large mixing bowl with an electric mixer or a stand up mixer.
    • Filling Cupcake Liners – Divide the cupcake batter evenly in the cupcake liners. We try to keep it even so that the cupcakes cook about the same time and they are the same size. Use an ice cream scoop for best results.
    • Frosting Cupcakes – Before frosting the cupcakes make sure to allow them to cool on a cooling rack. This helps easily add the frosting without messing up the tops of the cupcake.
    • Food Coloring – For a more vibrant orange color, we recommend using gel food coloring. Add in as many drops as you prefer to get the perfect color of orange.

    Frequently Asked Questions

    Why Buttermilk instead of milk?

    I love using buttermilk in this orange creamsicle cupcake recipe instead of milk or vegetable oil. The buttermilk gives the cupcakes a softer texture and more body. I also love the flavor that it adds to these delicious and easy vanilla cupcakes.

    How to Store Leftover Cupcakes

    We recommend storing the cupcakes at room temperature in a cupcake container or any airtight container. These cupcakes stay fresh for about 3-4 days. Storing the cupcakes in the fridge could cause the cupcakes to dry out.


    More Easy Cupcake Recipes to try

    We love hearing from you. If you make these Orange Cupcake Recipe, please leave us a comment or a star review.


    Print
    clock clock iconcutlery cutlery iconflag flag iconfolder folder iconinstagram instagram iconpinterest pinterest iconfacebook facebook iconprint print iconsquares squares iconheart heart iconheart solid heart solid icon

    Orange Soda Cupcakes – Easy to Make Orange Cupcakes

    5 Stars 4 Stars 3 Stars 2 Stars 1 Star No reviews
    • Author: Hannah

    Description

    We love these orange soda cupcakes! They are so fun to make and they taste amazing with the orange soda frosting.  


    Ingredients

    Scale
      • Cupcakes:
      • 1 1/2 cup all-purpose flour
      • 1 tsp baking powder
      • 1/8 tsp baking soda
      • 1/4 tsp salt
    • 1 cup sugar
    • 1/2 cup unsalted butter (softened)
    • 1 large egg
    • 2 large egg whites
    • 1/2 tsp vanilla extract
    • 1/3 cup buttermilk
    • Orage Soda Frosting:
    • 6 TBSP unsalted butter (room temp)
    • 4 1/2 cup powdered sugar
    • 5 TBSP Orange Crush soda
    • orange gel food coloring

    Instructions

      • Cupcake Directions:
      • Preheat oven to 350 degrees. Line cupcake pan with your favorite paper liners.
      • Sift flour, baking powder, baking soda and salt in a medium bowl. Set aside.
      • Whip the butter and sugar with a mixer until pale and fluffy.
      • Add in an egg and egg whites, one at a time. Add in vanilla.
      • Whisk in the buttermilk.
      • Slowly mix together flour and buttermilk mixture until well blended. Do not over mix.
      • Fill your cupcake liners 3/4 full.
      • Bake at 350 degrees for 20-25 minutes or until a toothpick inserted in the center comes out clean.
      • Allow cupcakes to cool in the pan for about 10 minutes.
    • Remove cupcakes from pan and place each on a wire rack to cool completely. While your cupcakes are cooling, make your frosting.
    • Orange Crush Frosting Directions:
    • Cream all of your ingredients together until smooth.
    • You want your frosting to be thick enough to stand up. If it isn’t thick enough, add more powdered sugar. If it is too thick, add more soda. Be sure to mix well after each addition.
    • Once the frosting is ready, scoop it into a pastry bag with a large decorating tip.
    • Decorate to suit your taste.

  • Easy Carrot Cake Cupcakes Recipe – Carrot Cake Muffins

    Easy Carrot Cake Cupcakes Recipe – Carrot Cake Muffins

    You will love this Easy Carrot Cake Cupcakes recipe. These carrot cupcakes are creamy and delicious. I’m sure they will soon be a family favorite.

    These are truly the best carrot cupcakes. This is the perfect dessert for Easter or any time of the year. Even if your family doesn’t care for carrots, they will love this recipe.

    We always make these adorable Peeps Cupcakes every year. I think I’m going to have to add these Carrot Cake Muffins to the rotation as well. These cupcakes are just delicious. I can’t wait for you to try them. Check out all our cupcake recipes.

    Why This Recipe Works

    This carrot cake cupcakes is the perfect individual serving of this Carrot Cake Recipe. The cupcakes turn on soft, fluffy and full of flavor. I love the added in raisins and chopped nuts recipe for added flavor and texture.

    We make these cupcakes for our spring get togethers and always for our Easter dinner. If you are looking for an impressive dessert that is made from scratch, make these Easy Carrot Cake Cupcakes.

    Ingredients


    For the Cupcakes

    • All Purpose Flour
    • Granulated Sugar
    • Baking Powder
    • Baking Soda
    • Salt
    • Cinnamon
    • Eggs beaten
    • Canola Oil or Vegetable Oil
    • Buttermilk
    • Vanilla Extract
    • Shredded Carrots
    • Walnuts or Pecans
    • Raisins

    For the Frosting

    • Cream Cheese
    • Unsalted Butter
    • Powdered Sugar
    • Vanilla Extract

    Scroll to the bottom for the full recipe and ingredients in the recipe card.

    Variations Ideas

    • Greek Yogurt – For extra moisture, Greek yogurt can be added in. I recommend starting with about ¼ of a cup.
    • Spices – Feel free to add in additional spices for added flavor. Ginger or nutmeg are great options and I would add in about ¼ teaspoon.
    • Cake Mix – You can even use a box carrot cake mix to make this recipe. You can still add in shredded carrots, raisins and walnuts. I have even added in shredded coconut for added texture.

    Step by Step Instructions

    • Step 1 – Preheat oven to 350 degrees and fill cupcake pan with paper liners

    Step 2 – In a large bowl, combine flour, sugar, baking powder, baking soda, salt, and cinnamon and whisk together.


    Step 2 – In another bowl, beat eggs, then mix in canola oil, buttermilk, vanilla, and carrots.


    Step 3 – Add wet ingredients to dry ingredients and stir to combine.


    Step 4 – Fold in walnuts and raisins.


    Step 5 – Divide batter into cupcake liners and bake for about 12-15 minutes or until a toothpick inserted in the center comes out clean.


    Step 6 – Cool completely

    How to Make Cream Cheese Frosting


    Step 1 – Add cream cheese and butter in large mixing bowl and beat until creamy and smooth.


    Step 2 – Gradually add powdered sugar. Add in vanilla extract and beat until smooth. Frost cooled cupcakes and enjoy.

    Recipe Tips

    • Shredded Carrots – We recommend shredding carrots from a box grater instead of using pre-shredded carrots. The grated carrots are tough and dry which could mess up the overall taste of your cupcakes.
    • Combining Ingredients – Combine the ingredients with a hand mixer or in a bowl of a stand mixer for best results.
    • Frosting Cupcakes – Wait until the cupcakes have cooled to room temperature before frosting the cupcakes with the cream cheese frosting recipe.

    Frequently Asked Questions

    How to Store Leftovers

    Store leftovers in an airtight container in the fridge for up to 3 days.

    Can I Freeze Cupcakes?

    Yes, you can freeze these cupcakes by placing in a freezer bag or freezer container. Store the cupcakes for up to 3 months unfrosted for best results.

    Do I Need to Use Paper Liners?

    Yes, we recommend using paper liners to easily clean the muffin tin and for removing the cupcakes from the pan.


    Print
    clock clock iconcutlery cutlery iconflag flag iconfolder folder iconinstagram instagram iconpinterest pinterest iconfacebook facebook iconprint print iconsquares squares iconheart heart iconheart solid heart solid icon

    Easy Carrot Cake Cupcakes Recipe – Carrot Cake Muffins

    5 Stars 4 Stars 3 Stars 2 Stars 1 Star No reviews
    • Author: Hannah

    Description

    Enjoy this Easy Carrot Cake Cupcakes Recipe! The entire family will love these carrot cupcakes. They are truly the best carrot cake cupcakes. Carrot Cake Muffins are so cute! Make carrot muffins today.


    Ingredients

    Scale

    For the Cupcakes:

      • 2 1/4 cups All Purpose Flour
      • 2 cups granulated sugar
    • 1 1/2 teaspoon baking powder
    • 1 teaspoon baking soda
    • 1 teaspoon salt
    • 2 1/2 teaspoons cinnamon
    • 4 eggs (beaten)
    • 1 cup canola oil
    • 1/2 cup buttermilk
    • 1 teaspoon vanilla extract
    • 3 cups finely shredded carrots
    • 3/4 cup Chopped Walnuts (or Pecans)
    • 3/4 cup raisins

    For the Frosting:

    • 8 ounces cream cheese (softened)
    • 4 Tablespoons unsalted butter (softened)
    • 4 cups powdered sugar (sifted)
    • 1 teaspoon vanilla extract

    Instructions

    For the Cupcakes:

      • Preheat oven to 350 degrees and fill cupcake pan with liners.
      • In a large bowl, combine flour, sugar, baking powder, baking soda, salt, and cinnamon and whisk together.
      • In another bowl, beat eggs, then mix in canola oil, buttermilk, vanilla, and carrots.
      • Add carrot mixture to flour mixture and stir to combine.
    • Fold in walnuts and raisins.
    • Divide batter into cupcake liners and bake for about 12-15 minutes or until a toothpick inserted in the center comes out clean.
    • Cool completely.

    For the Frosting:

    • Add cream cheese and butter in large mixing bowl and beat until creamy and smooth.
    • Gradually add powdered sugar and mix until smooth and combined.
    • Add vanilla extract. Beat until smooth.
    • Frost cooled cupcakes and then they are ready to serve and enjoy!